

Better Homes And Gardens Fragrance Oil Refill Wild Berry Cheesecake
Blog

Forever Searching for Cute Macaron Boxes
I have been searching for years to find a suitable box for my character macarons. It's only in the last little while that macaron boxes for regular round macarons have been easily accessible to the general public while there still seems to be a complete absence of boxes made specially for character macarons. Such a box should ideally be shallow since the best way to show off their sweet faces is when they are shown face up instead of on its side. And, of course, the box needs to have a clear top in order for the gift recipient to take a peek and be absolutely blown away by the cute mac babies inside the box 🙂 Ok, I might be exaggerating a little but you get the point. And if you are thinking of making character macarons, here's a great tutorial to start with. Rikuma Bear Macarons using All-Batter Technique.
This is one of my favorite projects so far and I hope it makes your baking life just a bit easier too.
XOXO,
Mimi

Supplies for Homemade Gift Boxes
Now back to making these boxes. Take a look at the short video showing you how I did it and you'll also need all the supplies listed below:
- 2 colorful round plates of your choice (Plate size in video is 7inches, purchased at the Dollar Store for $1.50 for 8 pcs)
- Piece of ribbon (Ribbon length in video is 30 inches which allows for tying a small ribbon on the bottom.)
- Food-safe acetate film. Here's a link to a manufacturer who sells it (affiliate link): Baking Acetate Roll - Transparent Membrane ACETATE SHEET.
If you can't get access to it, you can also use clear overlay film like this one found at Michaels - direct product link. Just make sure that your box has enough height clearance so that the film doesn't directly touch your macarons.)
- Round object a bit smaller than your plate.
- Flower shaped hole puncher. (The one used in video is Daisy 1 inches/2.54 centimeter from Recollections at Michaels.)
- Foam adhesive mini circles for creating 3D flower effect. These double sided "foam tape" adds dimension to your projects. (Purchased at Michaels - direct product link)
- Reinforcement labels. Take the small center dot and use it as the pistil for the flower.
- Glue gun
- X-acto knife
- Scissors
- Tape
- Hole punches
- Foam cutting board


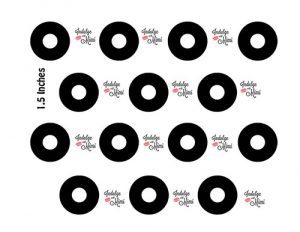
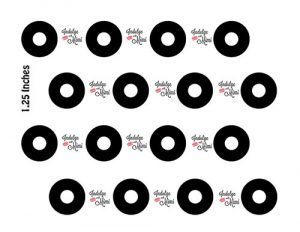
Bunny Macaron Templates
Available for download for Newsletter Subscribers. Just sign up for the newsletter and wait for the double opt-in confirmation email. Confirm your subscription and you'll be sent the password to the member's only area.

Game On!
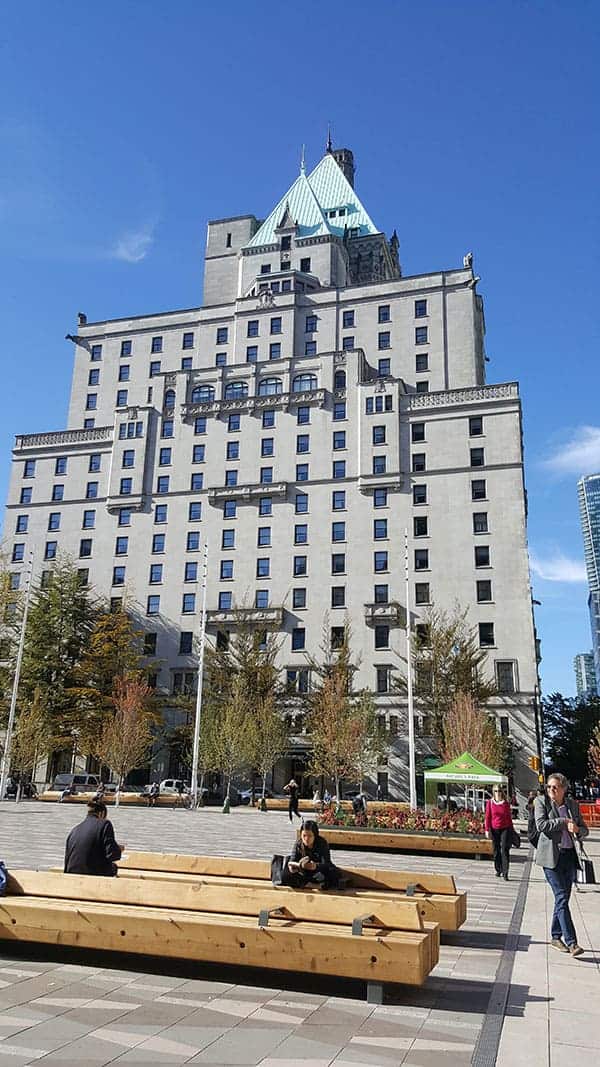
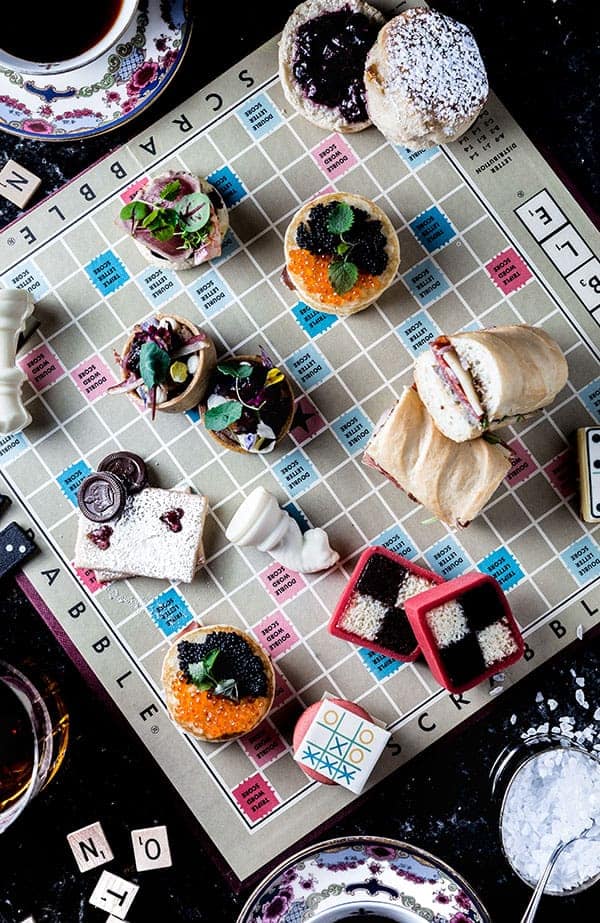
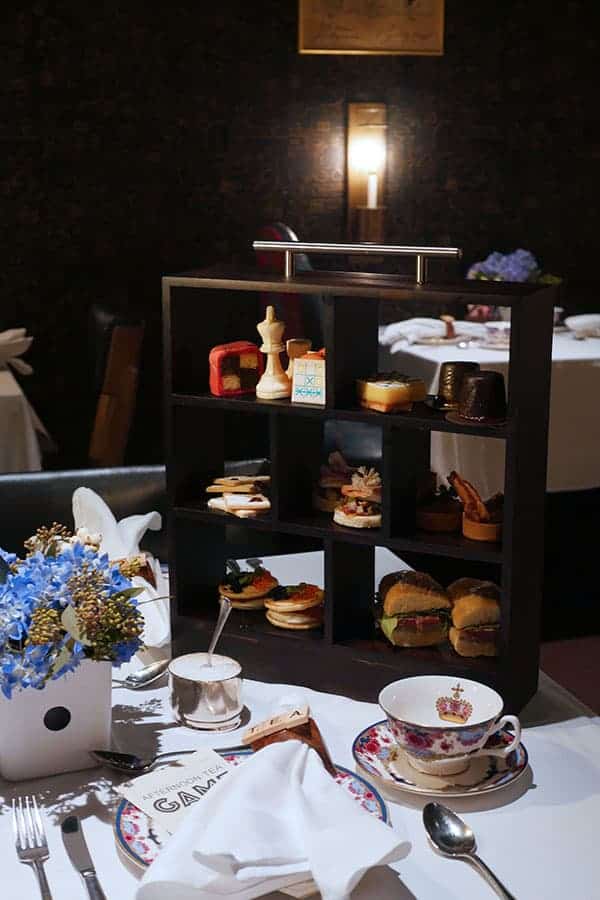
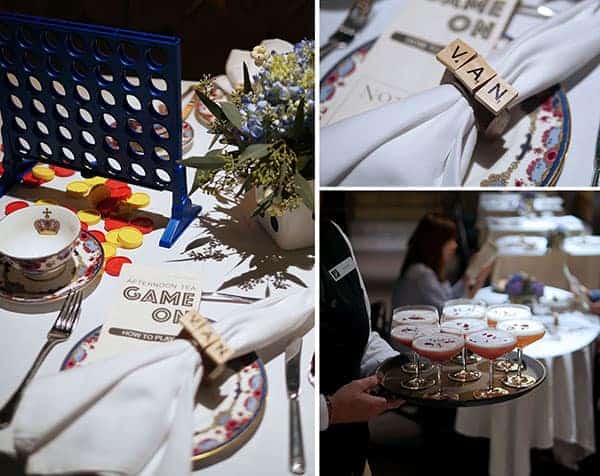
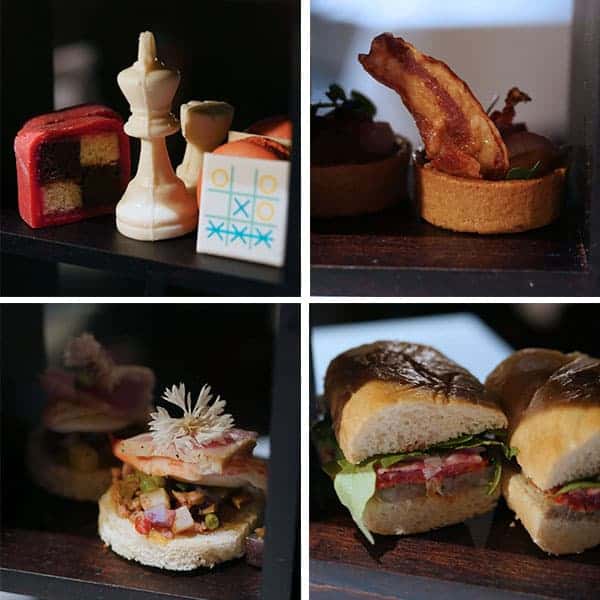
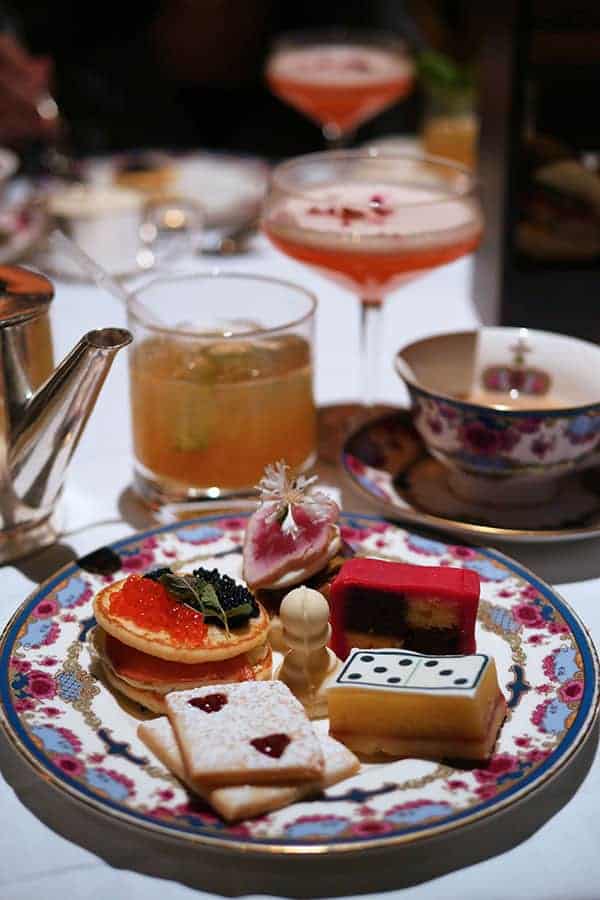
Being social is one of the fundamental aspects of an afternoon tea outing so besides just drinking tea, eating sweets and catching up on a little bit of gossip, there is another activity you can now add to that list: table games. For the month of October, Notch8 in the Fairmont Vancouver will serve a games-themed afternoon tea set that comes complete with treats that are reminiscent of game pieces from various beloved board games. The aptly named Game On tea set will be served in a unique bookshelf display unseen elsewhere in Vancouver. And of course, the experience won't be complete unless there are actually games being played; the restaurant also offers various table games and trivia cards which you are welcome to play at the table with your partner. How fun is that!
Game Step - How it Works
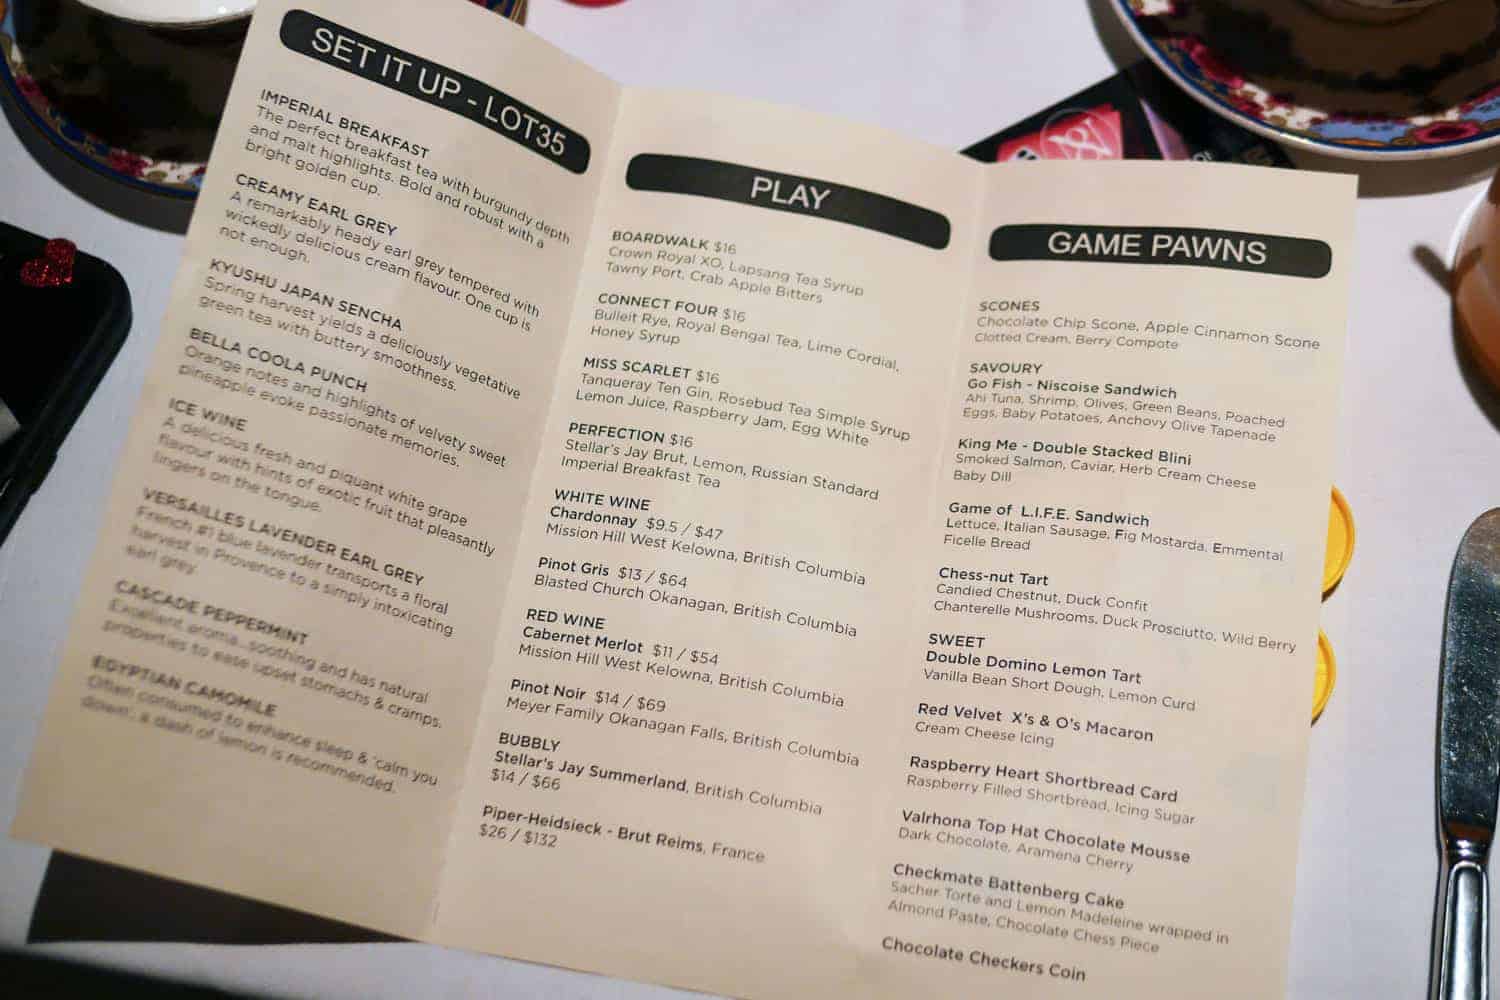
1. Set it up
Select Lot35 loose leaf tea. Lot35 is the new upper tier tea collection from the supplier of Fairmont Hotel teas. There are 8 different tea choices to choose from. I had the Creamy Earl Grey which has a smooth body and creamy flavour containing cornflower petals. And, obviously, it pairs very well with cream!
2. Play
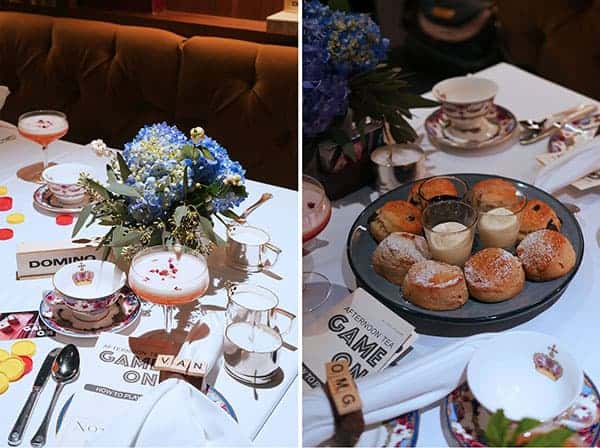
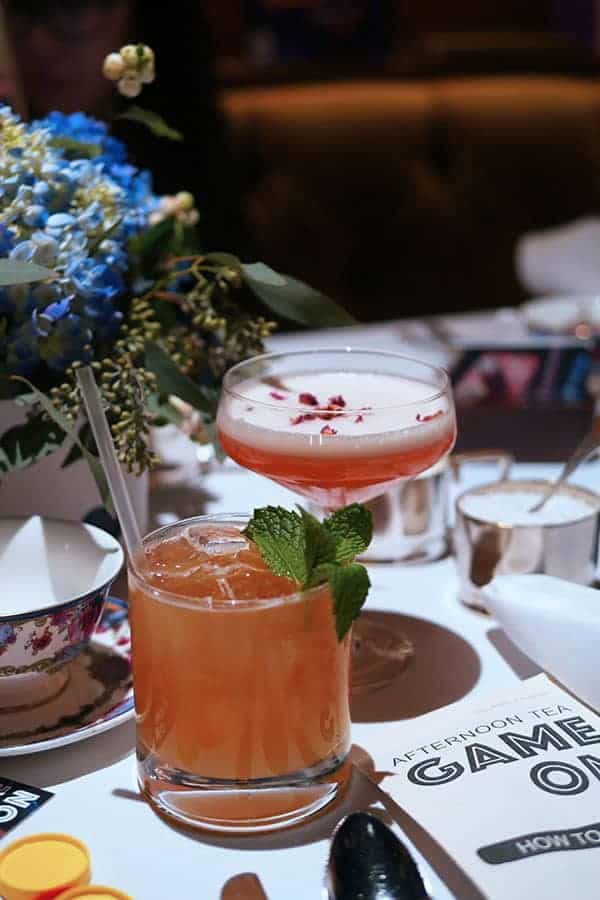
Select a tea-infused cocktail (4 different choices) or wine/bubbly. Mocktail selections are available too.
3. Game Pawns
Partake in scones, 4 savouries and 6 sweets. This season, Fairmont's signature scones are offered in two flavours: chocolate chip and Apple Cinnamon served with a tangy cream cheese infused clotted cream and berry compote. The scones are always a big highlight for me at the Fairmont. There are only a few places in Vancouver that perfectly executes this traditional tea time item.
Games Night Tipsy Tea for October 2017 & Afternoon Only Slots in November
The Game On tea set will be available from September 20 - November 26, 2017 on Wednesdays to Sundays with sittings at 11AM, 1PM & 3PM. During the month of October only, in addition to the afternoon slots, there will also be an evening sitting which is referred to as "Games Night Tipsy Tea". Tipsy tea is a London-inspired interpretation of tea time which includes serving tea sets in the evening with some alcoholic beverages. The Games Night Tipsy Tea Set includes two alcoholic beverages along with the same treats found in the Game On tea set. Guests are encouraged to stay as long as they like (until 1pm) so you can make a complete night of your experience. Ever since I experienced this evening version of tea last year, I knew it would be a real winner and I'm happy that the Fairmont has brought it back. This year, the sitting times are only on every Friday in October so make sure you plan ahead since you definitely don't want to miss this!
XOXO,
Mimi
NOTES:
Game On Afternoon Tea runs from September 20th – November 26th, 2017, with sittings Wednesdays – Sundays at 11AM, 1PM & 3PM. Adults $59, Children $29.5 (ages 12 & under).
Game Night Tipsy Tea runs Friday evenings from October 6th – November 17th, 2017, at 7PM. $75 per
person. Tipsy Tea includes a tea tier of mouthwatering fare, LOT35 Tea, and two cocktails per person. Guests must be 19+ years of age.
Options catering to guests with specific diet-dependent conditions such as gluten-free, as well as dietary preferences like vegetarian and vegan diets are available with advance notice at time of booking.
Disclosure: I was invited to preview the new afternoon tea set. All drinks and food were complimentary. All opinions are my own.
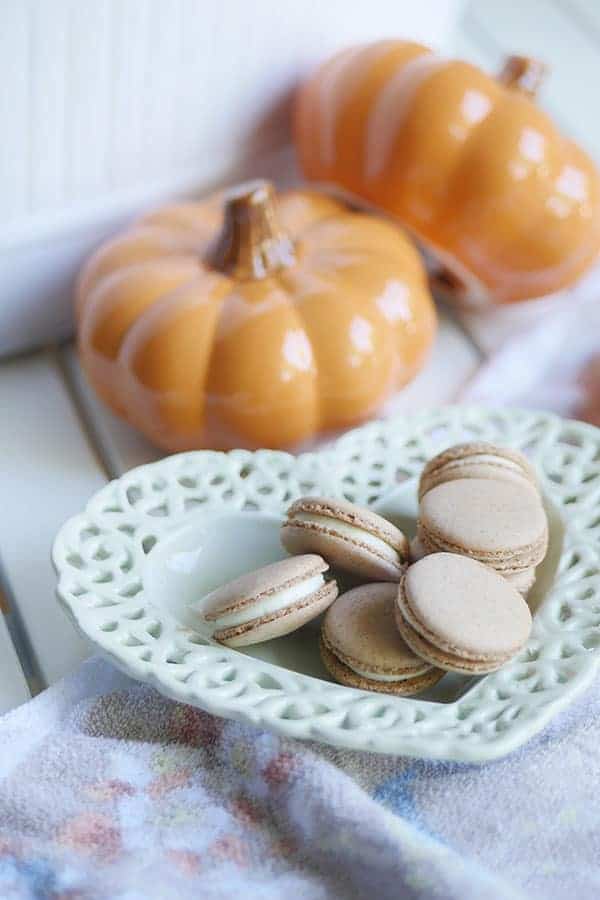
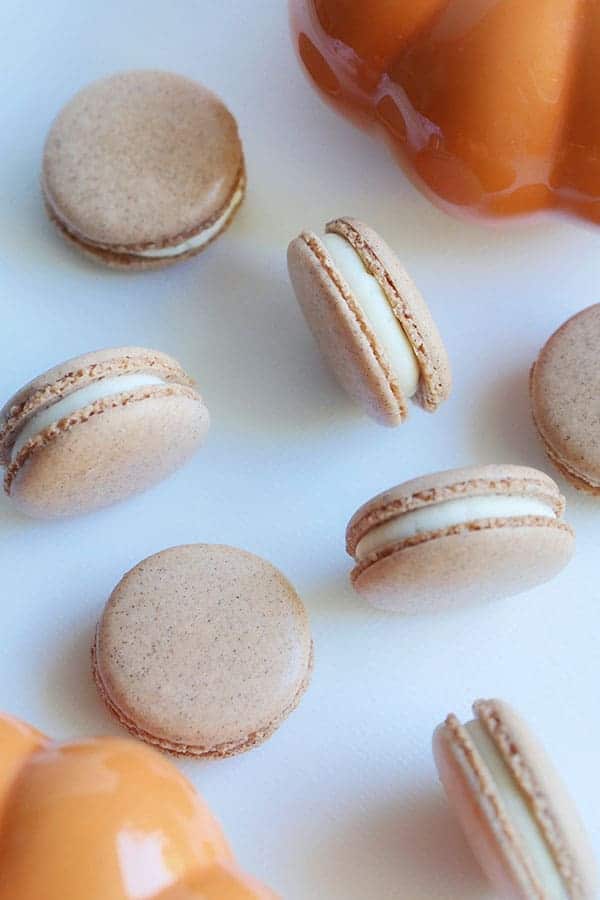
Pumpkin spice cheesecake macarons with extra flavorful shells infused with holiday spices. Filled with a ring of smooth pumpkin cheesecake buttercream and a dollop of pumpkin spice curd - a classic fall flavor re-imagined in macaron form.
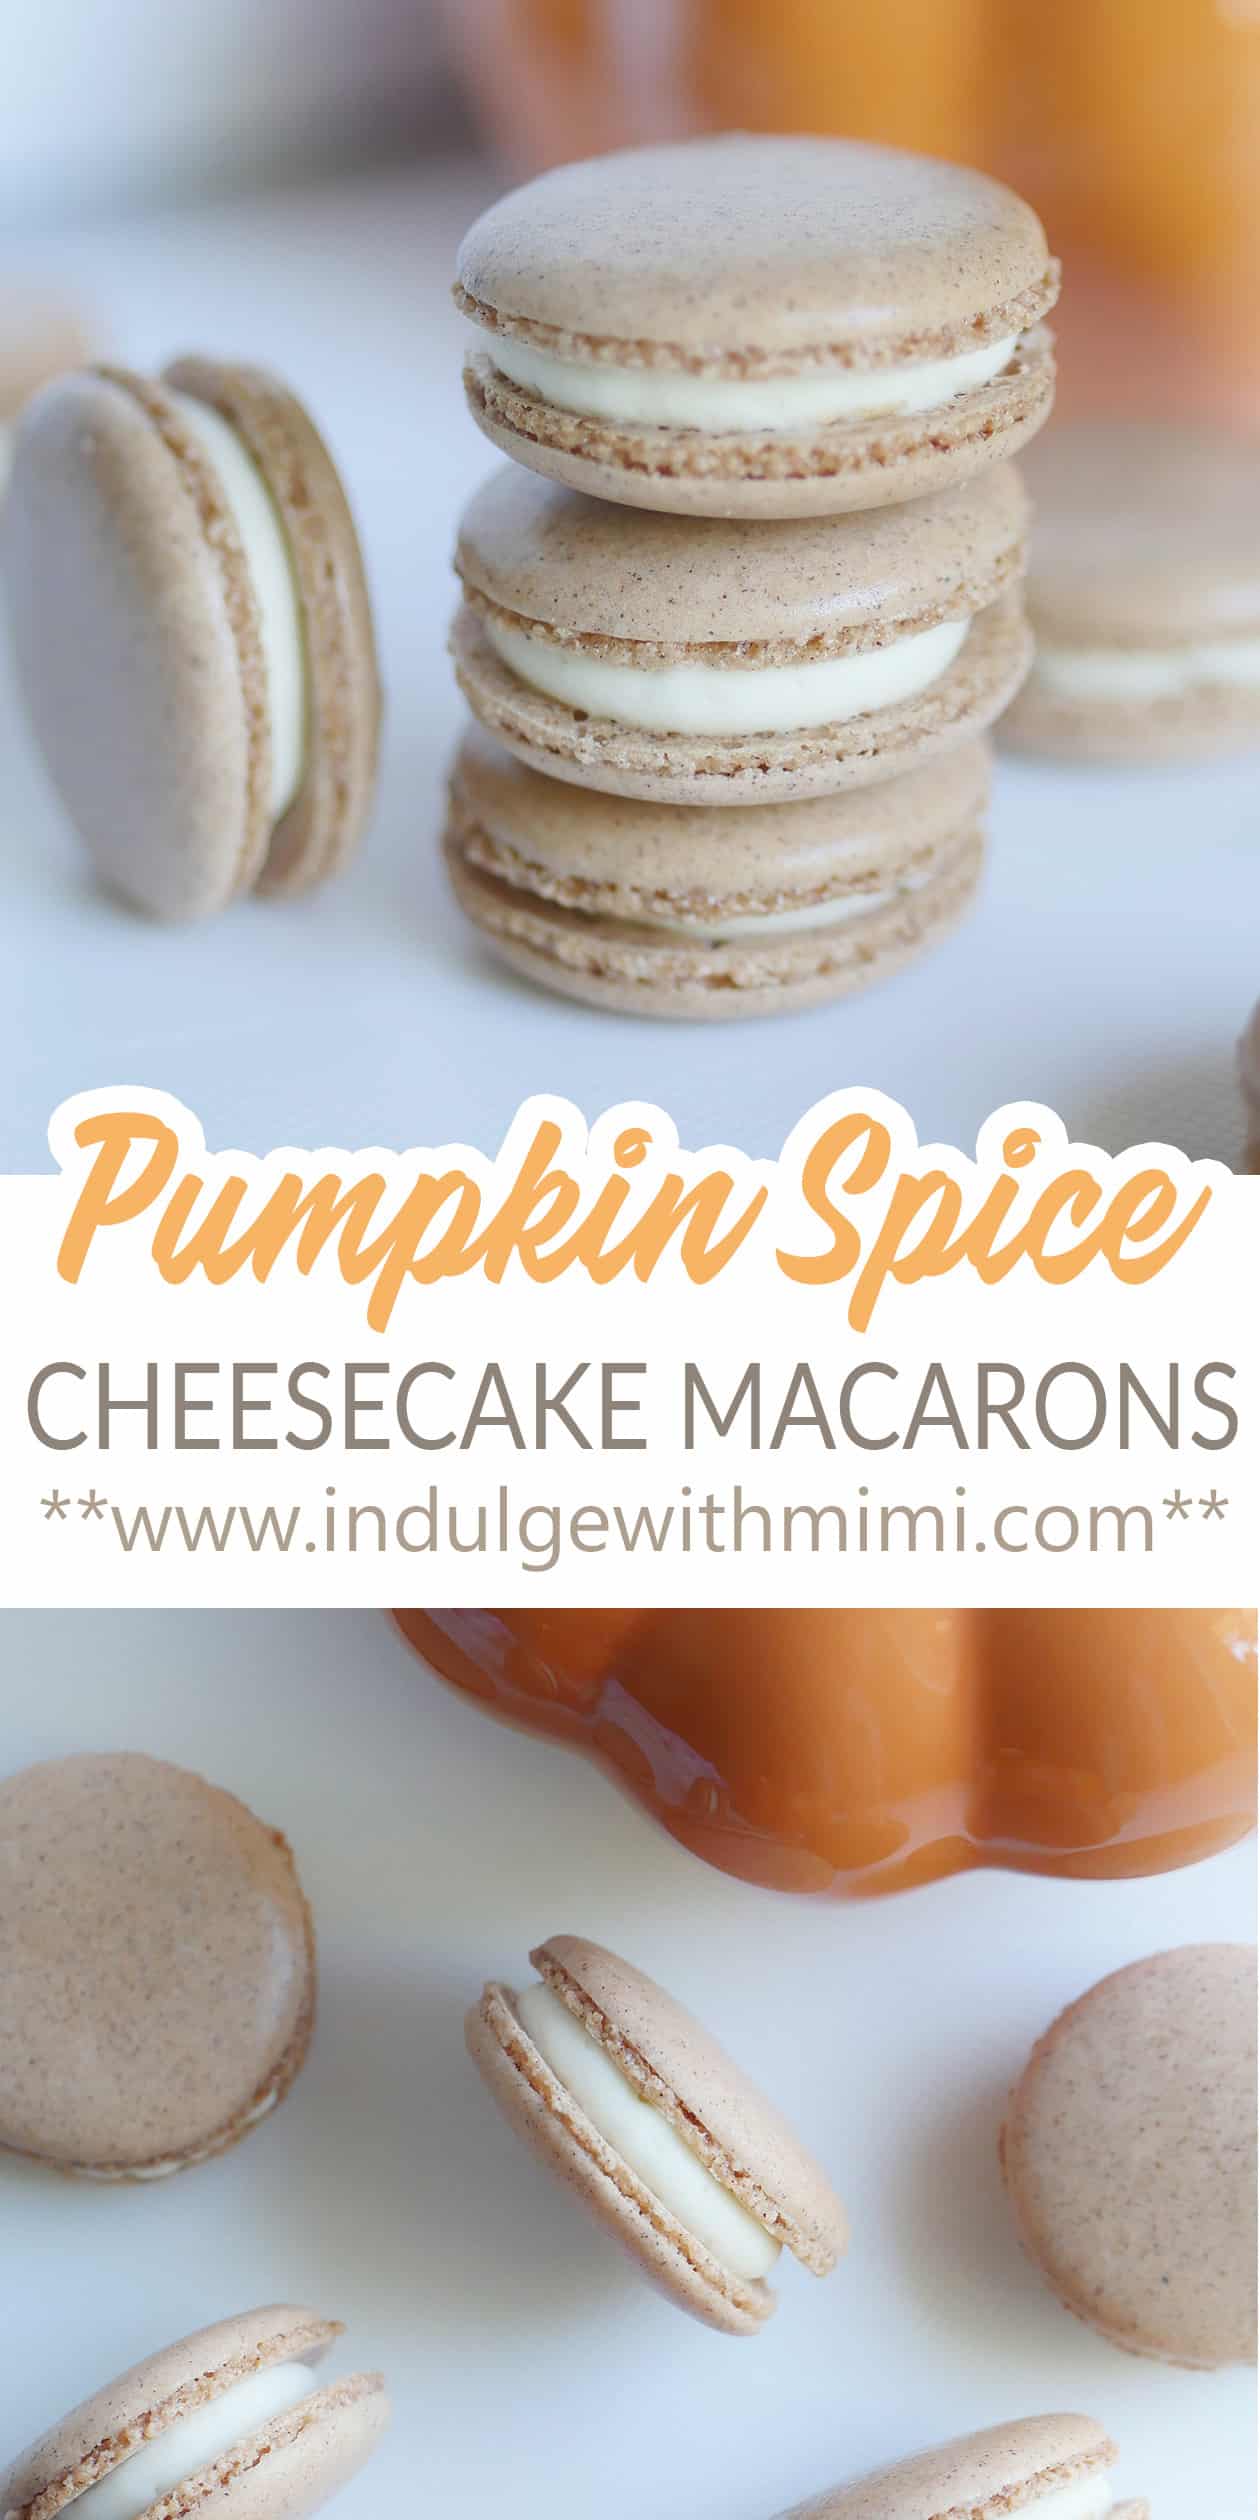
Table of contents
- How to Make a Sturdy Pumpkin Cheesecake Macaron Filling
- Ingredients & Substitutions
- How to Fix a Curdled Cream Cheese Frosting
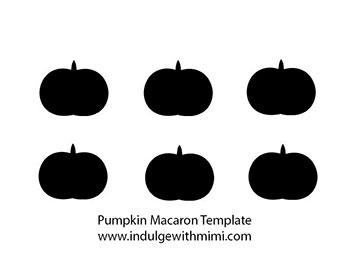
- Pumpkin Macaron Template
This year I was actually inspired to get on this Fall bandwagon a bit early. Maybe it's that ever impatient push in our commercialized world to have Halloween themed products out on the shelves before summer BBQ equipment is even put away that had me thinking about pumpkin spice since late August.
How to Make a Sturdy Pumpkin Cheesecake Macaron Filling
I decided early that this year's fall project would be a recipe for a Pumpkin Spice Cheesecake Macaron. Sure, there were a few other recipes out there already with variations of pumpkin, spice and or cheesecake but I wanted to create one that didn't involve mixing cream cheese with powdered sugar (too sweet).
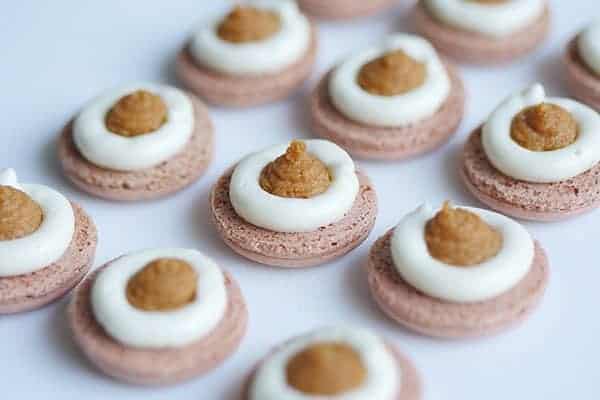
For this recipe, I've infused the shells with pumpkin spice to give it that extra flavor. Then I followed up with a cheesecake filling with a meringue buttercream instead of American buttercream which contains powdered sugar. A ring of this cheesecake frosting is piped on the outside to create a dam and the inside is filled with a dollop of pumpkin spice curd. This combo is structurally sturdy and tastes delicious!
Ingredients & Substitutions
- Almond flour - I prefer to make my own almond flour via this tutorial but many bakers have used this brand successfully.
- Icing sugar - also referred to as powdered sugar by some. Note: icing sugar in North America usually contains corn starch as an anti-caking agent.
- Aged egg whites for the macaron shells - measure it before aging.
- Castor sugar - Castor sugar is an extra fine granulated sugar also known as berry sugar. Castor sugar is easily dissolved, making it preferable for meringues. It can be substituted with granulated sugar.
- Ground Cinnamon - Try to get cinnamon and at least one other of the spices, then substitute the remaining missing spices with what you have. Use a mixture for a more multi-dimensional flavor.
- Ground Nutmeg
- Ground ginger
- Ground Cloves
- Cream of tartar – its used to stabilize the meringue and usually found by the spices in the baking aisle. It can be substituted with lemon juice or vinegar in double the amount. Or left out completely if you cannot find it.
- Cream cheese - use block cream cheese as the tub versions are too soft for this filling.
- Egg whites for the buttercream - make sure this is separated carefully in a clean bowl, taking care not to get any yolks inside. It's hard to whip up egg whites that are compromised with fat or oils.
- Granulated sugar
- Butter - it should be at room temperature. It will clump up and not incorporate into the meringue if it's too cold.
- 100% pumpkin puree - a simple can of store- bought pumpkin puree was used in this recipe. There's a lot of discussion that the pumpkin puree found in canned pumpkins isn't really pumpkins but different types of squash. This is because of the looser restrictions allowed on labelling this product, read more here. If you're a stickler for using real pumpkins, try making your own.
- 1 egg for the puree
- Butter - for the puree
How to Fix a Curdled Cream Cheese Frosting
One of the challenges of working with cream cheese is that it can separate if over beaten. You'll see that the mixture will become curdled, sweaty and very lumpy. One of the extra steps taken to combat this is to cream and soften the cream cheese ahead of time so that it can be easily incorporated into the buttercream without the need for much more beating.
Now let's just say, despite all your best efforts to prevent the cream cheese frosting from separating, it does. You'll see that the mixture will become broken, sweaty and lumpy. Normally, a broken looking buttercream can usually come back together after beating some more. With the addition of the cream cheese, this doesn't happen. The water separates from the cream cheese and the more you beat it, the worse it gets. Don't throw the mixture away in frustration. I know, it will look so ugly that you might be tempted to.
To fix it, boil a pot of water and once it comes to a boil, hold the mixture (in a heat-proof boil) over the boiling water and let it heat up. Stir it gently to keep it moving. Once it has melted to an almost smooth consistency, immediately remove it off the heat. Let it cool to room temperature. ( I like to put it in the fridge for a few minutes to speed it up.) Beat it on low speed with the paddle attachment on a stand mixer. Now watch as it slowly and miraculously turns from a runny mixture into a thick and fluffy cream cheese frosting!

I hope you enjoyed reading a little bit of the thought and journey that went into creating this recipe. Recipe development for me takes days and multiple test batches because I like to work from scratch, I'm always excited to share the end result with all of you. Print out this recipe, try your hand at it and let me know how it goes.
Thanks so much for reading. If you need another idea for Fall, try my super fluffy Japanese Carrot Spice Cake Roll. Oh, I've also included a special pumpkin macaron template for you all to download too. See below.
XOXO,
Mimi

Pumpkin Macaron Template
Prep Time 1 hour 18 minutes
Cook Time 12 minutes
Rest Time 30 minutes
Total Time 2 hours
Ingredients
Pumpkin Spice Macaron Shells
- 130 grams almond flour
- 130 grams icing sugar
- 100 grams egg whites
- 90 grams castor sugar* see note
- 2 tsp ground cinnamon
- 1/2 tsp ground nutmeg
- 1/2 tsp ground ginger (powder)
- 1/4 tsp ground cloves
- 1/4 tsp cream of tartar
Cheesecake Frosting
- 40 grams cream cheese* see note
- 65 grams egg whites
- 130 grams granulated sugar
- 195 grams butter at room temperature
Pumpkin Spice Filling
- 1/2 cup 100% pumpkin puree* see note
- 1 egg
- 50 grams granulated sugar
- 45 grams butter
- 1/2 tsp. grated ginger root
- 1/4 tsp. ground cinnamon
- 1/4 tsp. ground nutmeg
- 1/8 tsp. ground cloves
Instructions
-
Pumpkin Spice Macaron Shells
- Print out the big macaron template provided in post.
- Set aged egg whites out at room temperature.
- Pulse spices (cinnamon, ginger, nutmeg, cloves) with the almond flour and icing sugar together in a food processor.
- Sift dry ingredients. Discard big pieces of almond that can't be sifted.
- IF YOU ARE NEW TO MAKING MACARONS, please read the instructions to my BEST MACARON RECIPE before attempting to follow the rest of the instructions since it is condensed for the advanced macaron baker
- With the balloon whisk attached, whip the room temperature egg whites on low-medium speed.
- Add cream of tartar when it becomes foamy.
- Turn up the speed to medium.
- Once the whisk starts to leave tracks in the egg whites, add sugar a little at a time.
- Turn the speed up to medium-high and whip until firm peaks, stop mixer and
add gel food color if desired. Continue whipping on medium-high until
stiff peaks. - Fold the dry mix and meringue together until the batter becomes a "lava" or honey-like consistency.
- Transfer batter into a piping bag fitted with a #6 round piping tip.
- On parchment paper or silicone mats, pipe the big macaron cake shape.
- Rap the tray hard on the counter to remove any excess air bubbles. Use a toothpick to pop any remaining bubbles.
- Wait until the shells become completely dry before baking. Depending on the humidity, this can be between 30 min. to an hour.
- Bake at 325F for 25-35 minutes. Every oven is different, you may need to adjust your own temperature settings. Please read How to Use Your Home Oven Properly for Baking Macarons if you are unsure.
- Macarons are done when the foot doesn't push back and the tops don't move when you wiggle it.
- Once baked, let cool completely before removing from the baking mat/parchment paper.
Instructions for Cheesecake Frosting
-
Set butter and cream cheese out at room temperature.
-
Beat the softened cream cheese until creamy. Do NOT over beat since it can cause the water to separate out from the cheese.
-
Bring a small pot of water to a boil.
-
Place egg whites and sugar into a heat proof bowl. Stainless steel is light and safe.
-
Whisk the whites & sugar mix over the boiling water.
-
Pay attention to whisking the mixture when it starts getting hot, you don't want to cook the eggs.
-
Whisk the mixture until the temperature reaches 160F. This temperature is generally accepted to be able to kill salmonella in eggs.
-
Pour the mixture into the Kitchenaid mixer and whisk on low with the balloon whisk, then turn it up to medium.
-
Once the mixture is stiff and the bottom of the bowl is cool to the touch, stop mixer. Change the whisk attachment to the paddle attachment.
-
Add the room temperature butter a little bit at a time while beating with the paddle attachment at medium speed.
-
The mixture might look curdled or separated for a while but keep mixing. It will all come together.
-
Keep 100 grams of the buttercream for use in our current recipe. Freeze the rest of the buttercream for use at a later date.
-
Add the softened cream cheese into the buttercream and beat until incorporated. It should look very smooth and creamy. Do NOT over beat. Once the water comes out of the cream cheese, the mixture will curdle. If this happens, see how to fix it in the introduction to this post.
Instructions for Pumpkin Spice Filling
-
Cream butter and sugar together until light and fluffy.
-
Add cinnamon, nutmeg, cloves, ginger root and mix until incorporated.
-
Add egg and mix until incorporated.
-
On the slowest speed, mix in the pumpkin puree until incorporated.
-
Pour mixture into a pot and cook it on med. heat until it reaches 180F.
-
Take off the heat and drain the excess liquid out with a strainer. Let
mixture sit on the strainer until all the liquid is drained out. -
Place in the fridge for a minimum of five hours or overnight.
-
Pipe a ring of cream cheese frosting on the macaron shell and fill the center with a dallop of pumpkin spice filling.
-
Assemble the shells together, wait at least 12 hours and enjoy!
Notes
1. Castor sugar is an extra fine granulated sugar also known as berry sugar. It can be substituted with granulated sugar.
2. 100% pumpkin puree from a can was used in this recipe
3. Use block cream cheese, not the type that comes in a tub.
4. If cream cheese is over beaten, the water will start to separate from it. Read the introduction in this post to learn how to fix it.
5. This is a higher moisture filling so it's best to consume it within 12-36 hours.
Nutrition Information
Yield
24 Serving Size
1
Amount Per Serving Calories 183 Total Fat 12g Saturated Fat 6g Trans Fat 0g Unsaturated Fat 5g Cholesterol 31mg Sodium 85mg Carbohydrates 19g Fiber 1g Sugar 17g Protein 2g
This information is provided as a courtesy and is an estimate only. This information comes from online calculators. Although indulgewithmimi.com attempts to provide accurate nutritional information, these figures are only estimates.
-
Baby Pooh Bear Macarons with Batman Halloween Costumes (Template)
-
Double Chocolate Bears with Tiny Jack-O-Lanterns (w/Template)
-
Japanese Carrot Cake Roll with Stabilized Mascarpone Cream
-
Easy Gingerbread Macarons with Chocolate Spice Filling
Since I do 99.9% of the grocery shopping in my home (the other .01% is when hubby runs out to get himself ice cream), I have the responsibility of picking out produce that is both healthy and delicious so organic produce is a big part of our diet. To consumers, the organic food movement is a somewhat easy sell since the end user can easily comprehend the benefits it brings to their own lives but with the earth's precious resources under rising threat, it's become increasingly important to think about the ramifications of how and where we obtain our food.
Sustainable, Organic, Local
The harvesting of sustainable food requires that we replenish the same resources that we take away so that there is supply for incoming generations. And doing all of this locally adds to these efforts since resources used for transportation and packaging are reduced. Having said that, it's not always easy to buy such foods (sustainable, organic and local) since companies need to adopt new harvesting practices at the expense of their bottom line. Doing the right thing is not always easy but its good to find perfect examples of these organizations in my own backyard.
Northern Divine is a local fish farm based on the Sunshine Coastt which produces organic sustainable sturgeons certified by the Ocean Wise program. These fish are grown to a size of several hundred pounds and in the Fraser River waters they take about 11 years to mature and start producing caviar. It's a long term investment in the region and Northern Divine has several thousand of these fish, at one time, all in different stages of their life cycle.
Sturgeon is Not Just For Caviar
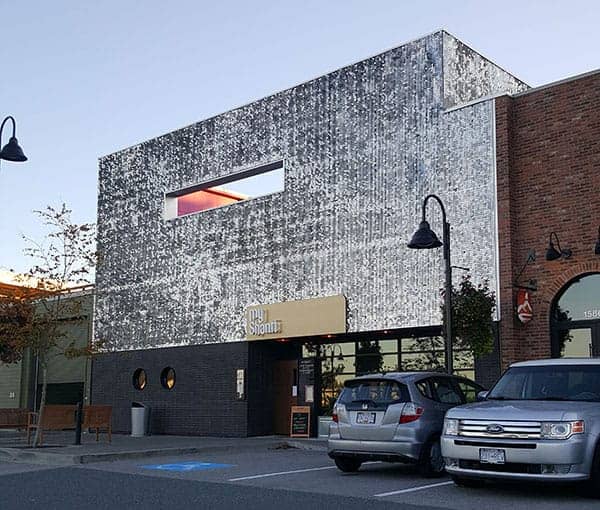
Although the sturgeon is most notably known for producing some of the best caviar in the world, it turns out that it is also a very delicious tasting fish on its own. I had a chance to experience this for myself last night when I was invited to a 5 course dinner featuring Northern Divine's sturgeon, prepared by Chef Robert Clark and the legendary Chef Vikram Vij's at the latter's restaurant, My Shanti, in South Surrey.
Chef Vij and Chef Clark cleverly incorporated a different part of the sturgeon in every course so nothing goes to waste. We had a few sturgeon steaks in the classic filet style but more interestingly - the sturgeon fin soup and sturgeon liver pate. I loved how the fish is boneless, non-fishy and had a firm texture, without which causes kids to dislike fish. Come to think of it, its actually a very family-friendly fish.
And if I've got you a little bit curious about sturgeon, you can also try your hand at it at home. It can be found at Choices market in the lower mainland and here are some sturgeon recipes you can follow.
.
Go Local
Lastly, I'd like to impart that this dinner experience had a big impact on me. Besides the amazing sturgeon dishes and the well thought out beer and wine pairings, the night highlighted the amazing things that a group of committed citizens can achieve together when they help each other succeed. It was inspiring listening to Chef Vij talk passionately about his partnerships with local breweries, wineries and bakeries to create new products and bring new dishes to his restaurants, thereby, supporting the local economy and it's people. Some of those collaborations came in the form of a specially formulated beer with Trading Post Brewery - a beer that comes in a small and stylish apothecary jar because as he muses "it's always nice to hold onto a bottle of beer", and chocolate cake by Langley's Tracey Cakes paired with sturgeon caviar. Meeting the people behind the sustainable Northern Divine fish farm, the owners of local wineries, breweries and bakeries, you can see how much people thrive when they are supported by their local community. You can never go wrong when you go local.
Until our next outing.
XOXO,
Mimi

Disclosure: I was invited to attend this dinner event. All drinks and food were complimentary. All opinions are my own.
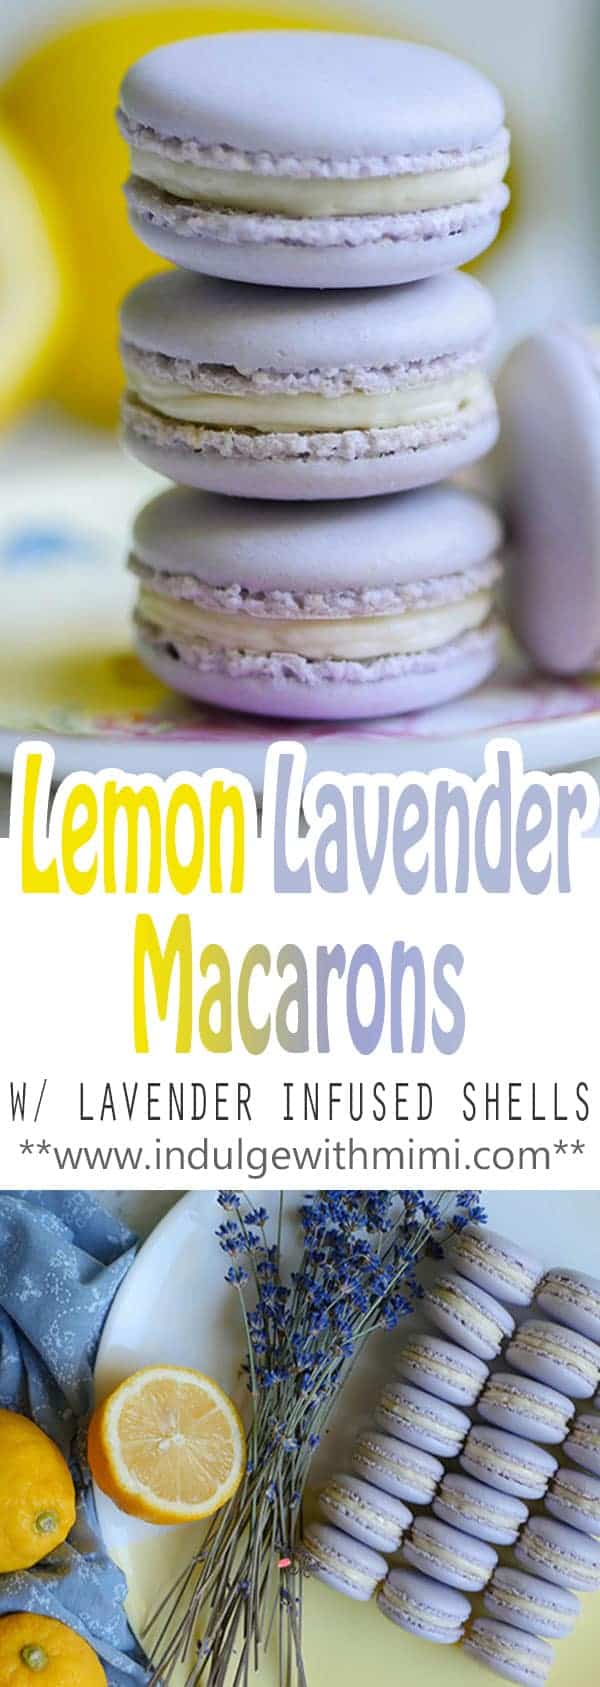
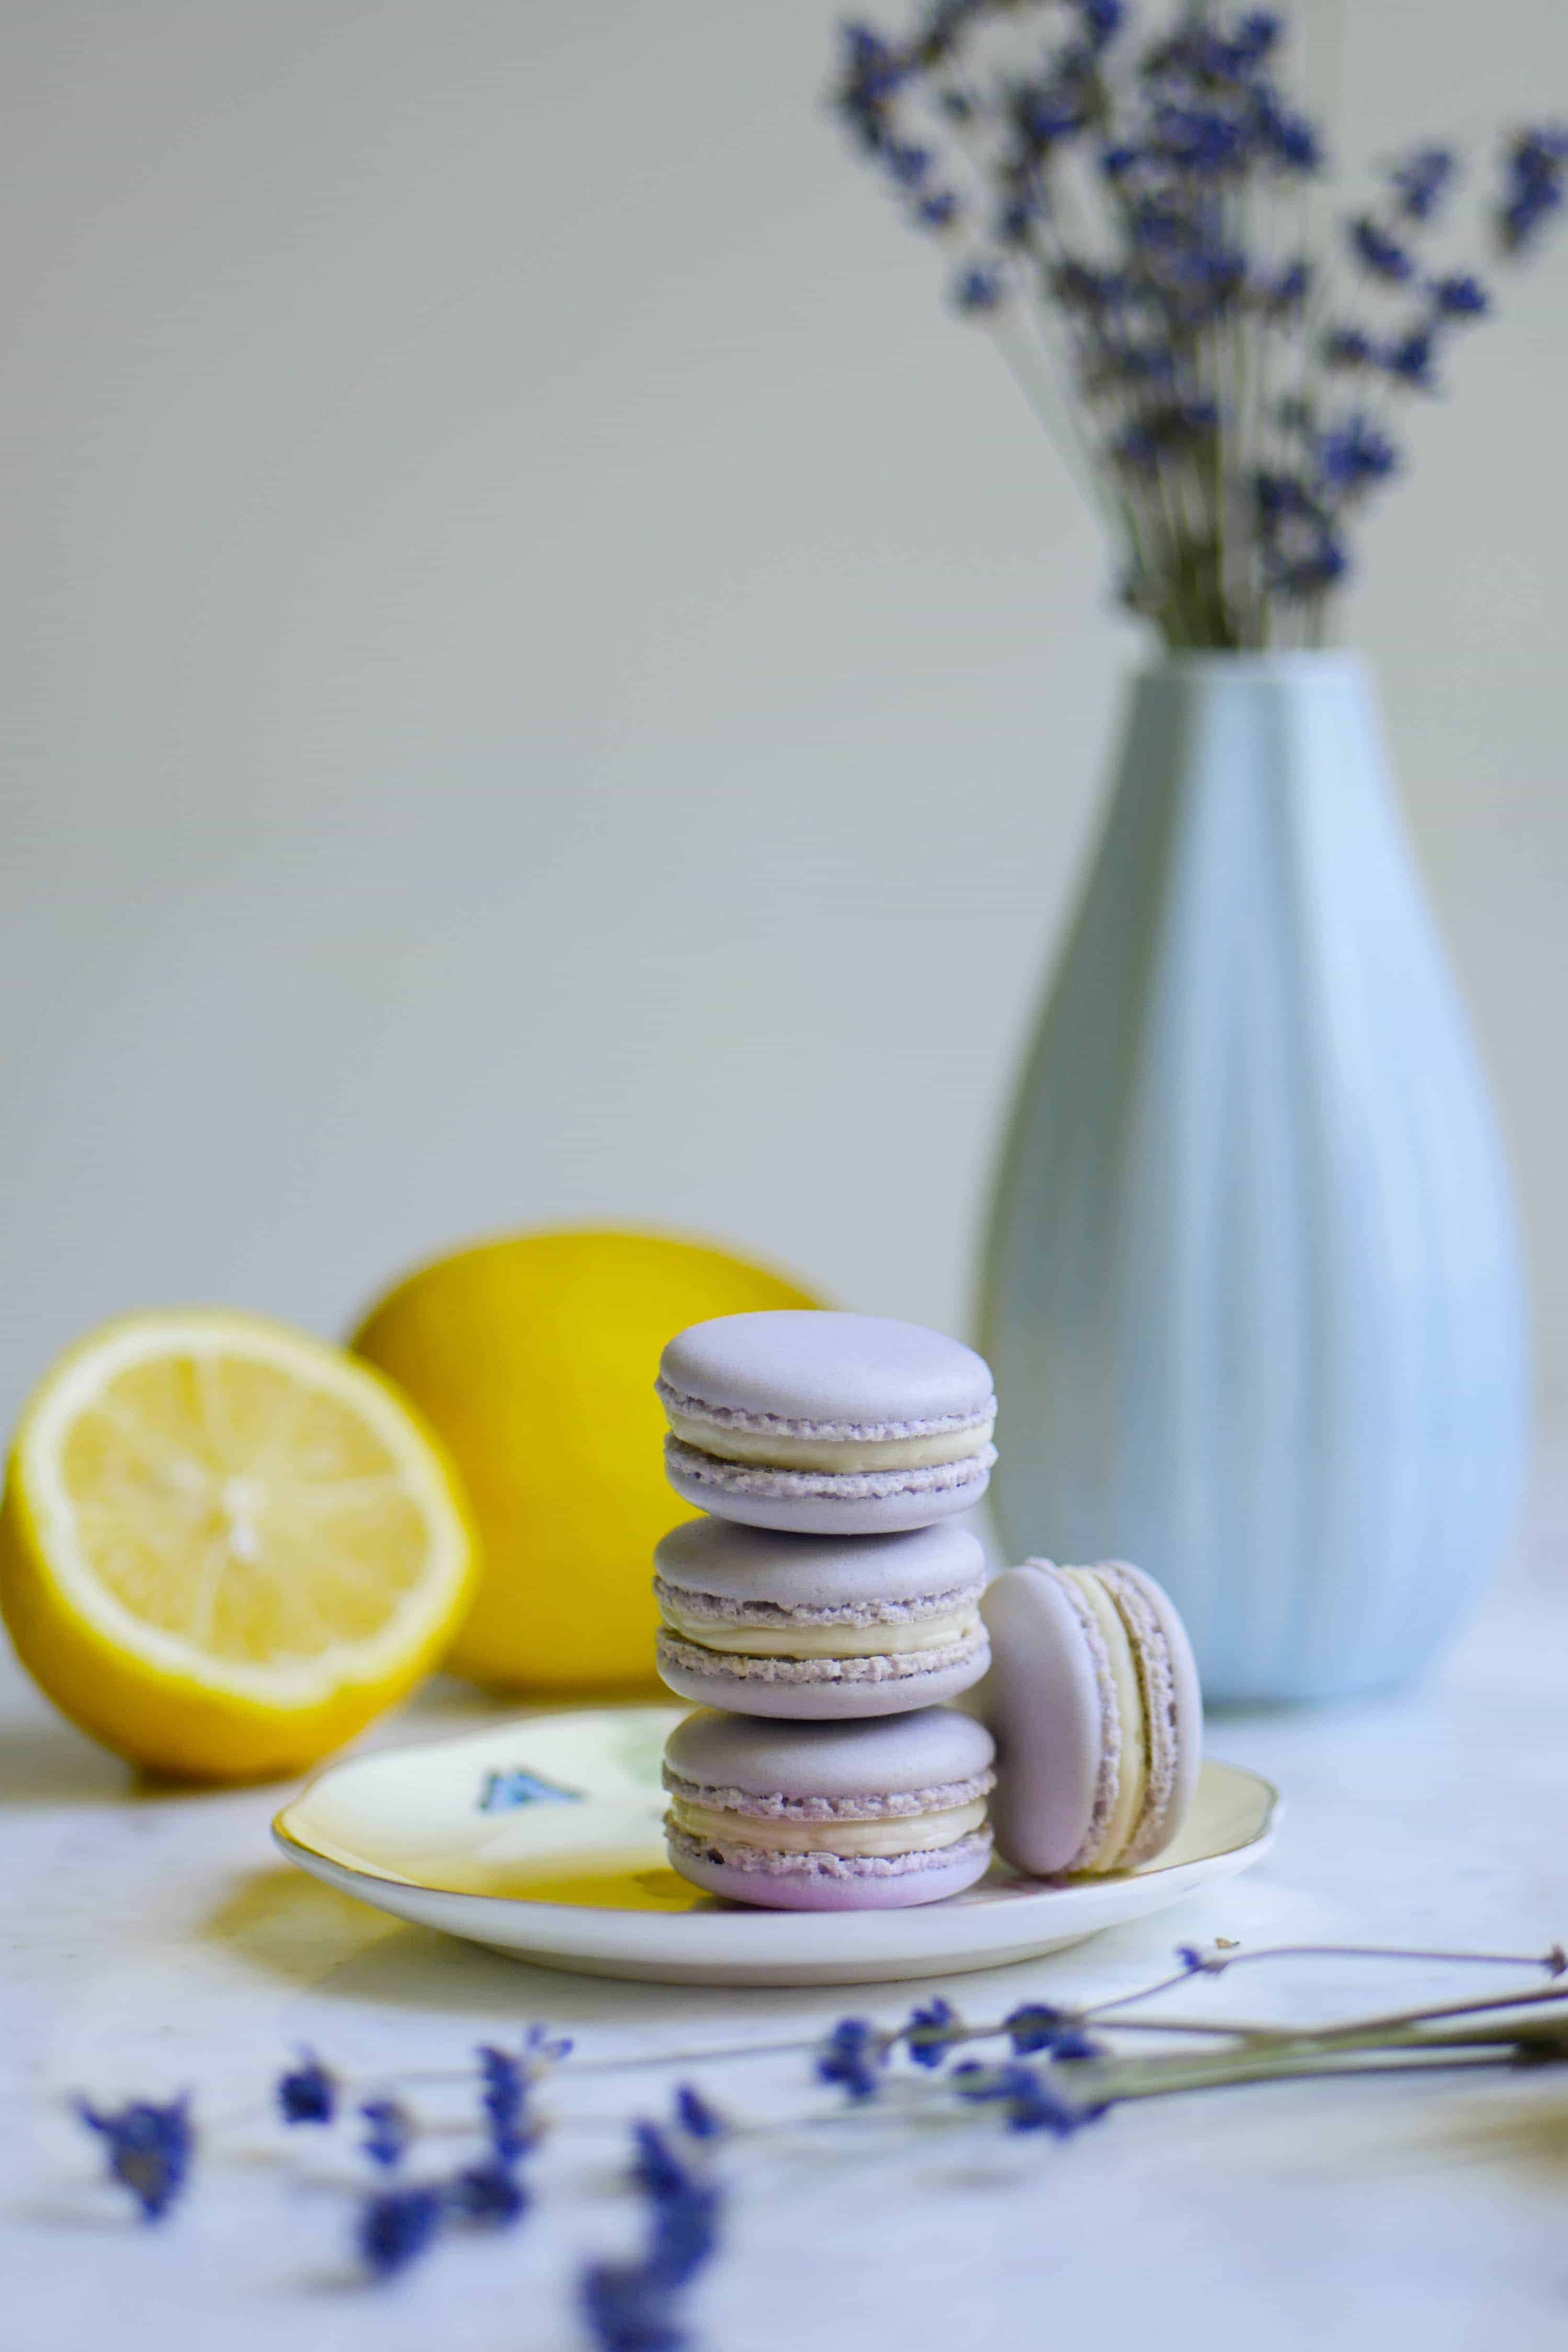
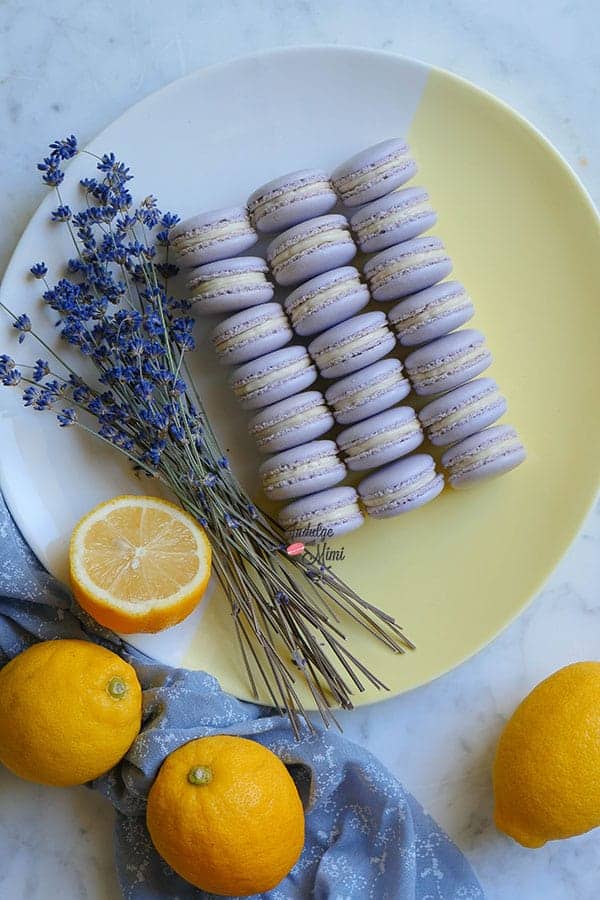
Lemon Lavender Macaron Recipe with lavender infused shells and a sturdy macaron-friendly lemon curd. Naturally flavored and so mouthwatering!
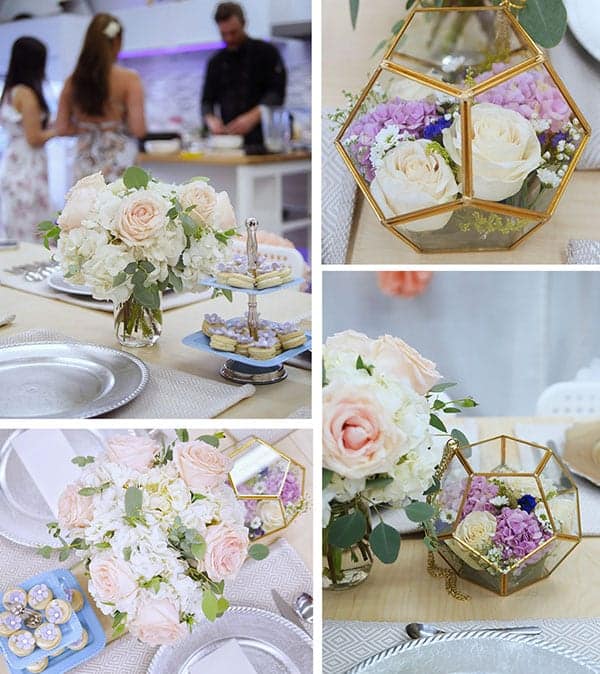
Dinner Party Macarons
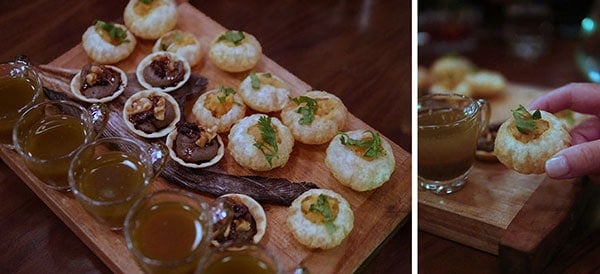
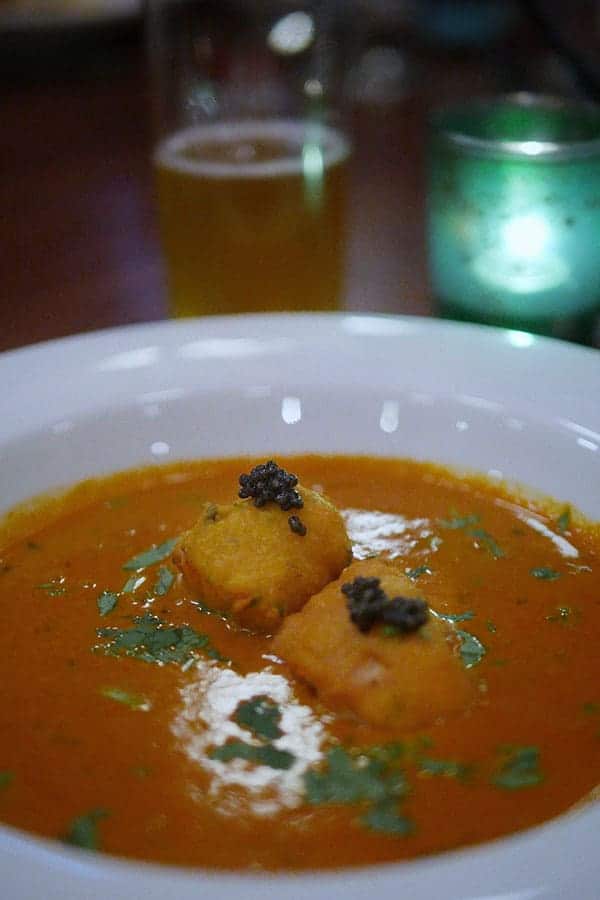
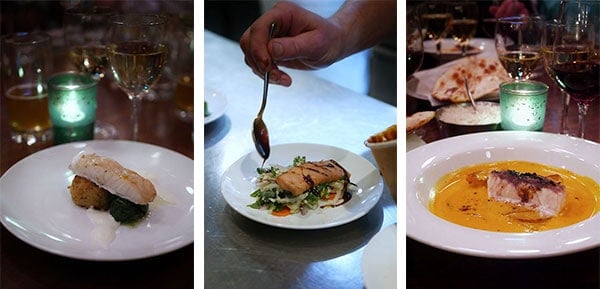
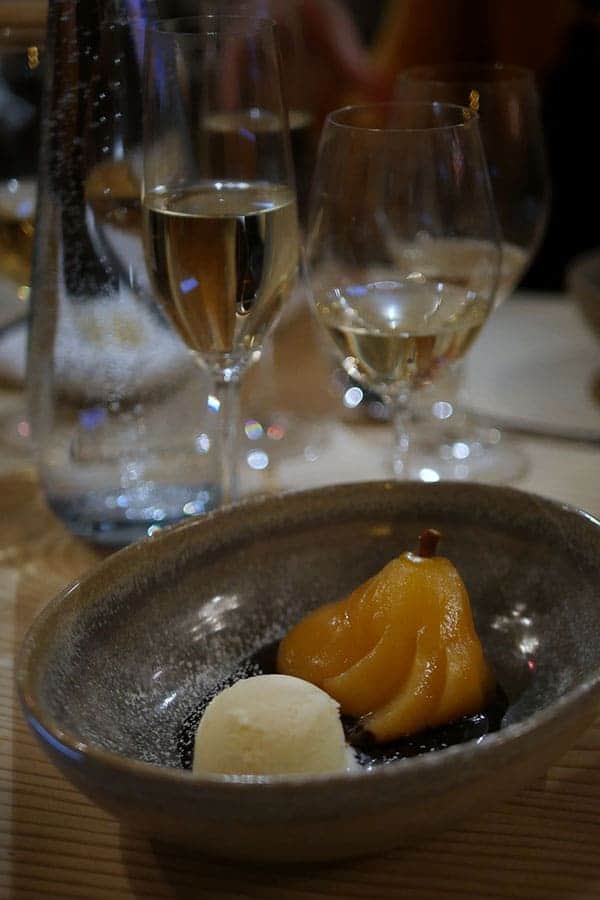
When I was on Deborah Moore's radio show last time, I told you about our private dinner experience prepared by Chef Travis Petersen and showed you the macarons I made for the event. I promised a recipe as well so I'm finally sharing it with you all tomorrow morning on the show along with some of the other activities I've been up to: Cooking a Gourmet Meal at the Dirty Apron and Tea at the new Avery Tea House.
In case you didn't read about our private dinner party experience last time, here are some photos:

3 Part Recipe
This recipe consists of three parts:
- Lavender infused shells: For this, you'll need to pulse three teaspoon of lavender buds along with the almond flour and icing sugar then use my Best Macaron Recipe to finish making the shells. This is a great way to add additional flavoring to the shells without compromising it's structure.
- Lavender white chocolate "ganache": We'll be adding food grade lavender oil to the white chocolate ganache which we then pipe into a circle creating a dam. Then we fill the center with a dollop of lemon curd
- Lemon Curd.
A Strong and Sturdy Lemon Curd
A very important element of this recipe is the strong and sturdy macaron-friendly lemon curd. Most macarons containing lemon curd tends to be wet and soggy since lemon curd is a high-moisture filling. Today, we'll be making one that is strong and sturdy and it keeps well in a macaron for a few days.
This recipe is multi-part but I think the results are worth the effort since the flavours really shine through. Any recipe with flavour infused into the macaron shell is going to be very flavourful and I hope you get a chance to try it.
XOXO,
Mimi
Prep Time 2 hours
Cook Time 30 minutes
Rest Time 30 minutes
Total Time 3 hours
Ingredients
Lavender Macaron Shells
- 3 tsp finely pulsed lavender
- 245 grams almond flour
- 245 grams icing sugar
- 185 grams egg whites, aged, room temperature
- 165 grams castor sugar (Note 1)
- 1/2 tsp cream of tartar
Lavender White Chocolate "Ganache"
- 50 grams heavy cream
- 150 grams couverture white chocolate (not chocolate chips)
- few drops of food grade lavender oil
Sturdy Macaron-Perfect Lemon Curd
- zest of two organic lemons
- 76 grams organic lemon juice
- 2 eggs
- 50 grams butter
- 180 grams granulated sugar
Instructions
Lavender Macaron Shells
- Set aged egg whites out at room temperature.
- Pulse almond flour, icing sugar and lavender buds together in a food processor to further break down any large pieces of almond flour and lavender.
- Sift dry ingredients: almond flour, icing sugar & lavender. Discard big pieces of almond and lavender that can't be sifted
- If you are new to macaron baking, please read the instructions to my BEST MACARON RECIPE before attempting to follow the rest of the instructions since it is condensed for the advanced macaron baker.
- With the balloon whisk attached, whip the room temperature egg whites on low-medium speed.
- Add cream of tartar when it becomes foamy.
- Turn up the speed to medium.
- Once the whisk starts to leave tracks in the egg whites, add sugar a little at a time.
- Turn the speed up to medium-high and whip until firm peaks, stop mixer and add gel food color if desired. Continue whipping on medium-high until stiff peaks.
- Fold the dry mix and meringue together until the batter becomes a "lava" or honey-like consistency.
- Transfer batter into a piping bag fitted with a round piping tip.
- On parchment paper or silicone mats, pipe out round shaped macarons.
- Rap the tray hard on the counter to remove any excess air bubbles. Use a toothpick to pop any remaining bubbles.
- Wait until the shells become completely dry before baking.
- Bake at 325F for 12-14 minutes. Every oven is different, you may need to adjust your own temperature settings. Please read How to Use Your Home Oven Properly for Baking Macarons if you are unsure.
- Macarons are done when the foot doesn't push back and the tops don't move when you wiggle it.
- Once baked, let cool completely before removing from the baking mat/parchment paper.
Instructions for Lavender White Chocolate "Ganache"
- Chop up couverture chocolate into small pieces.
- In a pot, heat cream on medium heat until just before boiling.
- Take cream off heat immediately once you see steam and a few bubbles along the edge.
- Pour cream onto chocolate. Wait one minute.
- Stir the mixture until incorporated.
- Add a few drops of food grade lavender extract to the mixture to your taste and stir until fully incorporated. Add only one to two drops at a time since you don't want it to end up tasting like soap!
- Put into fridge to firm up a bit before placing in pastry bag.
Instructions for Sturdy Macaron-Perfect Lemon Curd
- Zest the organic lemon, set aside.
- In a heatproof glass bowl, cream butter and sugar together. Do not use metal bowls as it will react to the acidity in the lemon juice.
- Add egg and beat until incorporated.
- Add lemon juice and beat until incorporated.
- Place over a pot of boiling water. Do not let the bottom touch the water.
- Whisk gently to keep the mixture moving as it heats up.
- Occasionally, check the temperature of the mixture. You should see the curd thicken up and it will coat the back of your spoon. Allow the mixture to reach 180-185F. It might take a while (10-15 min), so be patient.
- Take the mixture off the heat, add the lemon zest into the hot mixture to release the oils and mix until combined.
- Pour through a sieve into another bowl for a smooth curd.
- Let it cool down then place in the fridge. It will set up into an even firmer and thicker curd after you've chilled it in the fridge.
Assembly
- Pair two similar sized shells together.
- Pipe a ring of lavender ganache onto the macaron shell then fill the center with a dallop of lemon curd.
- Assemble the macaron shells together. Place in fridge for 24 hours so it can mature before eating. Enjoy!
Notes
- Castor sugar is also known as extra fine granulated sugar or berry sugar. Granulated sugar can be used by castor sugar is preferable.
Recommended Products
As an Amazon Associate and member of other affiliate programs, I earn from qualifying purchases.
-

Round Piping Tip #10
-
Ateco Disposable Piping Bags, 12-Inch, Pack of 100
-
Ateco Disposable Piping Bags, 12-Inch, Pack of 100
-

Braun 4-in-1 Immersion Hand Blender, Powerful 350W Stainless Steel Stick Blender, Multi-Speed + 2-Cup Food Processor, Whisk, Beaker, Masher, Easy to Clean, Black, MultiQuick MQ537BK
-
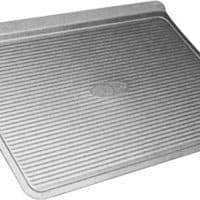
USA Pan Rimless Baking Sheet for Better Airflow to Macaron Shells
-

Regular Sized Silpat Non-Stick Silicone Baking Mat
-
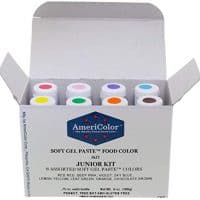
Gel Food Coloring AmeriColor Junior Kit, 8 Colors.75 Ounce Bottles
-

McCormick Gourmet All Natural Cream Of Tartar, 2.62 oz
-

Bob's Red Mill Super-Fine Gluten Free Almond Flour, 3 Pound
-
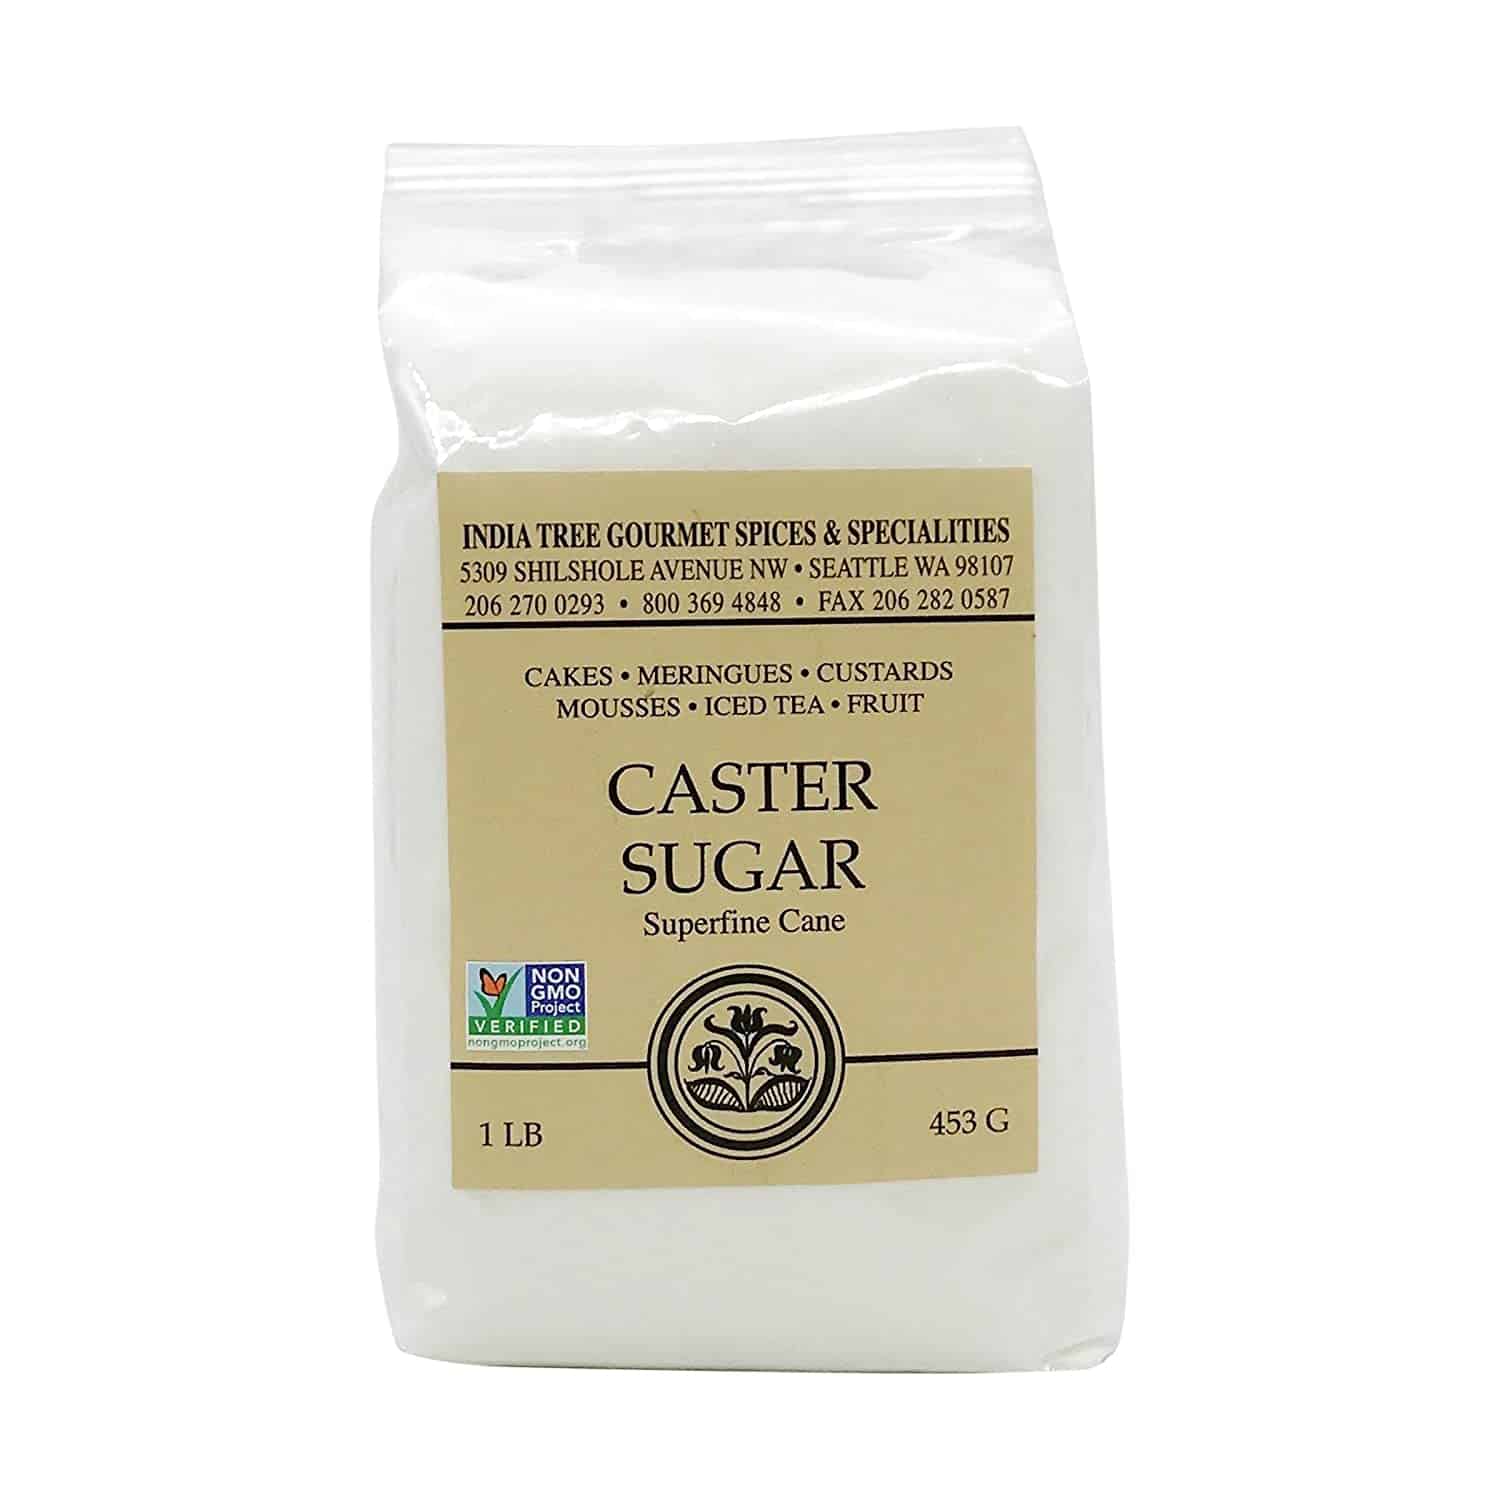
India Tree Superfine Caster Baking Sugar, 1 lb. bag
-

C&h Powdered Sugar 4 Lbs (1)
Nutrition Information
Yield
45 Serving Size
1 grams
Amount Per Serving Calories 122 Total Fat 6g Saturated Fat 2g Trans Fat 0g Unsaturated Fat 4g Cholesterol 13mg Sodium 21mg Carbohydrates 17g Fiber 1g Sugar 15g Protein 2g
This information is provided as a courtesy and is an estimate only. This information comes from online calculators. Although indulgewithmimi.com attempts to provide accurate nutritional information, these figures are only estimates.
Newest Afternoon Tea Offering in Richmond
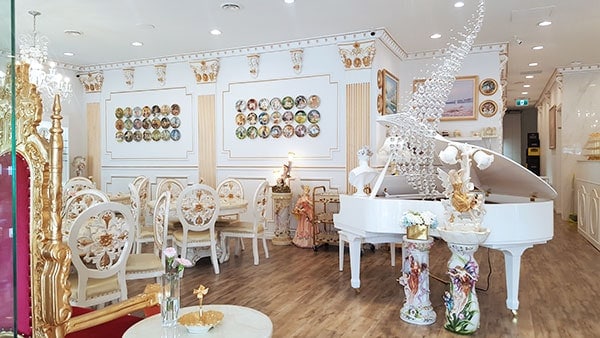
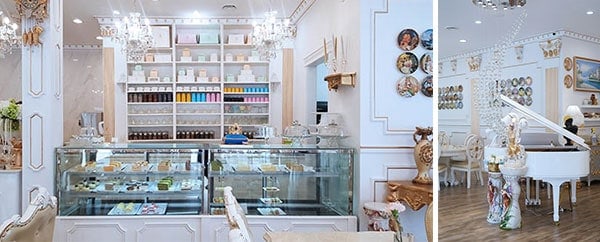
Richmond is now home to a brand new tea salon called Avery Cakes & Tea House. This new salon joins the ranks of the city's other tea offerings like L'Opera Patisserie and Adorabelle. It's located in a shopping plaza on the corner of Garden City and Alderbridge. The outside looks like any of the other shops in the plaza but inside the space is filled with opulent looking furnishings, gold gilding and crystals everywhere complete with a self-playing grand piano in white. Basically, the same level of opulence you see at L'Opera but on a much larger scale.
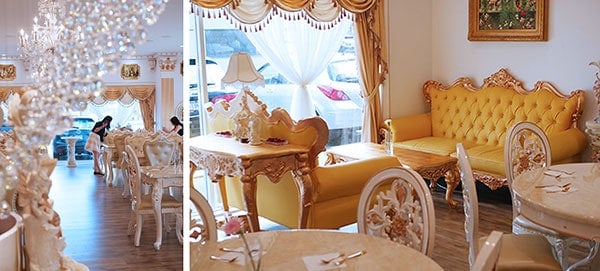
Size Matters
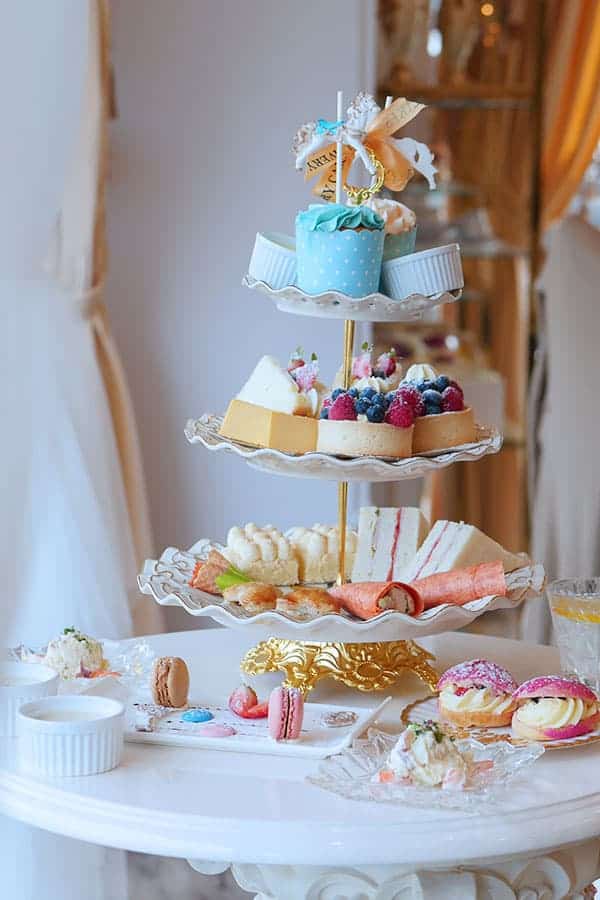
The space is so large that it has the capacity to serve over 60 guests at a time. Space is usually so tight at most tea houses (ex. the notoriously cramped Adonia) that this is quite a nice surprise. There is a good amount of spacing between each table so you can sit comfortably without bumping the seat behind you. The chairs are big and comfy, and the tables for four are large enough to place two 3-tiered trays comfortably along with all the other dishes in the tea set.
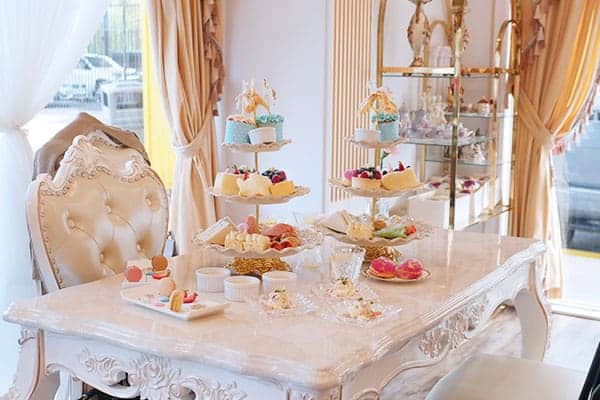
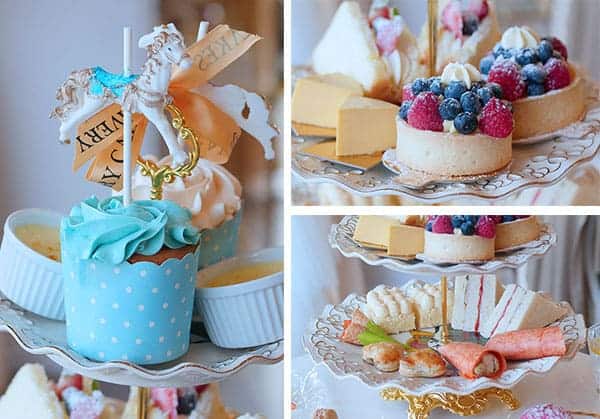
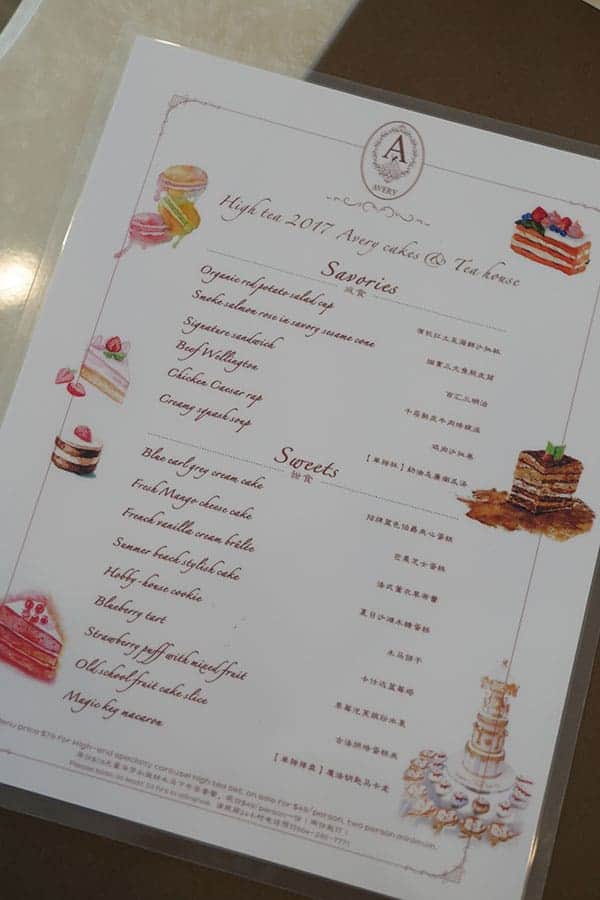
While we're on the subject of size, the tea set itself features some of the biggest dessert pieces I've ever seen in an afternoon tea set (even bigger than at Neverland). One such piece - the fruit tart - was actually sold on its own inside their display case as a regular sized dessert. This is definitely a tea set that will satisfy those with a heartier appetite. I had so much leftovers that it could have made a completely new tea set.

That "Je ne sais quoi"
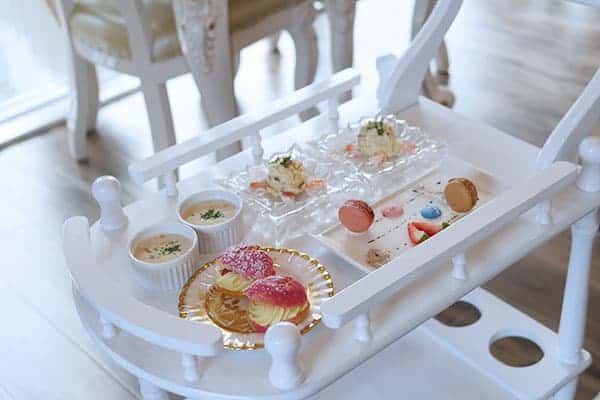
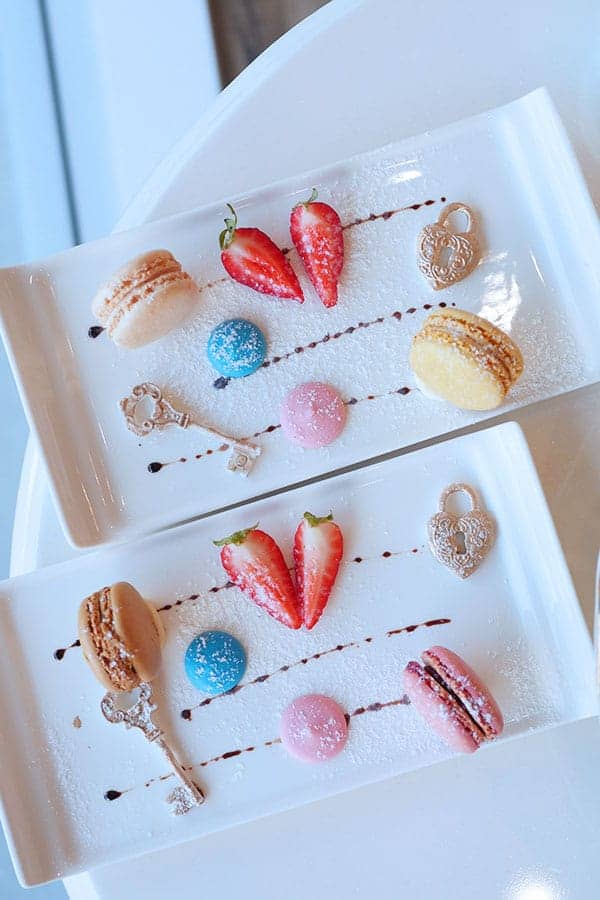
Avery cakes really has it all - almost. It's a big and brand new space that we heard took one year to renovate. Tons of thought was put into the furnishings and even the menu - fully illustrated and listing the ingredient composition of each tea. There is branded takeaway boxes and even Avery branded tea ware! The tea set itself was also of a good quality and size. Even the extra thought put into plating the macarons really impressed me.
So, naturally, with all these over-the-top offerings, we were excited and wanted to know more about this place. Except, there was no one there who could answer even simple questions like whether the shop was a chain or an independent (it's an independent). Firstly, the staff were not very attentive and secondly, when reached, one didn't have the answer and had to refer us to another staff member who answered without much enthusiasm for the brand. We were the only table in the tea salon for well over two hours and there were four front line staff who spent the majority of the time chit chatting with each other at the counter. I appreciated that they were all willing to help once we were able to get their attention. However, I feel like they may possibly be the missing link; the company needs a mouthpiece to convey its grand ambitions to their clients and who better to do it than front line staff? I can just see so much potential with all the infrastructure they have in place but also feel that it's missing something - an intangible energy.
That elusive quality may not be what everyone chases when it comes to tea and I would definitely recommend Avery on all it's other merits - location, ambiance and quality. All of it which it has in spades.
Until our next tea date.
Xoxo,
Mimi

Notable Points:
- newest tea offering in Richmond
- huge spacious tea salon
- many seats accommodate big parties
- many dessert offerings aside from tea sets
- big tea menu
- free parking
- Asian style desserts that are less sweet
- regular sized dessert offering will take you by surprise
Ambience:
Luxurious old world style furnishings including lots of crystal chandeliers, crystal waterfall display, self playing piano, plush chairs with carved design and shelves displaying tea ware. It's a spacious salon that accommodates well over 60 people. There is sufficient space between each table and many of them benefit from receiving natural light as the salon is a corner unit with floor to ceiling windows.
Scones: no scones came with our tea set
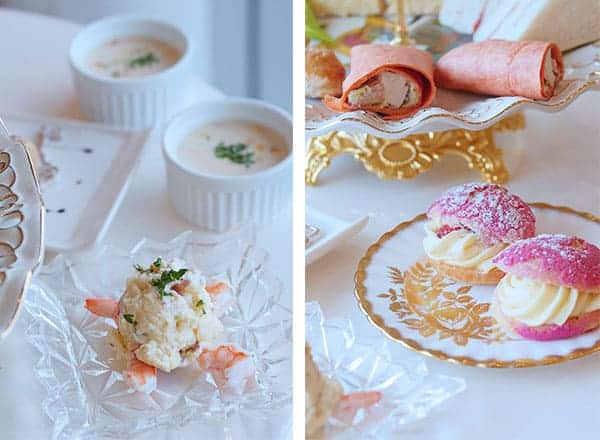
Savoury: They were all fresh and tasty. Compared to the desserts, they were smaller in size but comparable to any other tea set currently being offered by other tea houses. There wasn't a particular piece which stood out for me though. They were good enough but not memorable.
 Sweets: The regular sized desserts were truly a surprise after seeing the unusually small ones from other tea houses (ex. Rose House). One of these desserts were even offered in their dessert display case as an a la carte item. The tea set itself is very dessert heavy so there are a lot of items to choose from! The macarons with special plating was a nice thoughtful touch and they were super fluffy! The Creme Brulee in a little ramiken cup was very rich and creamy. The cream puff was filled with a smooth pastry cream that was perfectly sweetened (not too sweet). The mango cheesecake was dense and creamy, delicious but didn't exhibit any cheesy flavours.
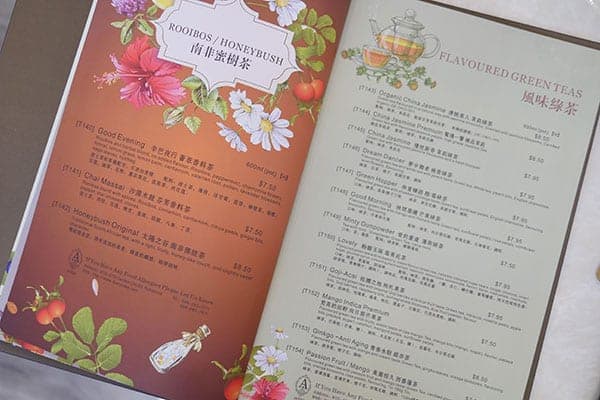
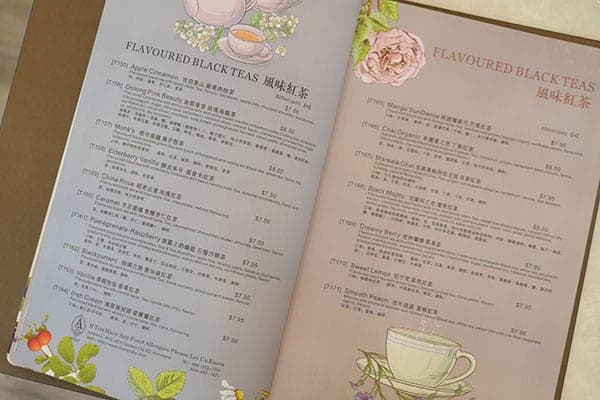
Tea: Big tea menu! There were 12 Rooibos flavours to choose from which is a lot compared to other tea houses, 12 greens and 17 blacks.
Each tea was also accompanied with a description of its composition which helps greatly when ordering.
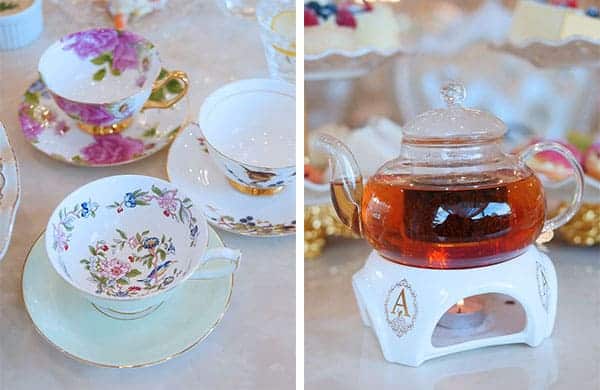
Teaware:
Very grand looking tea tray adorned with "Hermes inspired" horses. There were many designs for tea cups so everyone had their own design which helped to distinguish between who's who. It was a surprise to find that the cups were branded with the companies logo as well. Tea Warmers with candles kept the pot of tea warm - something not usually offered (seen at the Rose House).
Alcoholic Beverages: No alcoholic beverage service. See other tea spots in Vancouver which serves alcohol -Mosquito, Trump Hotel, Laduree, Fairmont Pacific Rim, Notch 8.
 Service:There were at least four servers on staff for our one table during a time when the restaurant was totally unoccupied but the staff spent a majority of the time standing around the counter chatting with each other. We were not checked on but occasionally when we caught their eye, one member would come by (happily) to refill hot water. They were all willing to help when requested but lacked the motivation to do so on their own.
Other notes:
♥ Tea Set $49/per person
(Does NOT include one pot of tea, tea is ordered separately)
No scones, 6 savouries, 9 sweets
♥ Reserve by phone: (604)-285-7771
♥ Parking: Free parking is available in the shopping plaza where the tea house is located. Closest Car2Go drop off and pickup is at Kwantlen College which is 9 minutes away by foot.
♥ Address: 112-4751 Garden City Rd, Richmond, B.C. V6X 3M7
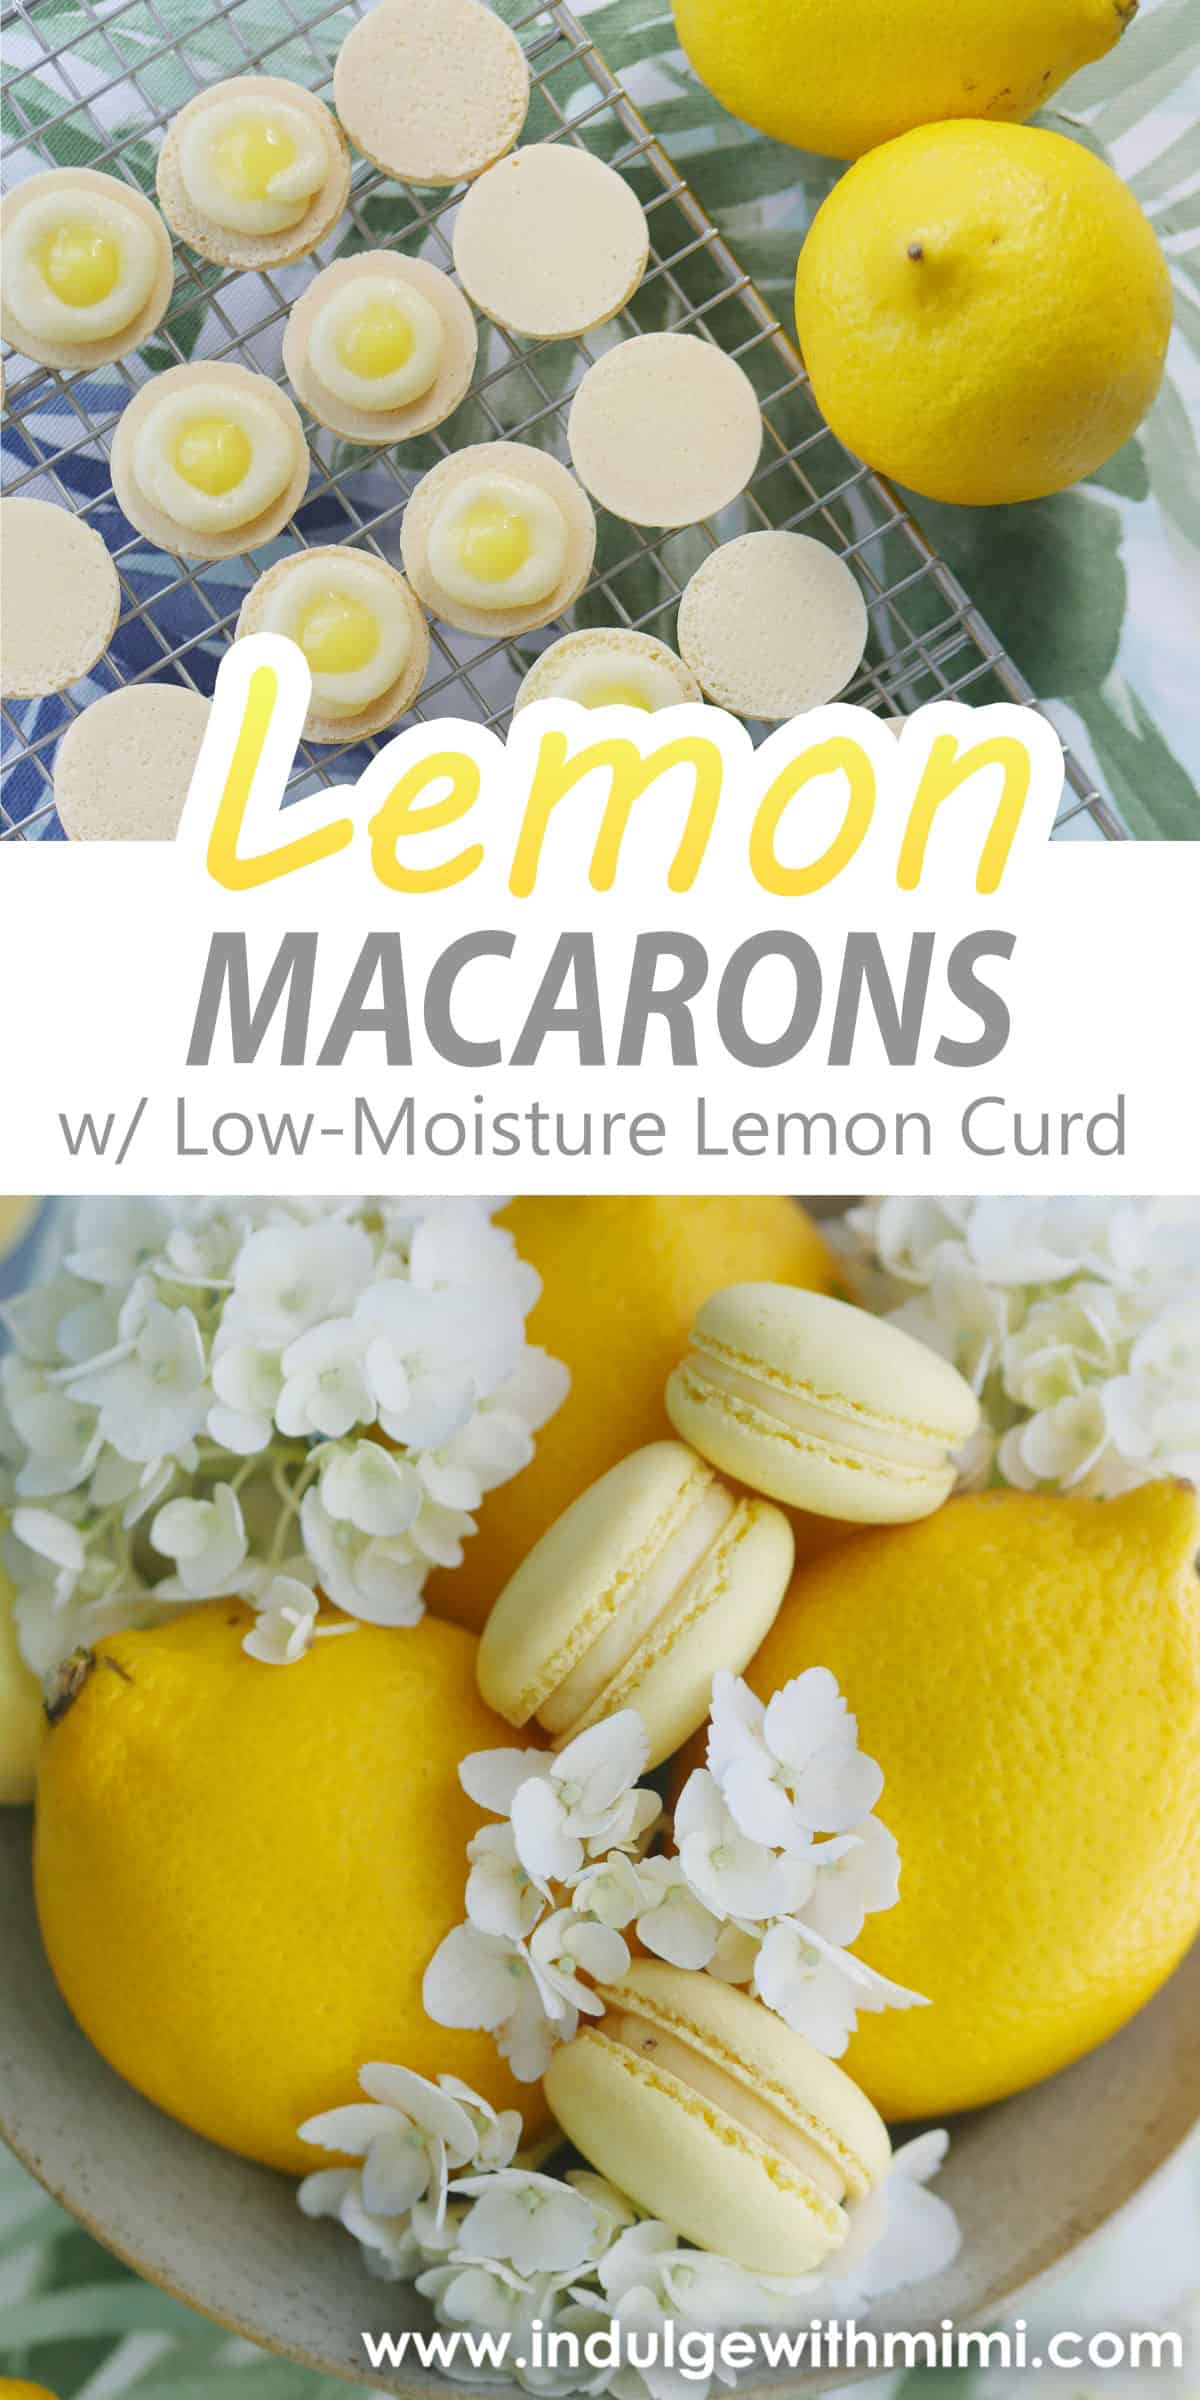
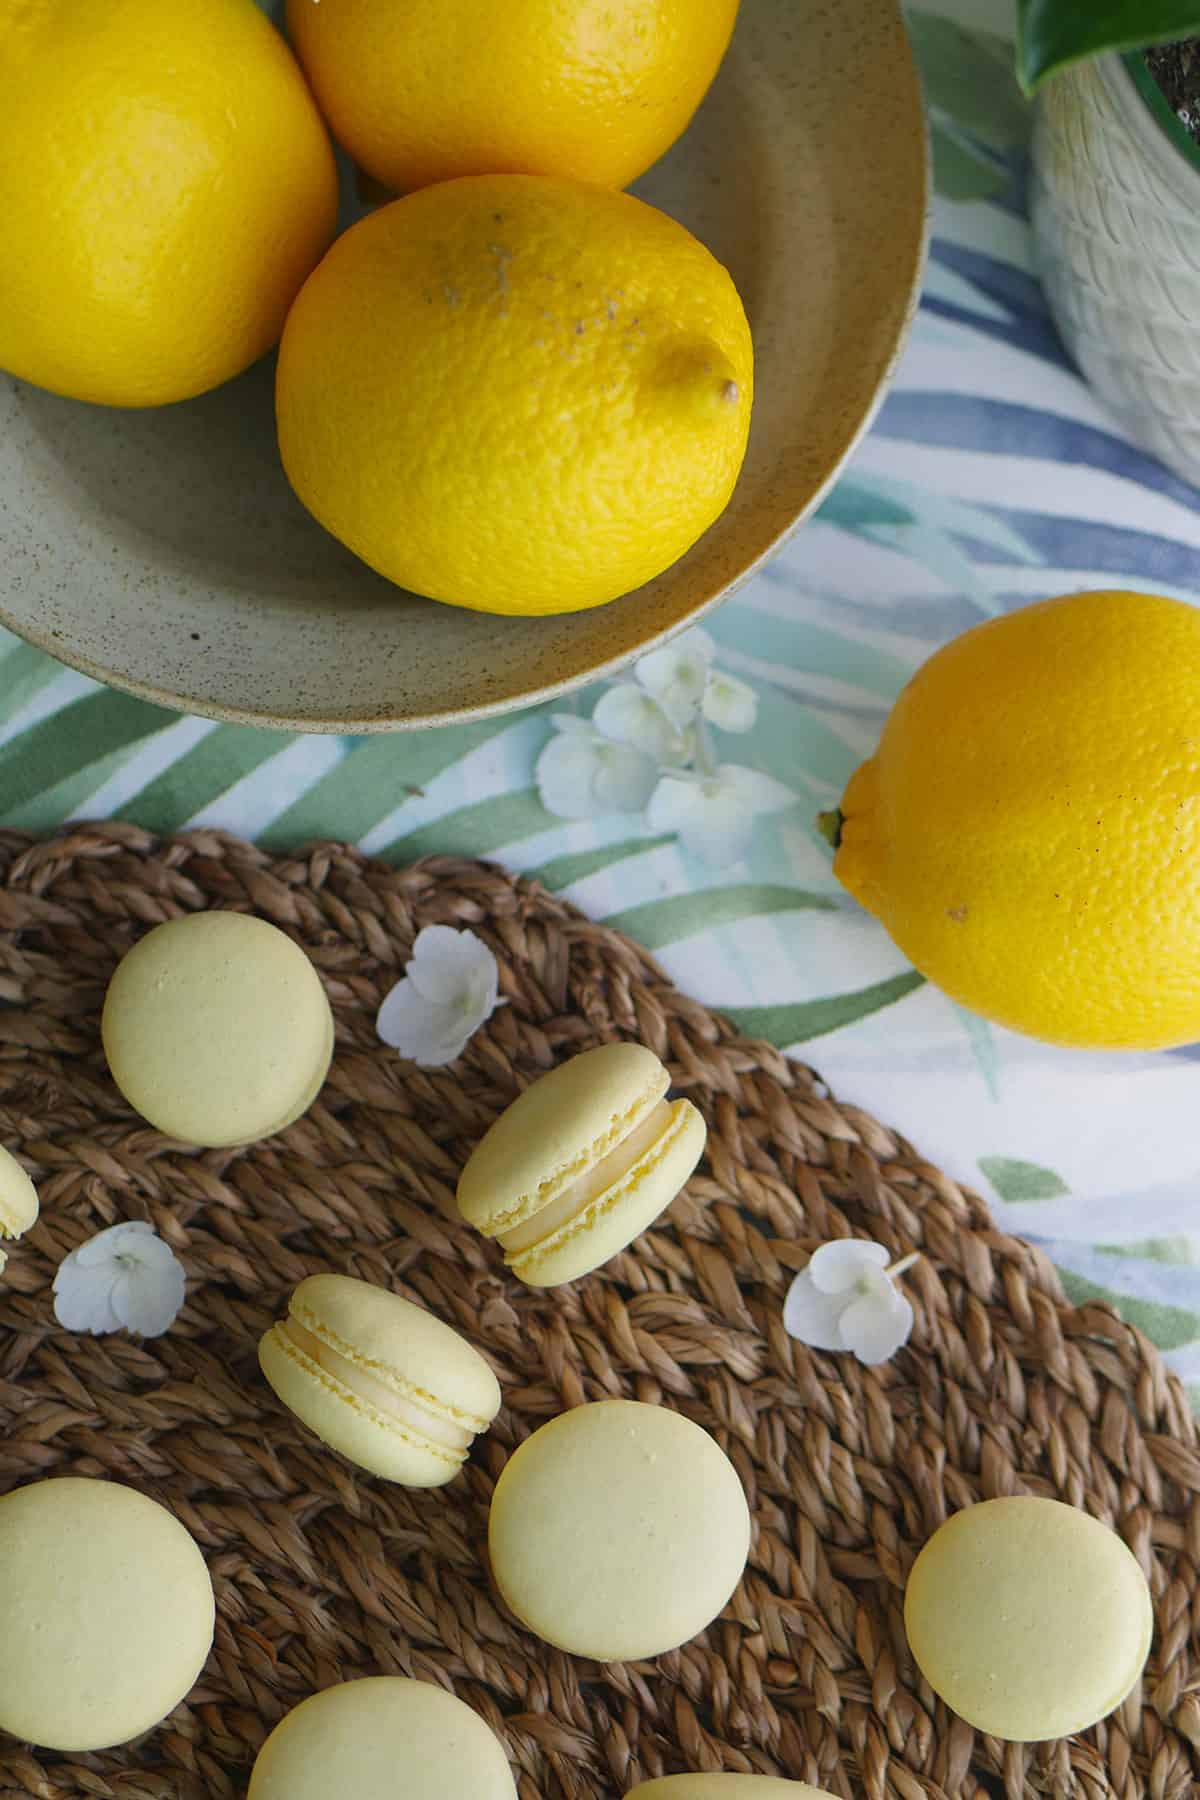
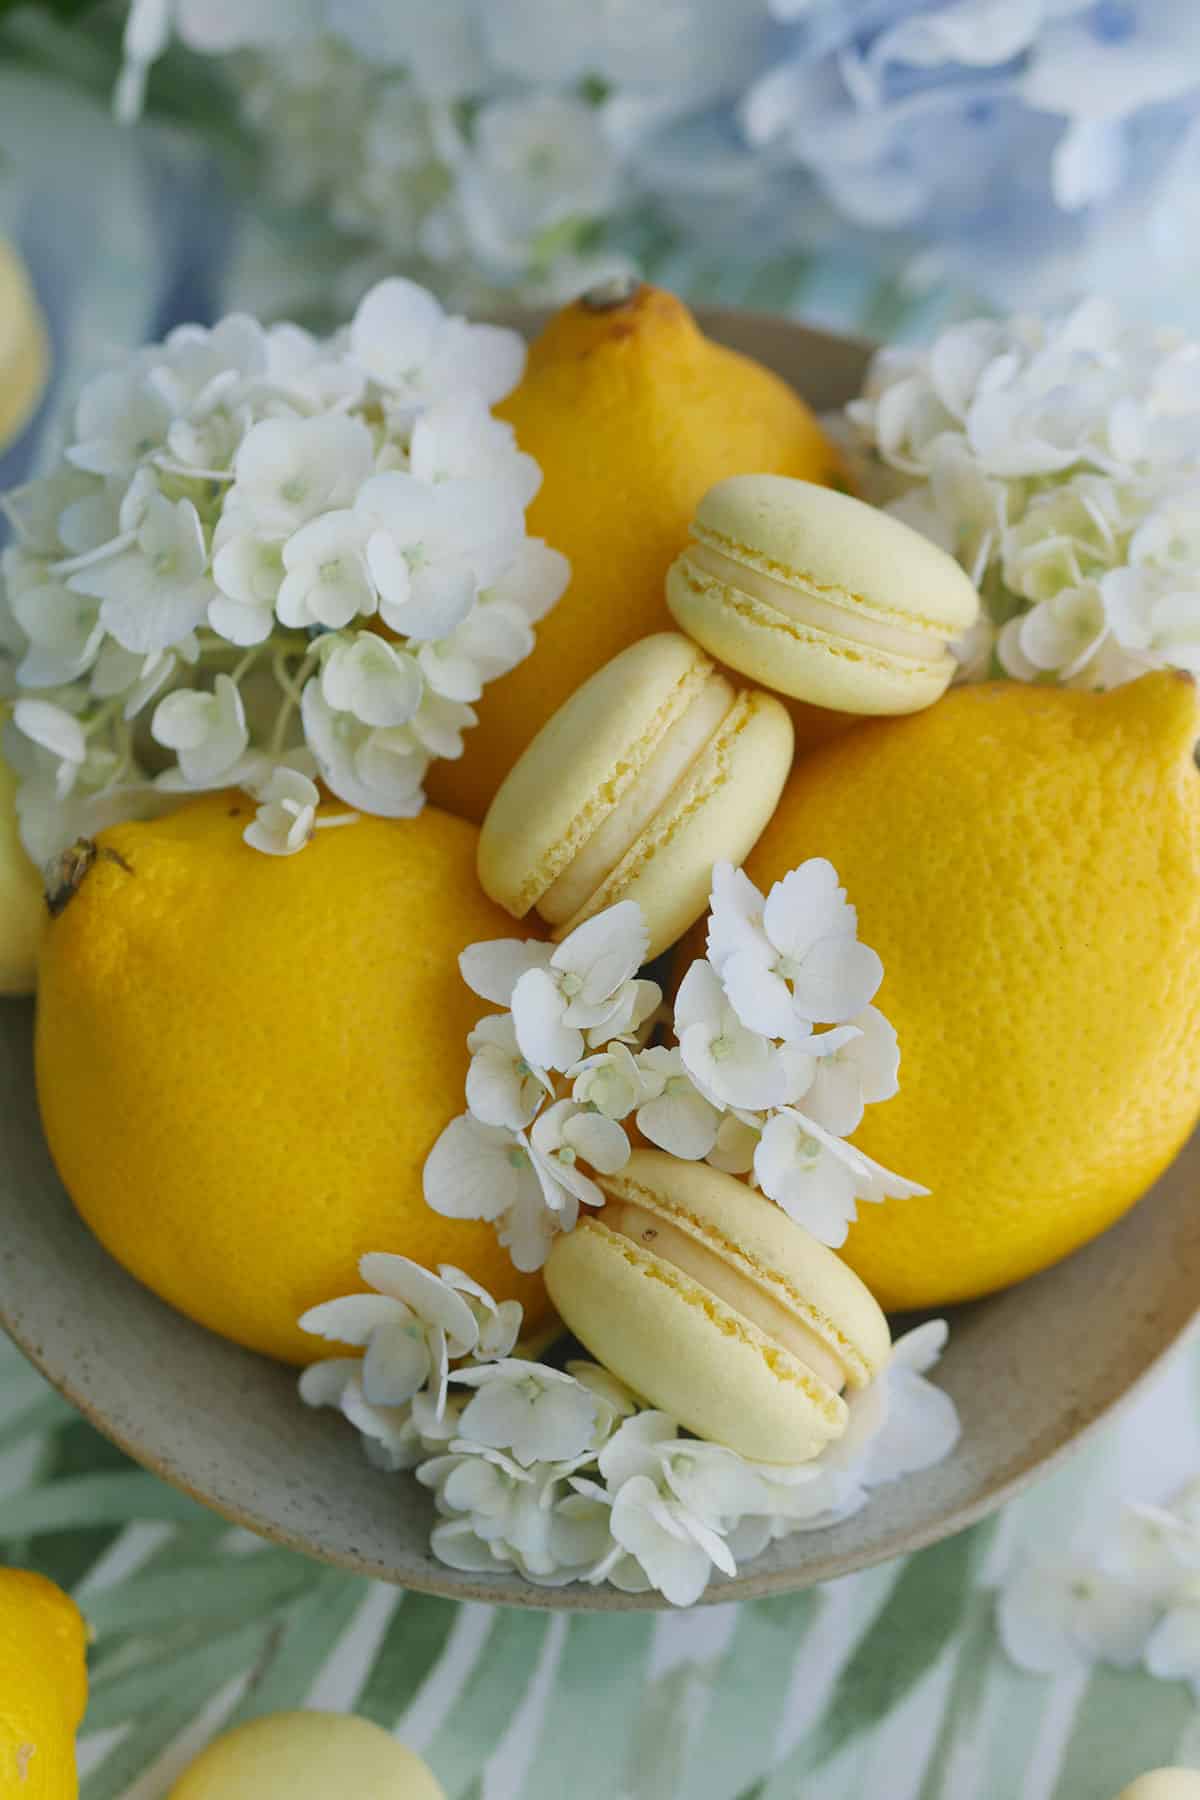
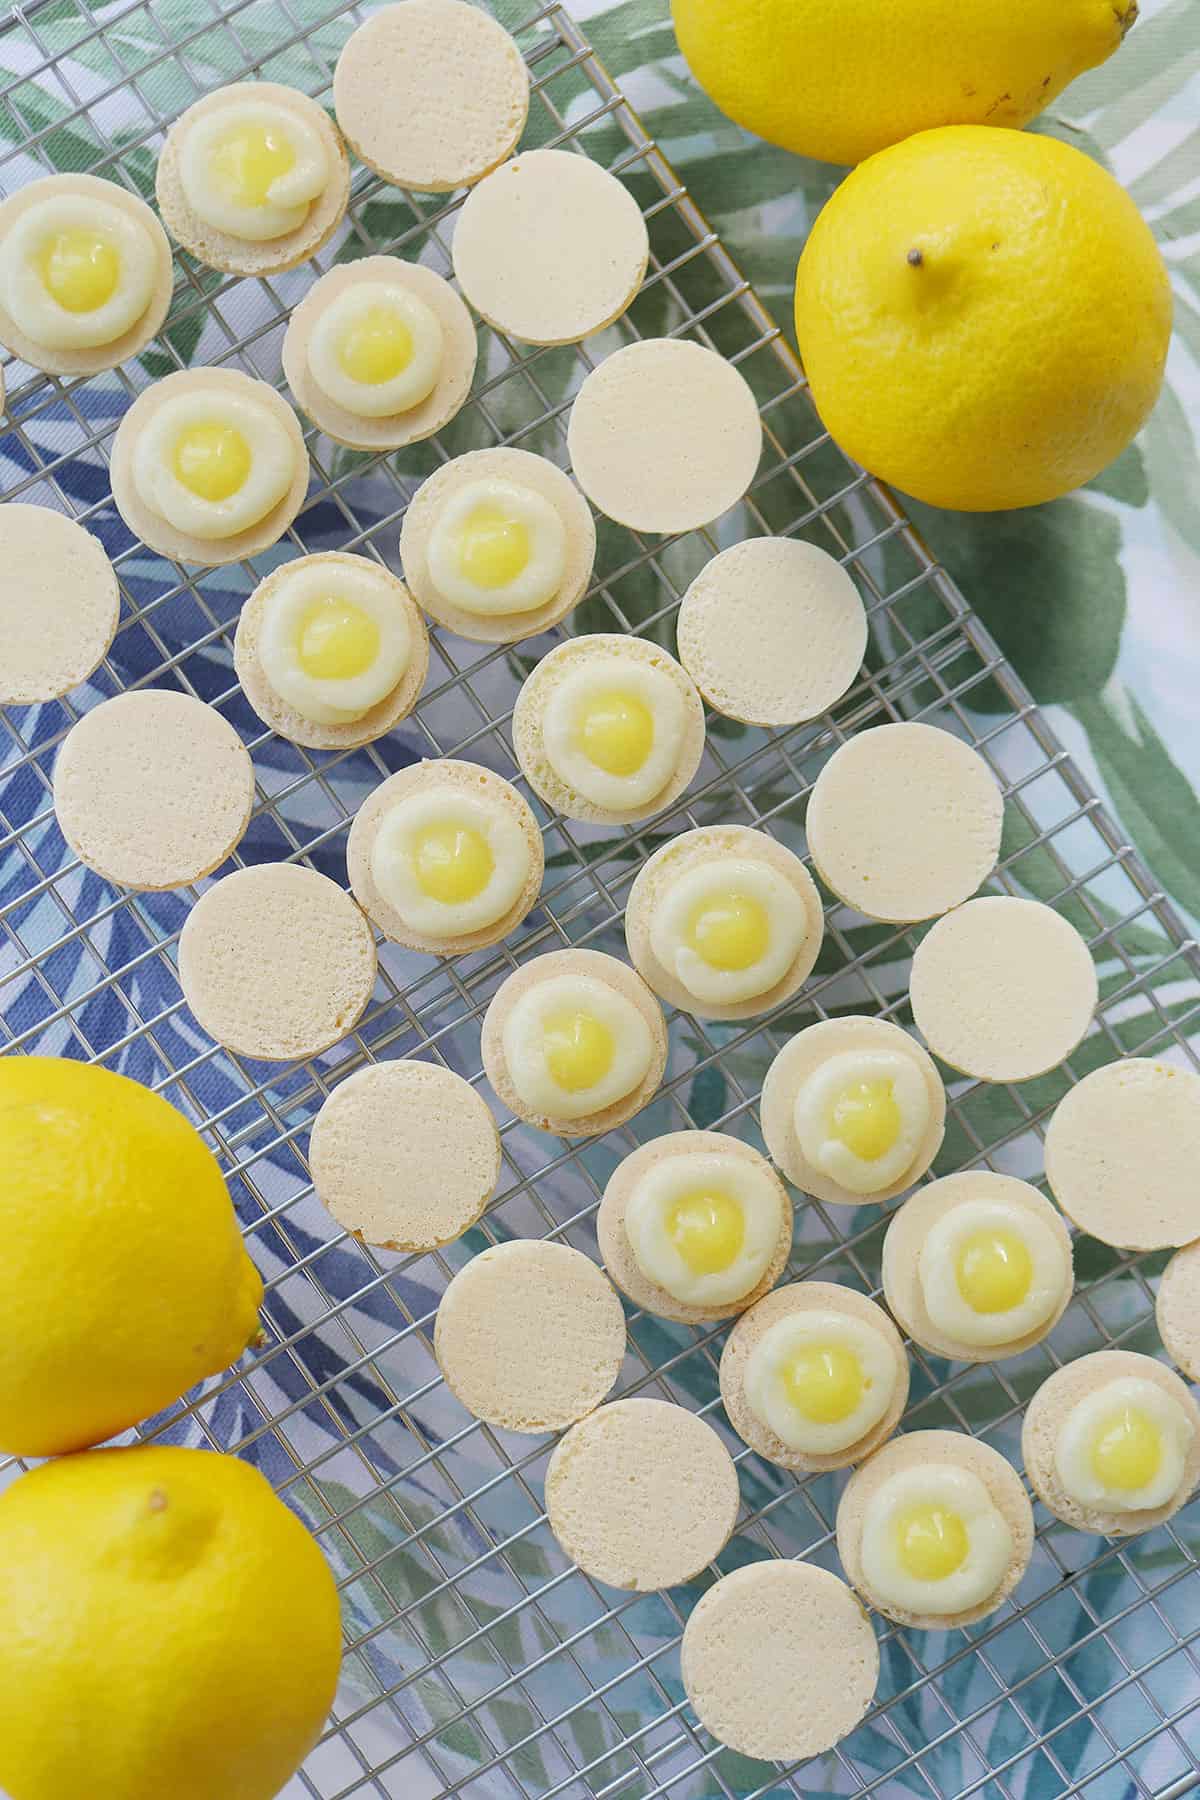
Macarons filled with a lemon cream and curd that won't make macarons soggy. It's a mouthwatering and delicious macaron recipe made with REAL lemons - no artificial flavours.
[feast_advanced_jump_to]
Why You'll Love This Recipe
- Low-moisture lemon curd prevents macarons from getting soggy.
- Uses all natural ingredients, no artificial flavors.
- Uses simple ingredients that can be found at most grocery stores.
- Mouthwatering and delicious. Cuts down the sweetness of the macaron shells.
How To Prevent Soggy Lemon Curd Macarons
I don't know about you, but I found that every macaron filled with lemon curd I've had in the past has been soggy since fruit curds are higher in moisture than other fillings. So in this recipe, I created a lemon curd recipe that would not cause the macaron shells to become soggy. The curd itself is low in moisture so it won't start eating away at the macarons shells (get my Best Macaron Recipe here). A lemon curd is made first and then added into a Swiss meringue buttercream to create a lemon buttercream. The buttercream is piped into a ring shape, creating a dam, which will then be filled with the low-moisture lemon curd. The end result is a very sturdy and lemon-y curd that holds up inside the macaron for days. I'm so pleased with the results and I hope you will get a chance to test out this new recipe. It's perfect for those who are looking for a macaron that is "less sweet".
How To Make Macarons Less Sweet?
One of the most common complaints about macarons is that they are "too sweet", I am from the camp that you should take macarons as they are. Either you like them or you don't and forgo manipulating the sugar level in the shells to make it less sweet. Sugar is one of the few but basic ingredients in the shells and you need a certain amount of it for it to be stable. There are still ways to get around the perception of it's sweetness and one of them is to consider the fillings that it's being paired with.
The type and flavour of the fillings can greatly impact how sweet the resulting macarons will be. An American Buttercream - one that is made with icing sugar and butter - will be considerably sweeter than the Swiss or Italian version. Learn more about different Macaron Filling Types here. My personal preference is to never use an American buttercream with macarons. It may be a sweet indulgence on cupcakes but it's sugary taste can be too much when paired with an already sweet macaron shell.
Tart Lemon Filling Cuts the Sweetness in Macarons
Another quick remedy to reduce the sweetness in macarons is to fill it with a tart fruit filling. The acidity in fruit fillings is a perfect mouthwatering contrast to the sweet shells. One of my favourite fruit fillings is the lemon buttercream with a lemon curd center. I really appreciate how this flavour can be achieved entirely with the fruit itself without the need for artificial flavourings.
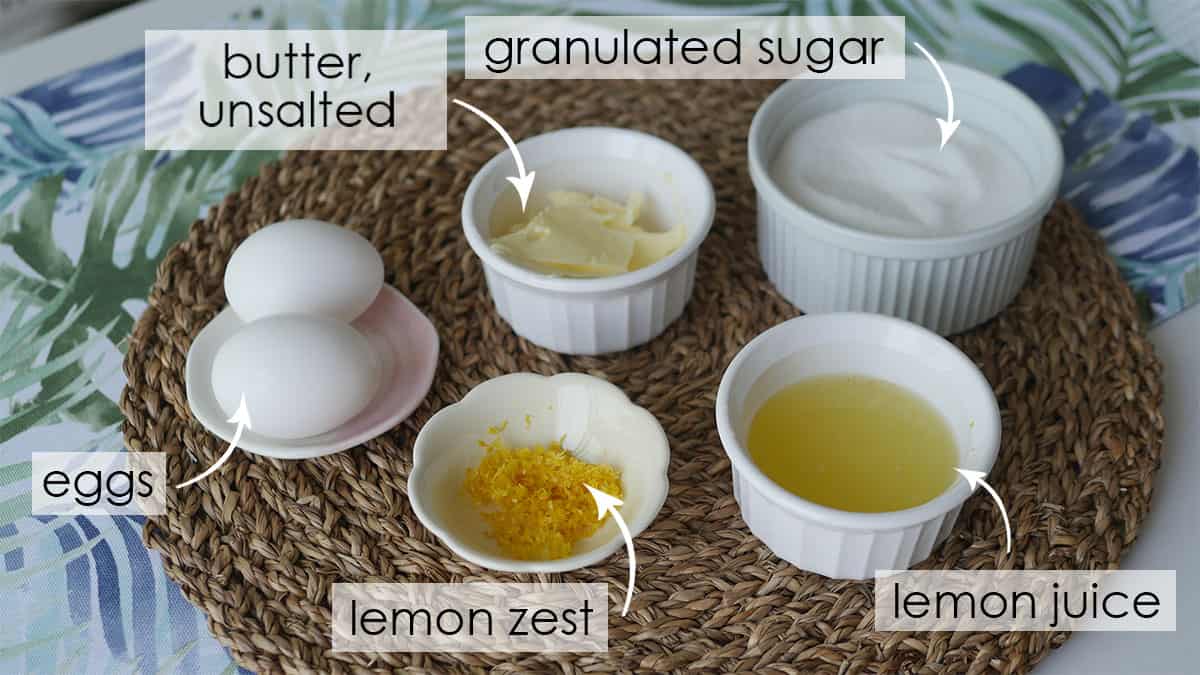
Ingredients and Substitutions
For the Lemon Curd and Buttercream
- Organic Lemons - This recipe requires using the zest of the lemons so organic lemons will be preferable.
- Eggs - large size.
- Butter - Use unsalted. For use in the buttercream, ensure that the butter is at room temperature. This is crucial for it to incorporate into the meringue mixture.
- Granulated sugar
For the Basic Macaron Shell
- Almond flour- it should be ground from blanched almonds. Some brands are more "oilier" than others so for the most consistent results, I like to make my own homemade almond flour. Alternatively, many readers have had good results with this brand.
- Powdered sugar- this is also known as icing sugar or confectioner's sugar. The type sold in North America usually contains a bit of corn starch as an anti-coagulant.
- Castor sugar - this is also known as extra fine granulated sugar or berry sugar. It's a finer granulated sugar that dissolves readily into the meringue making it ideal for macarons, which is heavily dependent on a strong and healthy meringue. If you can't find castor sugar, just use regular granulated sugar. Do not try to pulverize regular granulated sugar in the food processor to make castor sugar, it results in "chopped-up sugar crystals that will not perform well." (Source: chsugar.com)
- Egg whites, aged - egg whites that have been separated and let to "age" in the fridge have more relaxed proteins which makes it easier to whip to volume without overwhipping. It's recommended for the beginner macaron baker but is not absolutely necessary. Most carton egg whites are not intended for whipping into a meringue, check the back of the carton. A few (but not many) readers have reported success with carton egg whites.
- Cream of tartar- is an acid that is added to the meringue to make it more stable. It is usually found in the baking aisle next to the spices. If you do not have cream of tartar, you can substitute it with another acid like lemon or vinegar in double the amount. You can skip this ingredient if you can't find it. Make sure your bowls are clean and dry and whip carefully with room temperature aged egg whites until it reaches still peaks. If your egg whites take too long to whip or breaks apart, reconsider using cream of tartar.
- Gel food color- this is a more potent form of food color that doesn't add unwanted moisture into the macaron batter. Some brands perform better than others, I prefer this brand for its color stability, it doesn't fade after baking.
Tips for Success
- Have a cooking thermometer ready to measure the temperature of the lemon curd and swiss meringue buttercream. Heating the ingredients to the correct temperature is crucial. If you don't have a thermometer, you can check the readiness of the curd by running a spoon through it. If it coats the back of the spoon, it's ready. For the Swiss meringue, feel the mixture to see if all the sugar granules have dissolved.
- Use non-reactive tools and bowls as they can react to the acidity in the lemon juice, imparting a metallic taste. Non-reactive materials include: silicone, glass, ceramic and rust-free stainless steel.
- During the the heated bath step when making the curd and Swiss buttercream, avoid placing the mixture bowl on the hot water directly as it will cook the ingredients too quickly or over-cook it. Use a smaller pot of hot water and let a larger bowl hang over the top without touching the water. Make sure to move the mixture around gently to keep it moving and not over cook.
How to Make
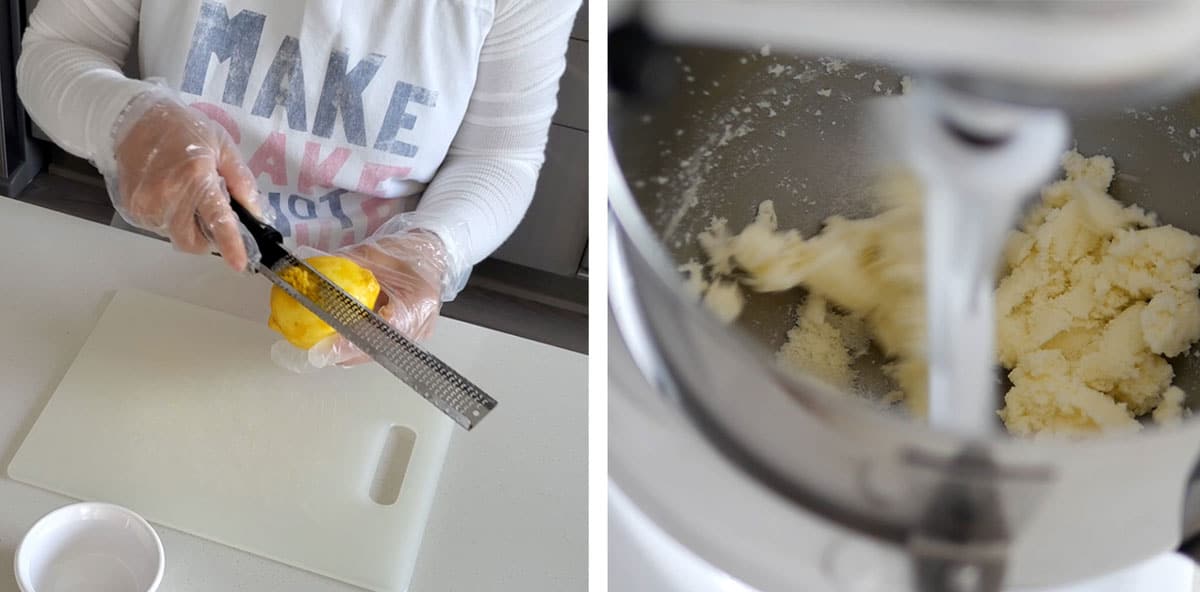
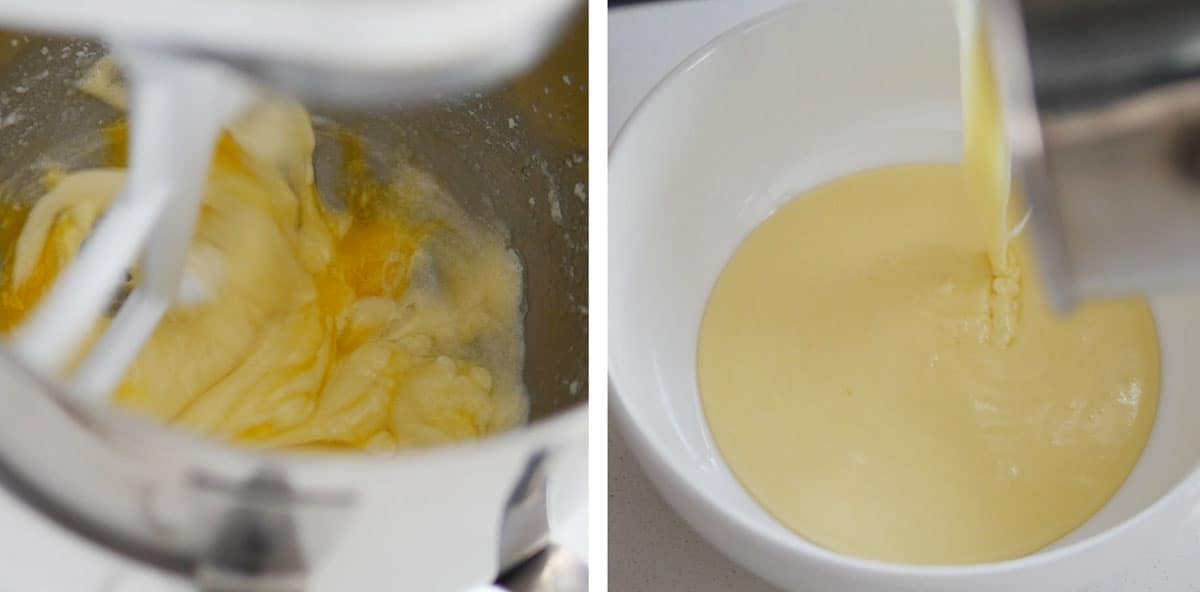
To make the lemon curd: Zest the organic lemon, set aside. Cream butter and sugar together until incorporated.
Add egg and beat until incorporated. If not already using, move mixture into a heatproof glass bowl, add lemon juice and beat until incorporated. (Some metal bowls can react to the acidity in the lemon juice.)
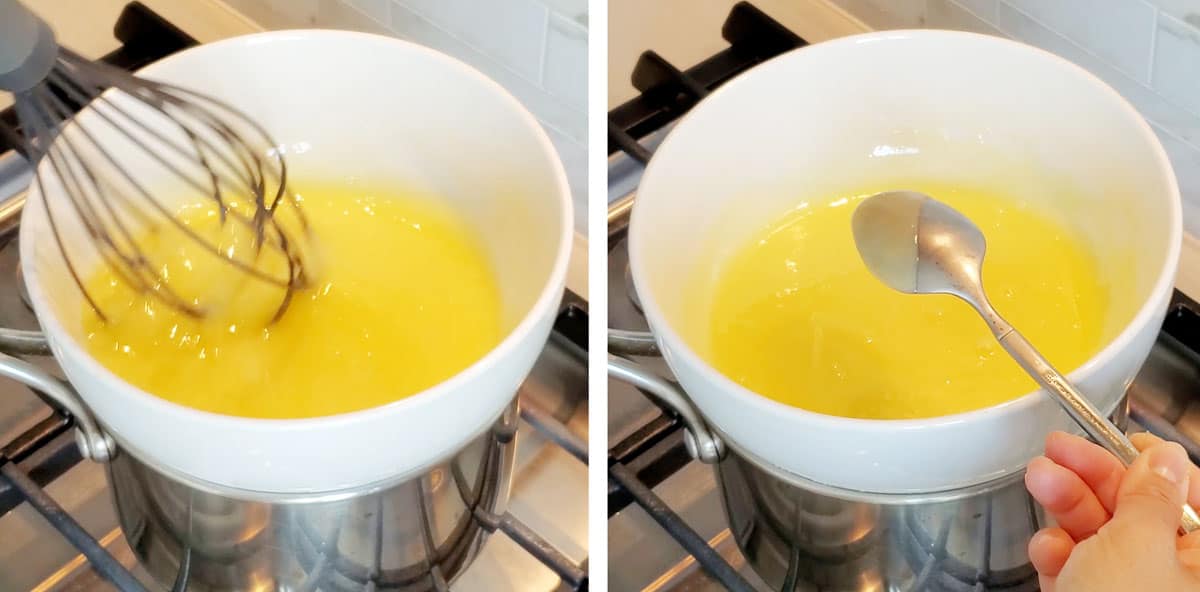
Place over a pot of boiling water. Do not let the bottom touch the water. Whisk gently to keep the mixture moving as it heats up. Occasionally, check the temperature of the mixture. You should see the curd thicken up and it will coat the back of your spoon. Allow the mixture to reach 180F-185F. It might take a while (10-15 min), so be patient.
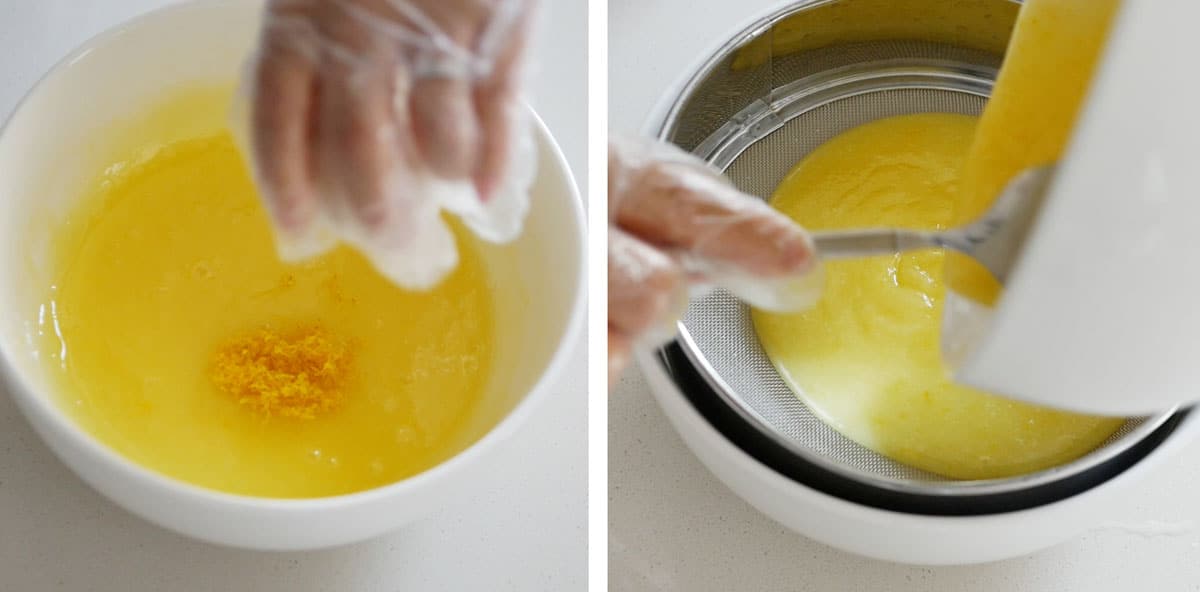
Take the mixture off the heat, add the lemon zest into the hot mixture to release the oils and mix until combined. Pour through a sieve into another bowl for a smooth curd. Let it cool down then place in the fridge. It will set up into an even firmer and thicker curd after you've chilled it in the fridge.
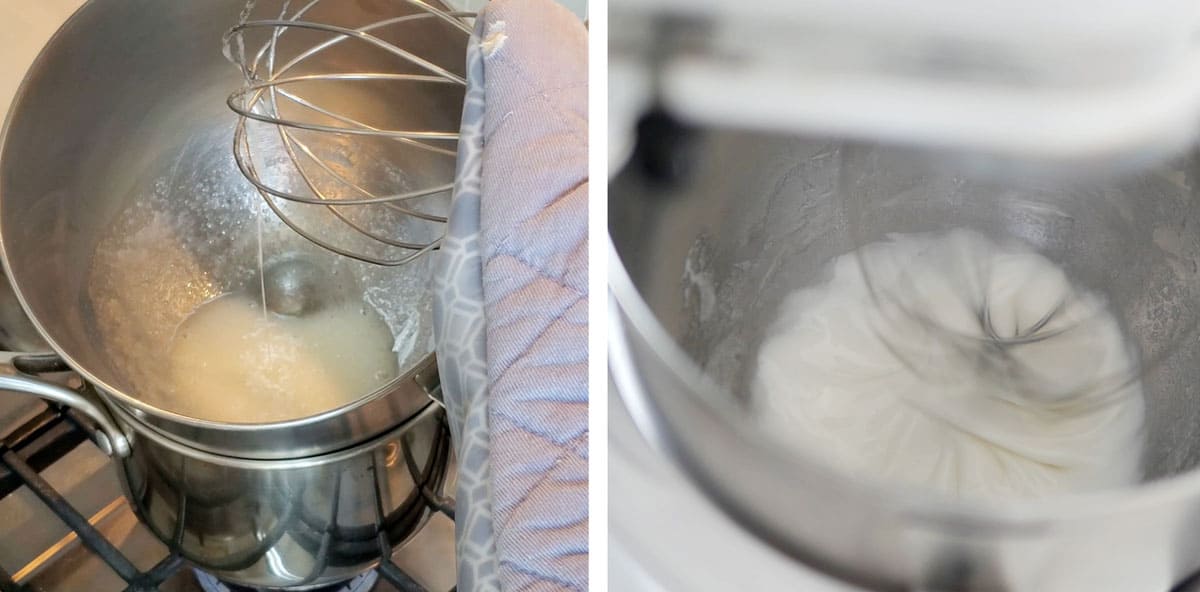
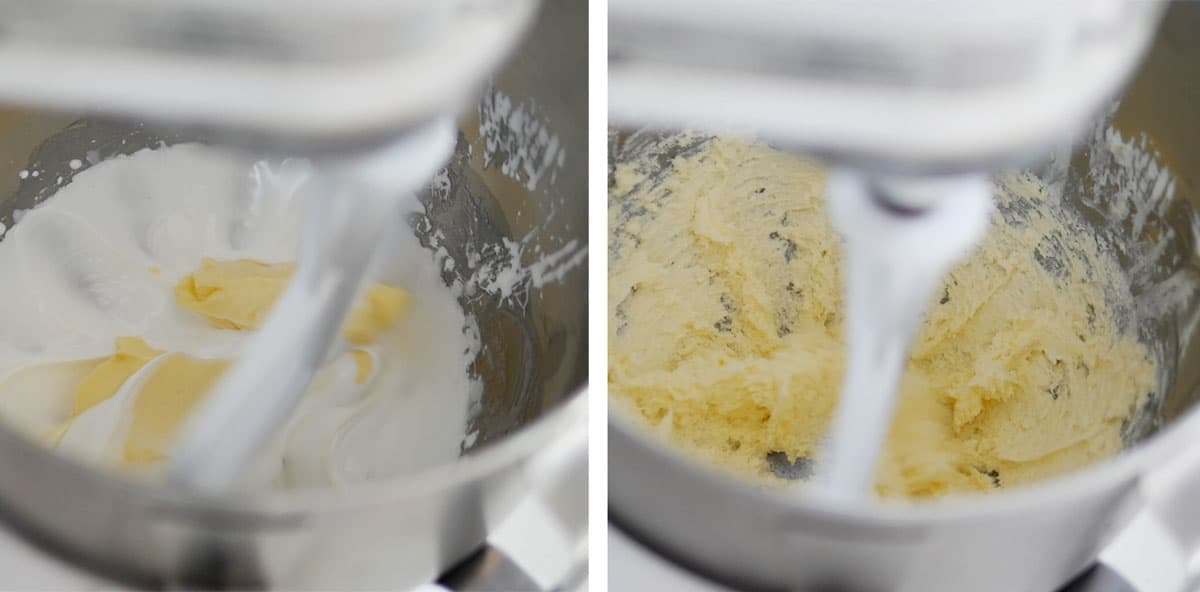
To make lemon buttercream: Bring a small pot of water to a boil. Place egg whites and sugar into a heat proof bowl. Stainless steel is light and safe. Whisk the whites & sugar mix over the boiling water. Pay attention to whisking the mixture when it starts getting hot, you don't want to cook the eggs.
Whisk the mixture until the temperature reaches 160F. Pour the mixture into the Kitchenaid mixer and whisk on low with the balloon whisk, then turn it up to medium.
Once the mixture is stiff and the bottom of the bowl is cool to the touch, stop mixer. Change the whisk attachment to the paddle attachment.
Add butter a little bit at a time while beating with the paddle attachment at medium speed.
The mixture might look curdled or separated for a while but keep mixing. It will all come together. Keep 200 grams of the buttercream for use in our current recipe. Freeze the rest of the buttercream for use at a later date.
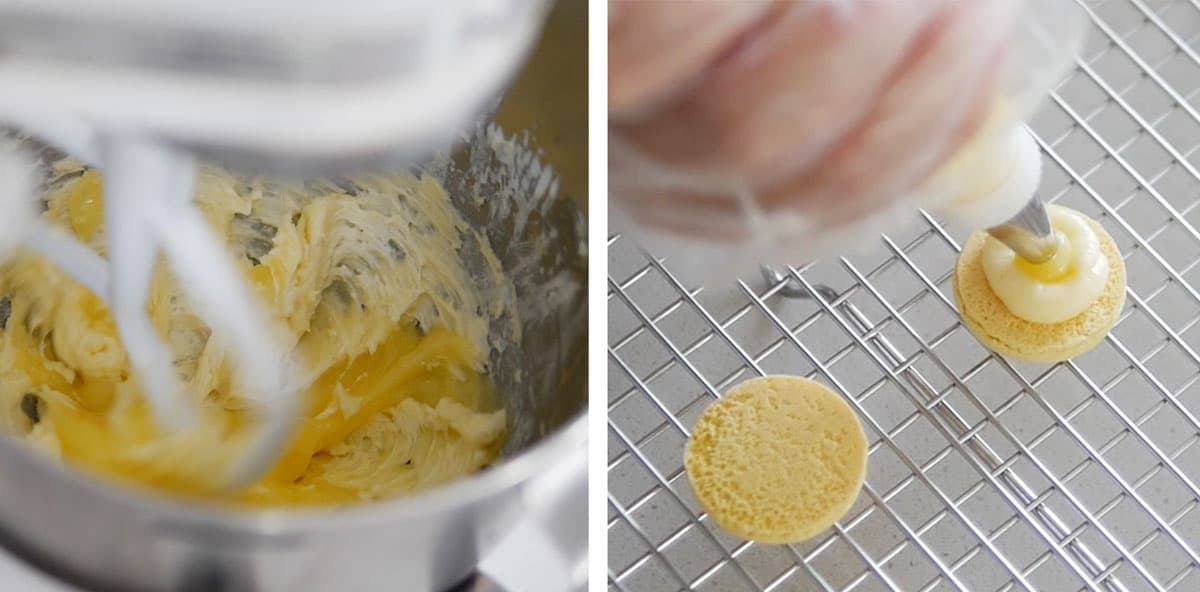
Add 8 tablespoon of the curd into the buttercream, a tablespoon at a time and beat until incorporated. To Assemble: pair two similar sized shells together. Pipe a ring of lemon buttercream as a dam then fill it with the lemon curd. Assemble with other shell. Place in an airtight container in the fridge and give it 12-24 hours to mature before eating. Enjoy!
Recipe
Prep Time 1 hour 30 minutes
Cook Time 45 minutes
Rest Time 15 minutes
Total Time 2 hours 30 minutes
Ingredients
Macaron-Perfect Lemon Curd
- zest of two organic lemons (Note 1)
- 76 grams organic lemon juice
- 2 eggs
- 50 grams butter, unsalted
- 180 grams granulated sugar
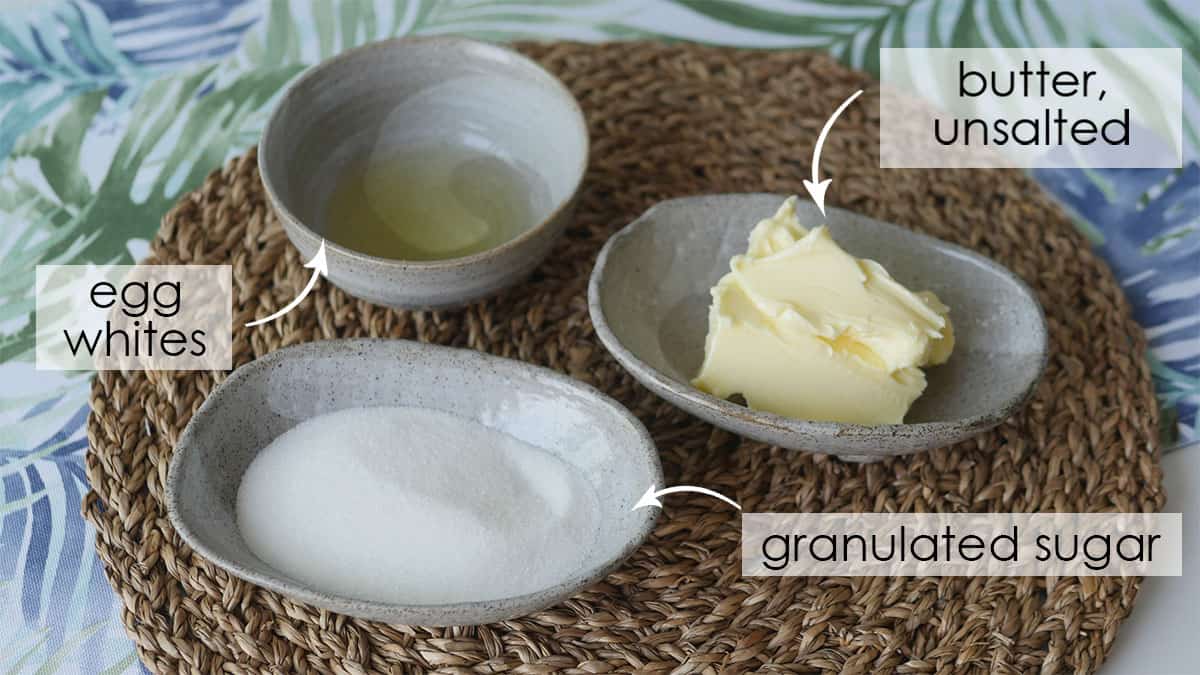
Lemon Buttercream
- 65 grams egg whites
- 130 grams granulated sugar
- 195 grams butter, unsalted at room temperature
Basic Macaron Shell
- 240 grams almond flour
- 240 grams powdered sugar
- 185 grams egg whites, aged, room temperature
- 165 grams castor sugar (Note 2)
- 1/2 tsp. cream of tartar
- Gel food color (Note 3)
Instructions
Macaron-Perfect Lemon Curd
- Zest the organic lemon, set aside.
- Cream butter and sugar together until incorporated.
- Add egg and beat until incorporated.
- If not already using, move mixture into a heatproof glass bowl, add lemon juice and beat until incorporated. (Some metal bowls can react to the acidity in the lemon juice.)
- Place over a pot of boiling water. Do not let the bottom touch the water.
- Whisk gently to keep the mixture moving as it heats up.
- Occasionally, check the temperature of the mixture. You should see the curd thicken up and it will coat the back of your spoon. Allow the mixture to reach 180F-185F. It might take a while (10-15 min), so be patient.
- Take the mixture off the heat, add the lemon zest into the hot mixture to release the oils and mix until combined.
- Pour through a sieve into another bowl for a smooth curd.
- Let it cool down then place in the fridge. It will set up into an even firmer and thicker curd after you've chilled it in the fridge.
Lemon Buttercream
- Bring a small pot of water to a boil.
- Place egg whites and sugar into a heat proof bowl. Stainless steel is light and safe.
- Whisk the whites & sugar mix over the boiling water.
- Pay attention to whisking the mixture when it starts getting hot, you don't want to cook the eggs.
- Whisk the mixture until the temperature reaches 160F. This temperature is generally accepted to be able to kill salmonella in eggs.
- Pour the mixture into the Kitchenaid mixer and whisk on low with the balloon whisk, then turn it up to medium.
- Once the mixture is stiff and the bottom of the bowl is cool to the touch, stop mixer. Change the whisk attachment to the paddle attachment.
- Add butter a little bit at a time while beating with the paddle attachment at medium speed.
- The mixture might look curdled or separated for a while but keep mixing. It will all come together.
- Keep 200 grams of the buttercream for use in our current recipe. Freeze the rest of the buttercream for use at a later date.
- Add 8 tablespoon of the curd into the buttercream, a tablespoon at a time and beat until incorporated.
Basic Macaron Shell
- Set aged egg whites out at room temperature.
- Pulse almond flour and powdered sugar together in a food processor to further break down any large pieces of almond flour.
- Sift dry ingredients: almond flour, icing sugar. Discard big pieces of almond that can't be sifted.
- If you are new to macaron baking, please read the instructions to my BEST MACARON RECIPE before attempting to follow the rest of the instructions since it is condensed for the advanced macaron baker.
- With the balloon whisk attached, whip the room temperature egg whites on low-medium speed.
- Add cream of tartar when it becomes foamy.
- Turn up the speed to medium.
- Once the whisk starts to leave tracks in the egg whites, add sugar a little at a time.
- Turn the speed up to medium-high and whip until firm peaks, stop mixer and add gel food color if desired. Continue whipping on medium-high until stiff peaks.
- Fold the dry mix and meringue together until the batter becomes a "lava" or honey-like consistency.
- Transfer batter into a piping bag fitted with a round piping tip.
- On parchment paper or silicone mats, pipe out round shaped macarons.
- Rap the tray hard on the counter to remove any excess air bubbles. Use a toothpick to pop any remaining bubbles.
- Wait until the shells become completely dry before baking.
- Bake at 325F for 12-14 minutes. Every oven is different, you may need to adjust your own temperature settings. Please read How to Use Your Home Oven Properly for Baking Macarons if you are unsure.
- Macarons are done when the foot doesn't push back and the tops don't move when you wiggle it.
- Once baked, let cool completely before removing from the baking mat/parchment paper.
Assembly
- Pair two similar sized shells together.
- Pipe a ring of lemon buttercream as a dam then fill it with the lemon curd. Assemble with other shell.
- Place in an airtight container in the fridge and give it 12-24 hours to mature before eating. Enjoy!
Notes
- Organic lemon was used in this recipe since it requires the zest. Most of the pesticides on citrus fruits can be found on the peel.
- Castor sugar is also known as extra fine granulated sugar or berry sugar. Granulated sugar can be used by castor sugar is preferable.
- Americolor Lemon Yellow was used here.
Recommended Products
As an Amazon Associate and member of other affiliate programs, I earn from qualifying purchases.
-
Ateco Disposable Piping Bags, 12-Inch, Pack of 100
-
India Tree Superfine Caster Baking Sugar, 1 lb. bag
-
Gel Food Coloring AmeriColor Junior Kit, 8 Colors.75 Ounce Bottles
-
Regular Sized Silpat Non-Stick Silicone Baking Mat
-
Bob's Red Mill Super-Fine Gluten Free Almond Flour, 3 Pound
-
Anthony's Almond Flour Blanched, 2lb, Batch Tested Gluten Free, Non GMO, Vegan, Keto Friendly
Nutrition Information
Yield
45 Serving Size
1 grams
Amount Per Serving Calories 71 Total Fat 5g Saturated Fat 3g Trans Fat 0g Unsaturated Fat 1g Cholesterol 20mg Sodium 41mg Carbohydrates 7g Fiber 0g Sugar 7g Protein 1g
This information is provided as a courtesy and is an estimate only. This information comes from online calculators. Although indulgewithmimi.com attempts to provide accurate nutritional information, these figures are only estimates.
-
Making Macarons Without a Mixer, Scale & Convection Oven
-
Spicy Cinnamon Heart Candy Macarons
-
3D Rainbow & Cloud Macarons with Vanilla Filling
-
The Best French Macaron Recipe w/ Video & Template
Yes, I'm a Bad Cook!
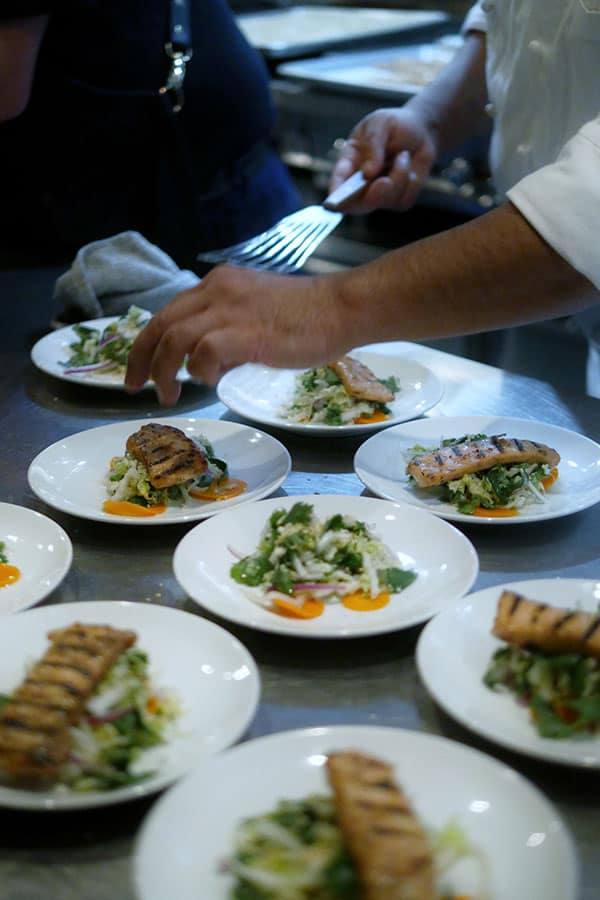
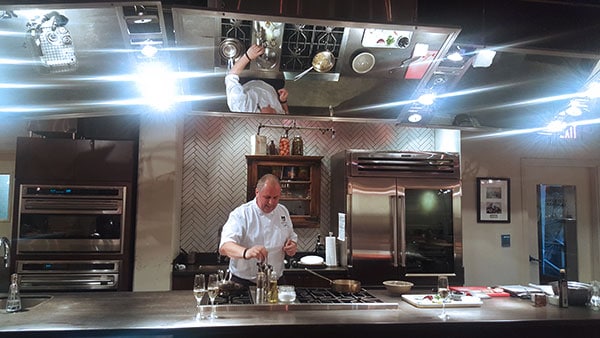
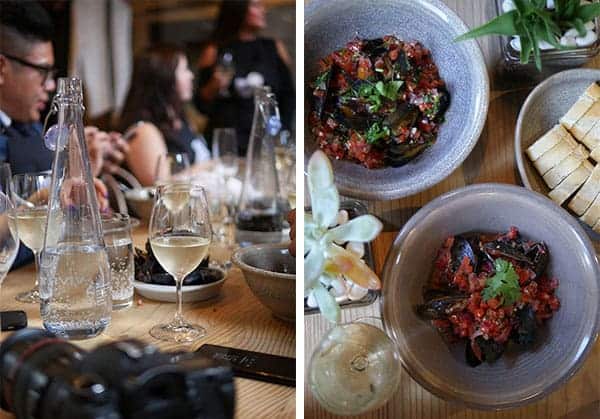
Dinner time sometimes involve real tears at my house. As I've mentioned before in the first post from my Easy Meal Recipes series, dinner time involves quite a bit of drama sometimes. I am not a good cook and when I try a new recipe, I'm often scrambling to complete each step like a mad woman with no clear direction. My kitchen is often a complete mess afterwards too. I just can't seem to multi-task in a calm and focused manner like I do when I bake. I've often wondered why there is such a dichotomy between the way I bake and the way I cook. I think some of it may be due to a lack of confidence handling raw meat and the fear of poisoning myself (meat at my house is always overcooked), the dislike of splashing hot oils and the fear of creating a kitchen fire, and a general lack of passion for it due to so many failed attempts at cooking on my own. So if you told me I would be creating a 3 course gourmetseafood meal in 3 hours all on a gas stove top, I would not have believed it but that was exactly what I did when I was invited to a cooking class at The Dirty Apron hosted by Alicia Fashionista and Villa Maria Wines.
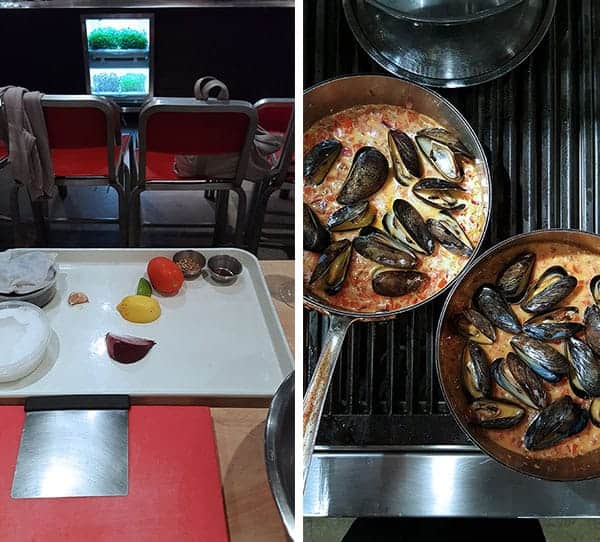
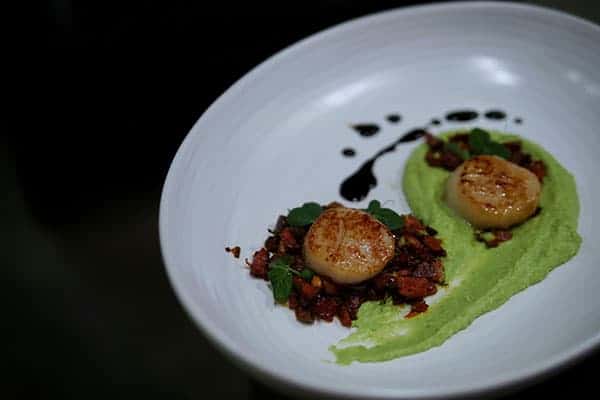
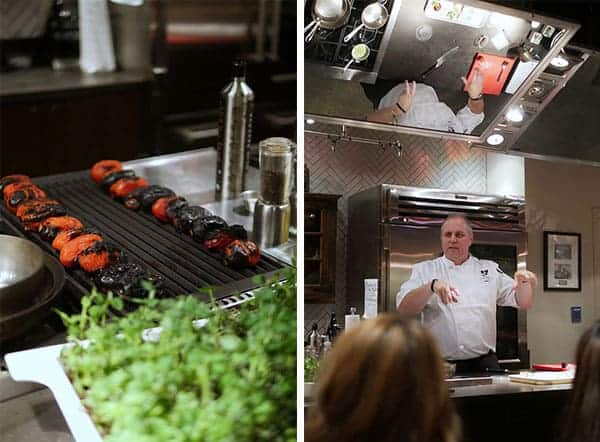
The structure of the cooking class goes like this. First, we sit down for a cooking demonstration by the chef instructor and then we head to our own cooking station, which we share with one other person, to start cooking. The ingredients for each course is carefully laid out on a tray so all you need to do is focus on cooking with the materials in front of you.
I don't know how it happened but I transformed into a little gourmet chef for a few hours under the direction of Chef John. Sure, on several occasions he asked me why I was standing so far away from the flames (Um... because I could burn myself! If anyone can, I can!) and he also swapped my small paring knife which I was perfectly content in using for an "intimidating" big French knife. But it was exactly that no-nonsense push that I needed from him to whip me into shape.
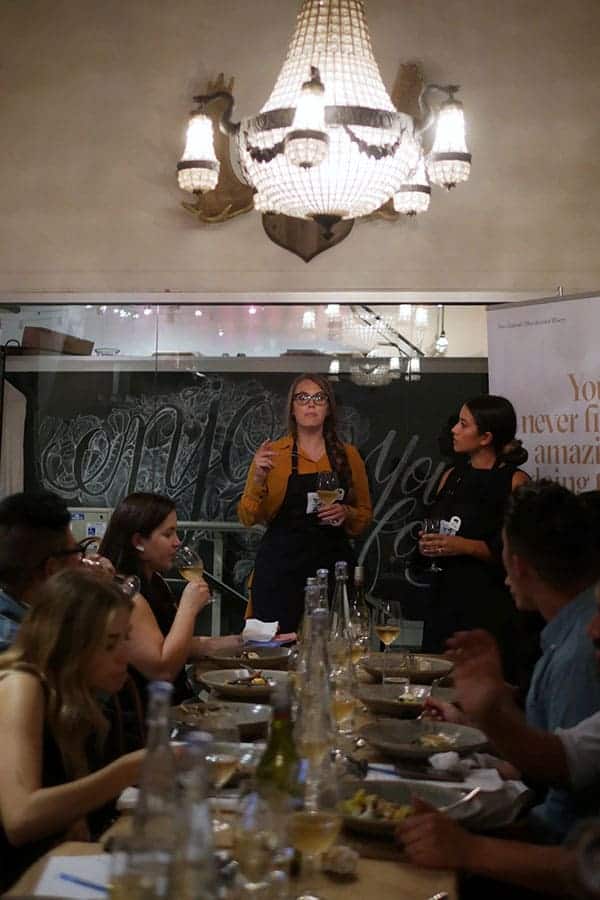
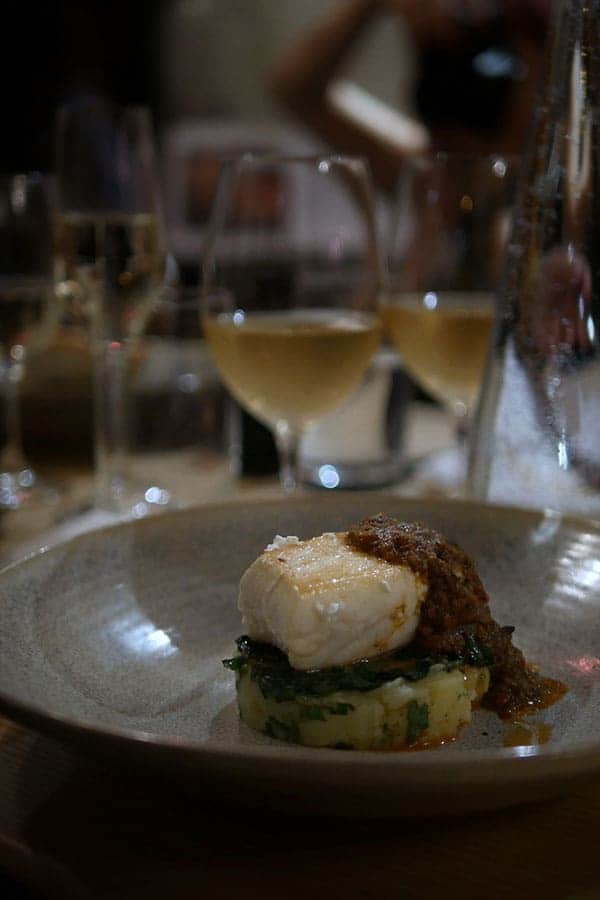
And, of course, we couldn't have seafood without some white wine! It's always been my personal preference to have Sauvignon Blanc with shellfish and Villa Maria Wines introduced us to their version along with an off-dry Pinot Gris which was paired with our third course of pan roasted halibut with charred tomato vinaigrette.
Hey, I Can Cook (?) !
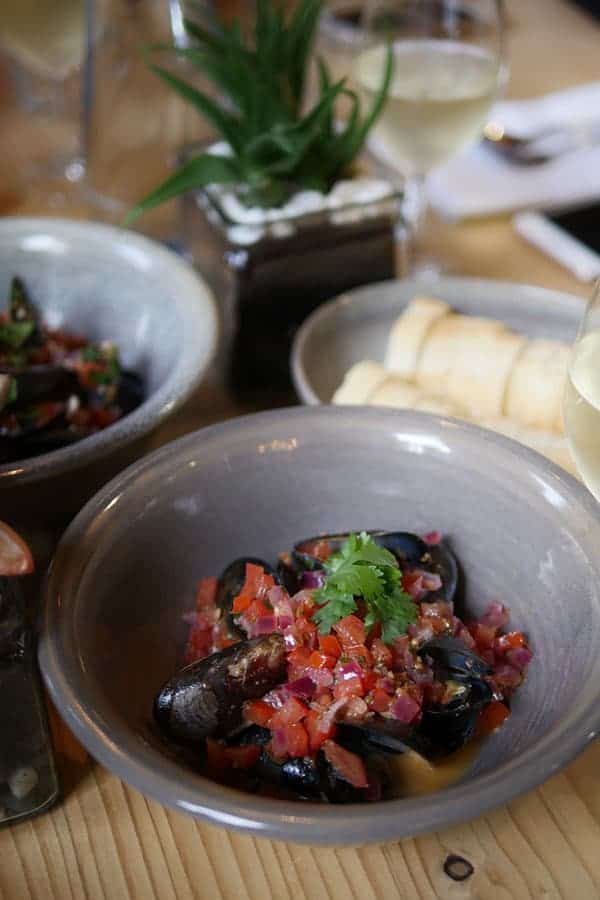
For me, I think failures don't breed success, success breeds success and luckily for me, the evening taught me that I wascapable of cooking a delicious gourmet meal without burning anything down. It was a surprise to me that in a few hours, my confidence for cooking grew immensely. Chef John showed me to cook with more passion instead of viewing cooking as a practical means for survival each day. I have the recipes of our dishes from the night stashed away in my recipes folder, I'm excited to cook the mussels again for a dinner party and open a bottle of Sauv Blanc from Villa Maria Wines as well. I'll also try not to burn the house down 🙂
Until our next dinner date.
XOXO,
Mimi
Disclosure: This was an invite event. All food and drinks were complimentary. All opinions are my own.
[srp post_limit='5' post_random='yes' category_include= 131 widget_title = 'Other Vancouver Life Moments'
My Best Macaron Recipe in Spanish - Le Mejor Receta de Macaron Francesa
This is my Best Macaron Recipe translated into Spanish. Thank you so much to Monica Reymundo for all her hard work on this! I hope you all enjoy this recipe and here is the link to the English version.
Please leave all your comments or questions in English. Thank you!
XOXO,
Mimi
Tamaño de la porción : Hace 12 macarons (receta puede fácilmente duplicar)
Ingredientes ♥ ♥
** Por favor, no sin volver a publicar sin permission.* *
– harina gramos 65 – almendra
-65 gramos-azúcar en polvo
-45 gramos-azúcar en polvo (o también conocido como "la baya" azúcar o azúcar granulado extra fino)
-50 gramos – de claras de huevo (aprox. 2 medio huevo
Nota: No use el polvo de merengue
-1/8 cucharadita de Crémor Tártaro o 1 cucharadita de jugo de limón
-GEL Color de su elección (no uso color líquido)
♥ se necesita ♥
– balanza electrónica
-2 muy limpia y seca mezcla tazones absolutamente libre de aceite o agua – preferentemente no plástico.
-una batidora de mano
-un tamiz
-una espátula flexible
-una manga pastelera
-una punta de tubería redonda
(Yo prefiero Ateco #805 liso sin punta para macarons ronda regular o Wilton 12 para un mayor control con animales macarons)
– una buena calidad para hornear
-plantilla con el contorno de macarrón
-termómetro de horno
-papel pergamino o Silpat mat (yo prefiero el tapete Macaron Silpat con contorno de macarrón)-no use papel encerado
-deshumidificador o hacer en un ambiente seco con baja humedad
Estas son mi marca favorita de la estera del silicón y el tamaño. Una es en blanco y el otro tiene una plantilla de macaron conveniente imprimir en. Me gusta la versión en blanco para usar con mis plantillas de arte macarrón ya que es más fácil ver la plantilla por debajo. La estera con la plantilla de macaron impreso es conveniente para un montón de tuberías de conchas redondas a la vez.
Trabajo de preparación:
Preparar todo lo que necesitas por adelantado para tuberías tus macarons porque una vez que la masa esté lista, debe utilizarse inmediatamente.
♥ Limpie tazones de fuente de mezcla con un poco de vinagre para eliminar la grasa sobrante. Luego usar tazones de fuente para almacenar huevo de "envejecimiento"
♥ Su huevo 24 horas de anticipación de la edad
Claras de huevo separados, asegurándose de que no deje ningún rastro de yemas de huevo. Agua y las yemas de las claras de huevo hará muy difícil a batir el huevo en picos rígidos. Coloque las claras de huevo en un bol muy limpio, seco y sin aceite. Abrigo con el abrigo de Ceram y meter unos agujeros en ella. Poner en la nevera para deshidratar hasta que esté listo para usar.
♥ Si su pergamino viene en un rollo, aplanarlo poniendo objetos de levantamiento en la parte superior. Proporcionando una superficie plana lisa de tuberías sus cáscaras se les impidió separarse en formas extrañas.
♥ Imprime plantilla de macaron y lugar que debajo del pergamino de papel sobre una bandeja de horno. Mis plantillas de macaron gratis están disponibles para suscriptores del boletín. Por favor regístrese para el boletín y se le enviará una contraseña para acceder a la zona sólo miembros. Recuerde confirmar su suscripción ya que es un proceso de doble Opt-in.

♥Mida todos los ingredientes
♥ Crear su manga pastelera
Introduzca la punta de la tubería en la bolsa para que no se mueve alrededor de cuando empiezas a tuberías. Gire la bolsa e introdúzcalo en el extremo de la tubería. Actuará como un sello y detener cualquier bateador de escaparse fuera de la punta al comenzar a llenarlo. Coloque esta bolsa dentro de un vaso. Abrir la parte superior para que puedan tener ambas manos libres llenar la bolsa más adelante.
♥ Establece claras de huevo unos 20 minutos antes de hacer macarons para traer de vuelta a temperatura ambiente
Tamizar la harina de almendra y en polvo azúcar junto, mezcla bien
Tamizar permitirá tus macarons desarrollar conchas brillantes lisos. Tire a la basura curso almendras o azúcar bits pueden causar las claras de huevo a desinflar y terminarás con un macaron colapsado o desigual. No olvide añadir tamizadas cantidades para compensar las cantidades desechadas de nuevo.
♥ Sistema deshumidificador para llevar el nivel de humedad en la habitación por debajo de 50
Un entorno secador permitirá el macaron cáscaras para "descansar" después de la tubería. Este descanso periodo ayudará el macaron desarrollar pies.

Pasos para hornear:
1. batir las claras de huevo con una batidora de mano hasta que quede espumosa, añadir el cremor tártaro (1/8 cucharadita) o sal (pizca).
2. una vez que las claras comienzan dejando pistas, agregar azúcar granulada 1/3 a la vez
"Dejando senderos" se refiere a poder ver las pistas visibles en las claras de huevo.
3. una vez que todo el azúcar haya sido incorporado plenamente y antes de llegar a formen picos, agregar 1-3 gotas de gel de color a tu gusto. Bata hasta que esté tieso picos.
El término "Formen picos" se deriva de cómo las claras de huevo aparecen cuando usted tira de la bata fuera de él. Debe ser tan firme que literalmente pararse verticalmente y hacia arriba sin volver a caer en sí mismo. También, prueba poniendo la taza completamente boca abajo. Los blancos no deben resbalar o caer, en cambio se mantiene firme dentro del recipiente.

4. prueba de rigidez de merengue.
Una vez que ha llegado "tieso" parar y no batir más.


5. Verter un tercio de la mezcla de almendra en las claras de huevo. Doblar suavemente las claras de huevo a la mezcla de harina y el azúcar almendra. Luego agregar el resto de la mezcla de almendra.
Cómo doblar: Este es un paso muy importante en el macaron proceso llamado "macaronage". Tome la espátula y suavemente pasar por debajo de la mezcla, utilice un movimiento de abajo-en-hasta-en barrido (como está raspado alrededor de la taza hacia el centro) mientras gira el recipiente al mismo tiempo.
En ocasiones, cortar por el centro de la mezcla hasta incorporar los ingredientes en el centro. Así, muy suavemente toma su espátula y barrido contra la parte superior de la masa a desinflar correctamente parte del aire en la mezcla. "Descargue" la mezcla en sí mismo. Si te retiras suavemente, eventualmente incorporará a una mezcla aunque puede no parecer será al principio.
No es necesario mezclar o revolver. Plegable adecuadamente asegurará de que el aire burbujas que vencer en su huevo no desinflar cuando incorpore con los ingredientes secos más pesados. Quiere vencer a parte del aire que se creó en los azotes del huevo blancos, pero no tanto que su completamente desinflado y evita que los pies desarrollando.
6. dejar de doblar cuando su masa haya alcanzado un "lava" como o consistencia de la miel
De vez en cuando, verifique la consistencia para comprobar la cocción. El éxito de tus macarons dependerá en gran medida su capacidad para medir Cuándo dejar de doblar su masa

 7. Si utiliza papel de pergamino, frote un poco de masa en la parte inferior de las cuatro esquinas del papel pergamino. Se usa como un "pegamento" para mantener el documento que se adjunta a la bandeja y tubería. O utilizar imanes para fijar el papel sobre la bandeja. Utilizando la espátula, suavemente transferir la masa en la Manga pastelera. La masa al tamaño del círculo en la plantilla de la tubería.
A partir del centro sujetando la Manga pastelera vertical y exprimir y aplicar presión uniforme a todos los lados hasta que la masa casi ha alcanzado el tamaño de la plantilla, gire la punta alrededor de la espalda hacia el centro y tire lejos, que es donde quieres tu masa al extremo. Idealmente, si su masa se ha mezclado correctamente y está en la consistencia correcta, cualquier "niples" o "colas" deben hundirse a sí mismo. También, recuerde exprimir la masa de la parte superior de la bolsa sin manejo excesivamente ya que no desea que la estructura de la masa cerca del final a ser comprometida.
8. Retire la plantilla de papel de debajo el papel sulfurizado.
 9. rap varias veces la bandeja sobre el mostrador.
Esto permitirá que cualquier aire burbujas para escapar y evita que tus macarons agrietamiento durante el proceso de cocción. Rap una o dos veces, girar la bandeja y repetir.
10. deja reposar en el contador de 30 minutos y hasta una "piel" se ha desarrollado.
Dejar las cáscaras hilo descansar bajo el ventilador de la campana de gama. Ayudará a secarlos hacia fuera. No utilice un ventilador que sopla en un ángulo, ya que hará que tus macarons a ser desproporcionado. Una vez que la cáscara se ve opaco y mate brillante como cuando primero era hilo, prueba en una cáscara de sacrificio. Tocar ligeramente la superficie de la cáscara y si no la masa se pega a los dedos, ha desarrollado una "piel". Quedará muy claro cuando se ha desarrollado una piel, usted será capaz de tocar sin la masa a los dedos. Va también no sangrar fácilmente así.
 ¿Por qué debo descansar mis macarons?
Descansando el macaron es un paso crucial que permite que sus conchas se endurezca y de tal modo, lo que le permite ser lo suficientemente fuerte como para desarrollar pies durante su tiempo en el horno. Muchas recetas no explicar claramente el propósito de este período de descanso y se ha convertido en un tema polémico. Algunos panaderos dicen que nunca descansan sus macarons y algunos juran por ella. Para mí, creo que depende de si o no ha desarrollado una "piel". El tiempo no es tan importante como la presencia de una piel y un mate opaco. A veces en un ambiente húmedo (o su masa es mala, demasiado que moquea) puede descansar tus macarons durante 30 minutos y una piel aún no se desarrollen mientras que en otros días, una piel puede desarrollar rápidamente sin este período de descanso. Esa es probablemente la razón por qué algunos panaderos afirman que nunca descansan sus macarons. He probado esto muchas veces en mi cocina y he encontrado que voy a tener pies grandes, una vez que se ha desarrollado una piel, sin importar el tiempo de descanso.
11. precalentar el horno a 320 F.
Coloque un termómetro de horno en el horno para que la temperatura sea correcta. Muchos panaderos asumen que sus hornos estén a la temperatura correcta cuando de hecho la temperatura ha aumentado o disminuido durante el proceso de cocción sin su conocimiento.
 12. Coloque la bandeja en el estante del medio y hornear durante 12-14 minutos. Hornear solo una bandeja a la vez. VER COMENTARIO ABAJO:
Cada horno es diferente así que sugerimos que use esta temperatura y posición del estante como una línea de base si es tu primera vez haciendo macarons, luego de realizar los ajustes que necesita para perfeccionarlos.
13. los saca y para comprobar la cocción.
Use una espátula para golpee ligeramente los pies, debe ser firme y no empuje hacia atrás. Mueva la parte superior de la cáscara de izquierda a derecha, no debería ser inestable. Despegue ligeramente el papel para hornear y el macaron debe desprenderse fácilmente sin pegarse. (Esto no funciona bien en silpats aunque.) Si no pasa las pruebas anteriores, poner en el horno y hornear un extra 1 minuto a la vez.
14. Mantenga en bandeja a enfriar o sacarlos.
Si los fondos son sólo un poquito pegajosos (solo un poco sin embargo), mantener en la bandeja se enfríe durante unos 15 minutos. Si sin embargo, los fondos ya están marrones, desprenda limpiamente o aparecen demasiado cocidos, quitar la bandeja caliente se enfríe. Romper una abierta y verifique el interior, debe ser totalmente ajustado y no excesivamente húmedo. Si está demasiado húmeda se derrumbará las cookies cuando enfríe. Errar en el lado de encima para hornear en lugar de bajo de la hornada como la maduración proceso serán capaces de salvamento sobre macarrones al horno. Ver paso
15. Llene con tu relleno favorito.
Colocar el relleno en una manga pastelera y exprimir una cucharada de él en el centro. No necesita demasiado, no quiere que aplasta hacia fuera más allá de la cáscara una vez que se monta al otro lado de la cáscara del macaron.
16. dejar en la nevera en un recipiente hermético y dejarlos madurar por 24 horas.
Mejor se comen después de 24 horas ya que los sabores se absorberá en la cáscara. Si su cáscara es dura, crujiente/sobre cocido al horno, dejarlos desarrollar también permitirá a las cáscaras absorber la humedad del relleno y desarrollará esa textura suave y masticable distintivo. El proceso de maduración puede ser acelerado también frotando ligeramente la parte inferior de las cáscaras con un jarabe que es el mismo sabor como el relleno. Leche también funciona!
17. después de 24 horas de maduración en la nevera, traer de vuelta a temperatura ambiente 30 minutos antes de servir. ¡DISFRUTE!
[srp post_limit='5' post_random='yes' category_include= 3 widget_title = 'Other Macaron Posts You Might Like']
Here is Part 3 of 3 of the events I shared with Deborah Moore this morning on AM1470.
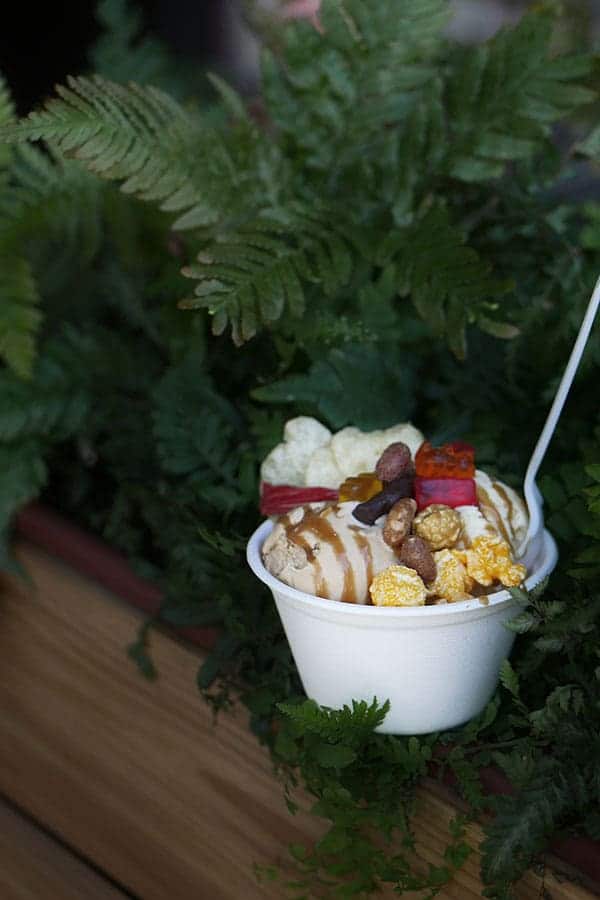
#SundaeChallengeYVR
A month ago I was asked to participate in something that was both delightful and daunting at the same time - to be one of the media judges in this year's Vanfoodster Sundae Challenge. I was delighted because you know I'm a big, and I mean BIG fan of desserts. On the other hand, it was daunting because I tend to shiver like a little Chihuaha all year round regardless of the temperatures outside. In any group setting, I'm guaranteed to be the one person in the room wearing the most clothes all the while asking for the heat to be turned up or the AC to be turned down. Putting the shivers aside, I have also been trying to stay disciplined on my diet. As you can remember from my recent post about how I lost my 5 pound "dessert weight", my goal was to eventually lose 7 pounds in total. I did ultimately lose 6 pounds so I was of course a bit weary about eating 11 sundaes in a span of 3 weeks. Nevertheless, this was not called a sundae challenge for nothing. I decided to embrace it head on with a game plan.
How to Eat 11 Sundaes without Gaining Weight
I devoted certain days to eat 2 sundaes in a day. Instead of eating them on separate days, the days when I ate 2 sundaes were my "cheat days". I made sure they were in the same areas and I would walk to these shops. Most of the time it took over an hour to reach each shop in the sweltering late summer heat so my plan had a two-fold effect. I would burn calories and warm myself up before eating each delicious cold treat. I felt it was a dubious plan but incidentally, my scale ran out of batteries when the challenge started so I had no way to see if I was on or off track with my weight. More on that later.
What makes a Great Sundae Creation?
After tasting each sundae, we were asked to give each creation a score from 0 to 40. 10 for originality/uniqueness, 10 for presentation and most importantly taste which accounted for half the overall score at 20 points.
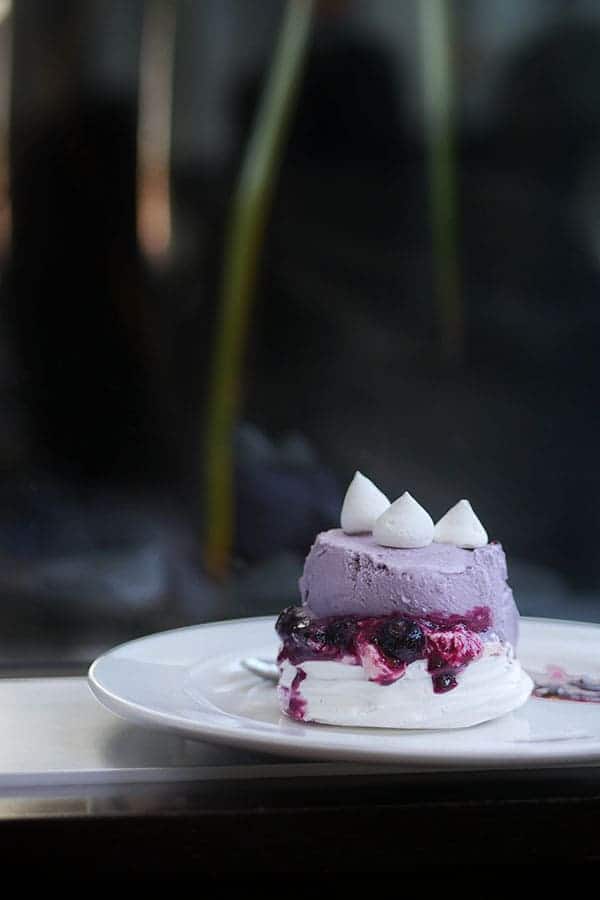
Every creation had a special name and some even had little stories which added to its originality. For example, the Earth Sun and Stars by Umaluma featured black vanilla ice cream with gold flakes which represents the stars in the sky and the Akbar Mashti ( tradional Iranian saffron ice cream) represents the sun.
An attractive presentation was also important since sundaes are presented as sum of it's parts - ice cream and fixings like chocolate, syrup, candy, sprinkles etc. And mind you, some were really flashy like the three tiered ice cream bubble waffle creation by Tmix Tea; some had a more elegant appeal like the Summer Pavlova by Beyond Coffee - a dainty pastel colored concoction that featured soft purple blueberry ice cream on top of a snow white meringue nest filled with lemon curd.
Lastly, taste was deemed most important and the sundaes that I finished completely on my own usually received the highest score in that department for me. Calories cannot be wasted when you're dieting! 🙂
Take a look at each sundae and when you're done, head over to Vanfoodster's page to see if your pick was crowned the winner for this year's challenge.
Final Weigh-In
I finally bought batteries for my scale and did a little weigh in. I gained 2 pounds from the 6 that I lost. It was worth it and I'm just glad it wasn't more than that since some of the creations were so good, I finished them all by myself. This post got me thinking again and I think I will be back for another sundae sooner than later.
I hope you enjoyed my sundae journey. Until our next dessert date.
XOXO,
Mimi
Beyond Coffee in Century Plaza Hotel
Summer Pavlova
Price: $4.75
Offered: All the time.
1015 Burrard Street, Vancouver Tel: 604-687-0575

Innocent Ice Cream Parlour
Dat Sundae, Dough!
Price: $9.95
Offered: daily
A: 4895 Main Street, Vancouver Tel: 604-879 8584
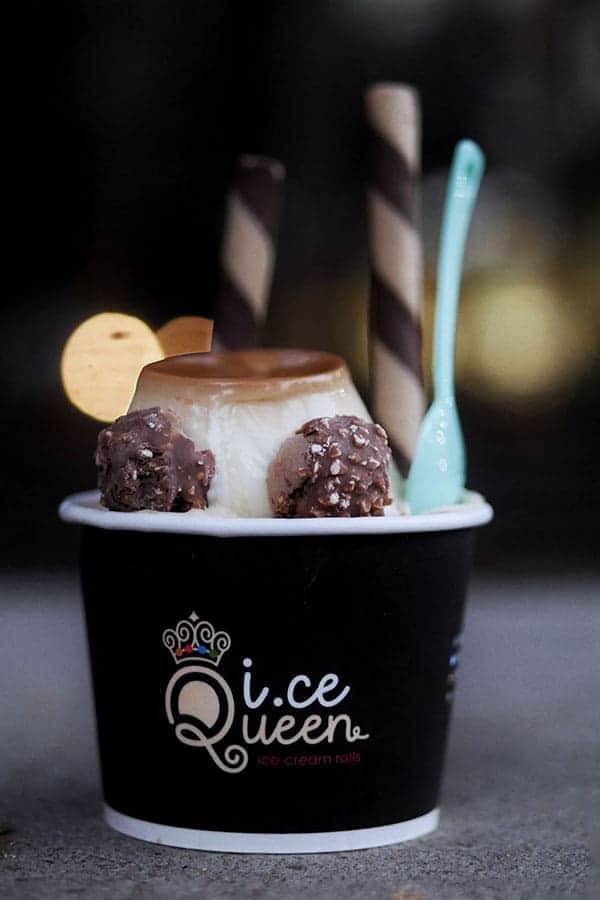
I.ce Queen
Puddilicous
Price: $9.71
2967 West Broadway, Vancouver
2355-4000 No 3 Road, Richmond
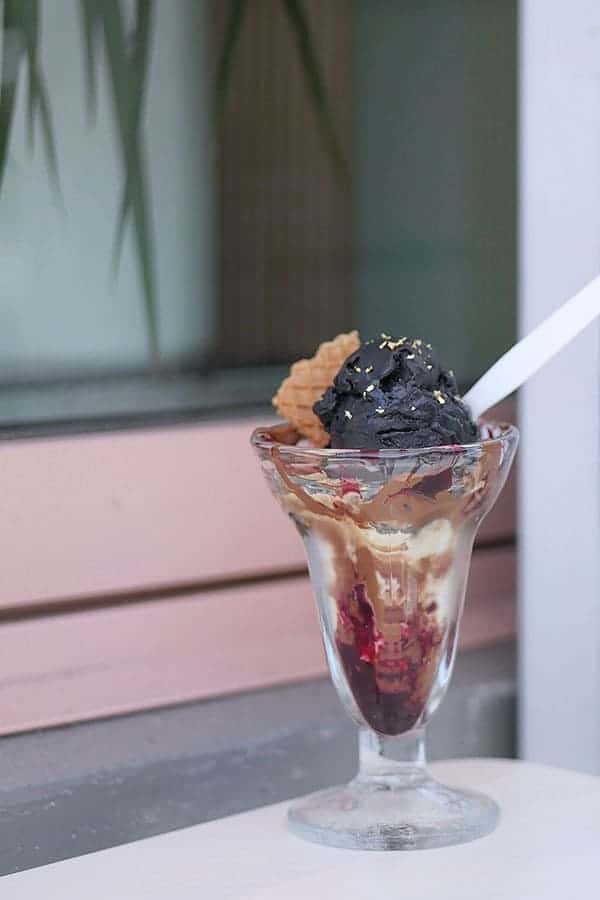
Umaluma
Earth Sun and Stars
Price: $9.75
Type: Plant-based ice cream
Offered: ask for availability
A: 235 East Pender Street, Vancouver Tel:604 559 5862
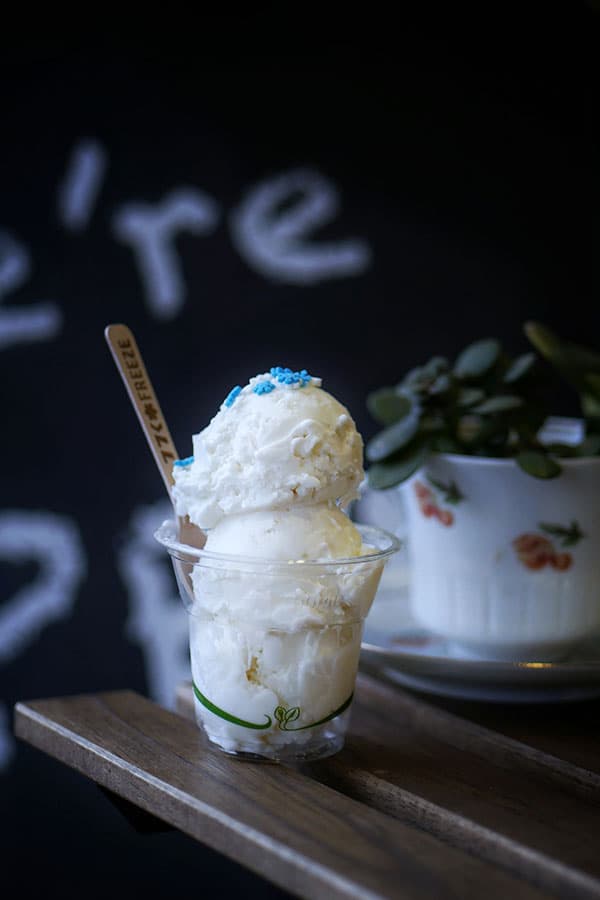
77K Freeze
Snowflake Freeze
Price: $ 8
A: 2240 Commercial Drive, Vancouver Tel: 604-868-2430
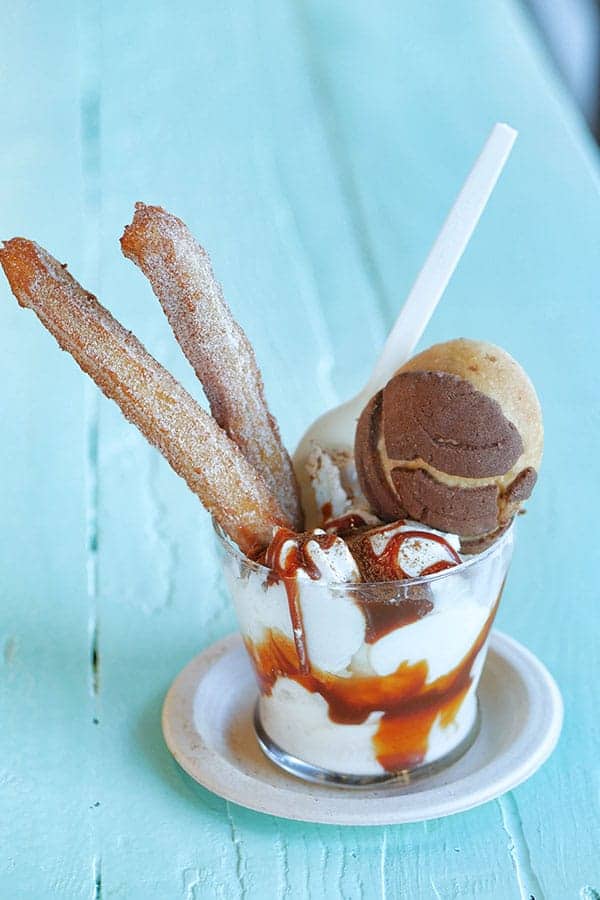
Hugo's Churros
Churro y Concha Sundae
Price: $12.50
Offered: All the time
A: 7899 Templeton Station Rd, Richmond
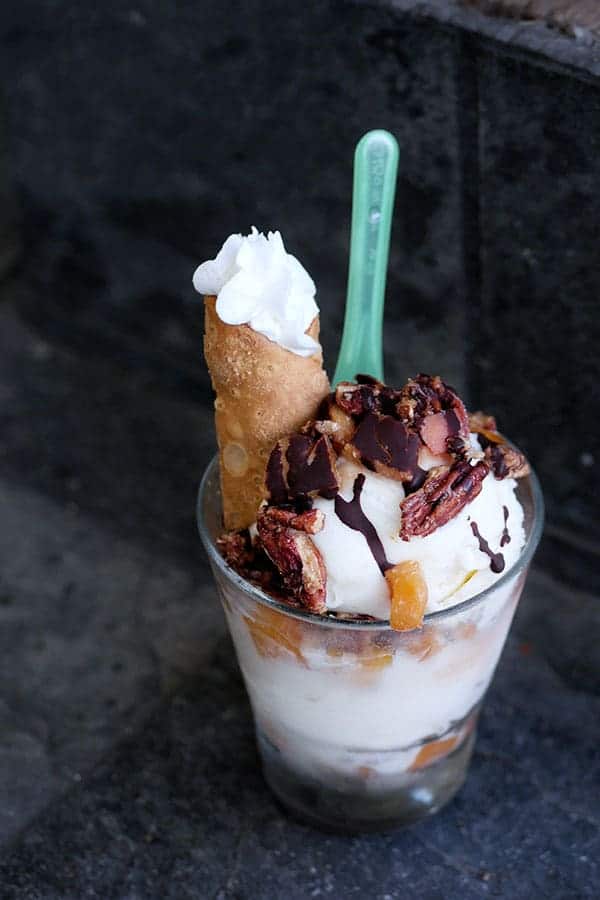
Dolce Amore
Leave the Gun, Take the Cannoli Sundae
Price:$8
A: 1588 Commercial Drive, Vancouver Tel: (604) 258-0006
Lisa Lou's Chocolate Bar
Sue Sundae
Price: $8
Offered: Sun, Tues, Wed 12-8 pm; Thurs-Sat 12-10 pm. Closed Mondays.
A: 1007 Main Street, Vancouver Tel: 604 689 8219
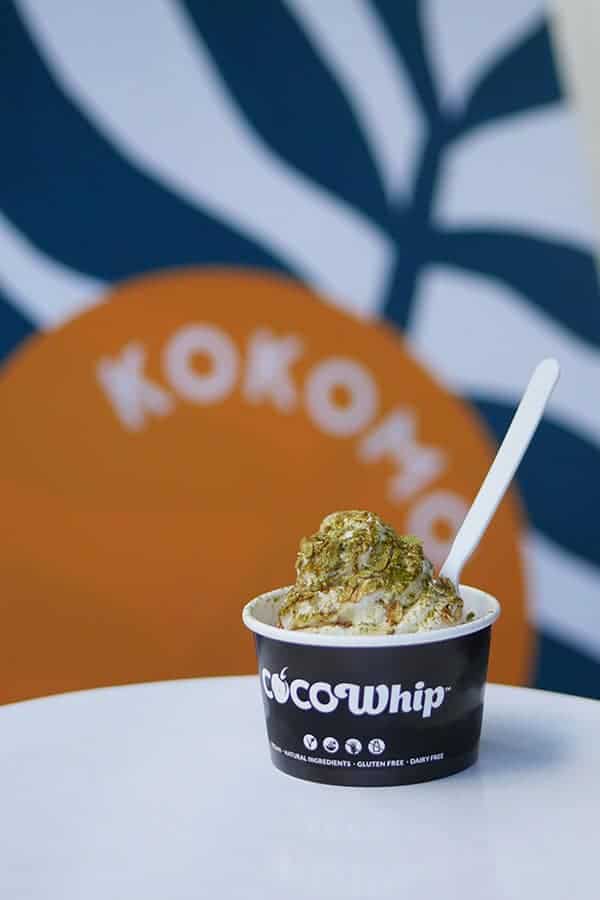
Kokomo
Crunchy Matcha Oatmeal with Hemp Seeds
Price: $8
Offered: all the time.
A: 611 Gore Avenue, Vancouver Tel:(604) 428-6599
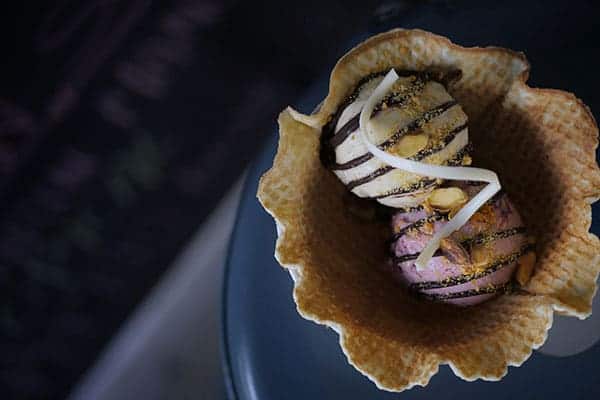
Chocolate Arts
Movie Night
Price: $8
Offered: Monday to Saturday 10am-6 pm
A: 1620 West 3rd Aveuue, Vancouver Tel: 604 739 0475

Tmix Tea & Dessert
Signature Bubble Waffle Pyramid Sundae
Price: $21.95 (serves 2-4 persons)
Offered: all the time
A: 3432 Cambie Street, Vancouver
A: 2790 West Broadway, Vancouver
A: 4538 Kingsway, Burnaby
[srp post_limit='5' post_random='yes' category_include= 131 widget_title = 'Other Vancouver Life Moments'
Updated 2018: Mosquito has closed permanently.

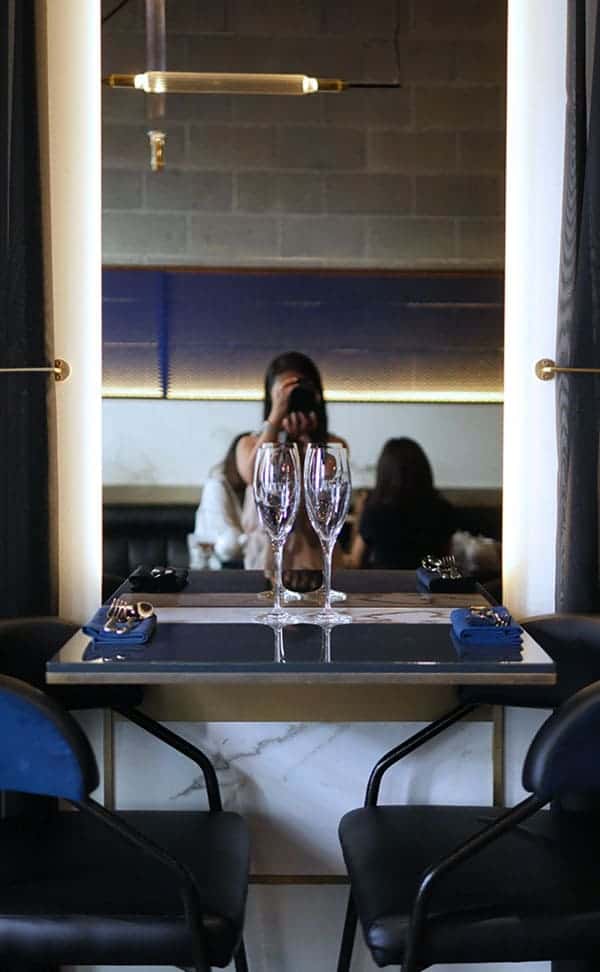
It's rare to find a late night dessert bar that is both sophisticated and sexy in this city but there is one establishment that happens to possess that elusive quality - Mosquito in Gastown. Opened since 2015, Mosquito has made a name for itself as an upscale dessert and champagne lounge. They have an extensive drinks menu filled with smart cocktails, wine and post-dinner drinks. Their decadent and perfectly plated desserts are also a draw although you'd never be able to capture a good photo since it has that sexy dark candle-lit ambiance that is mesmerizing for romance but not so much for the camera shutter - until now.
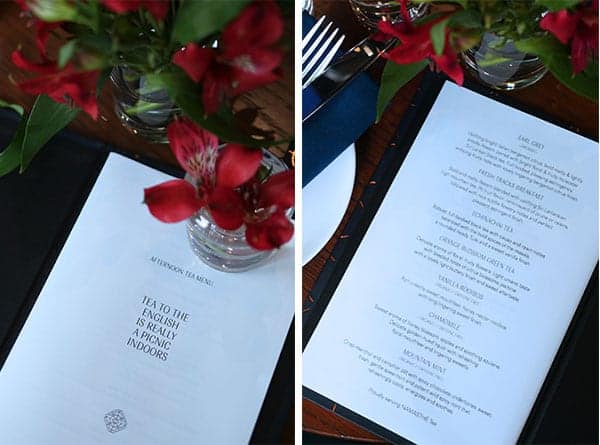
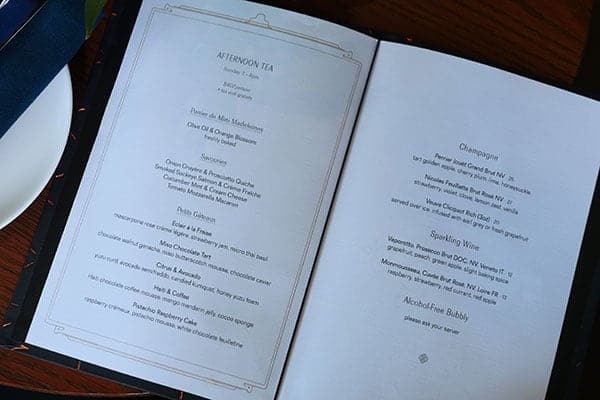
Afternoon Tea in a Dessert and Champagne Lounge
Over the summer, Mosquito introduced it's afternoon tea service with sittings on Sunday afternoons only from 1-4pm. It was nice to see the lounge in the daytime since I have only been there once during the evening. This time, in the light, the beautiful architectural details were definitely more perceivable and eye catching.
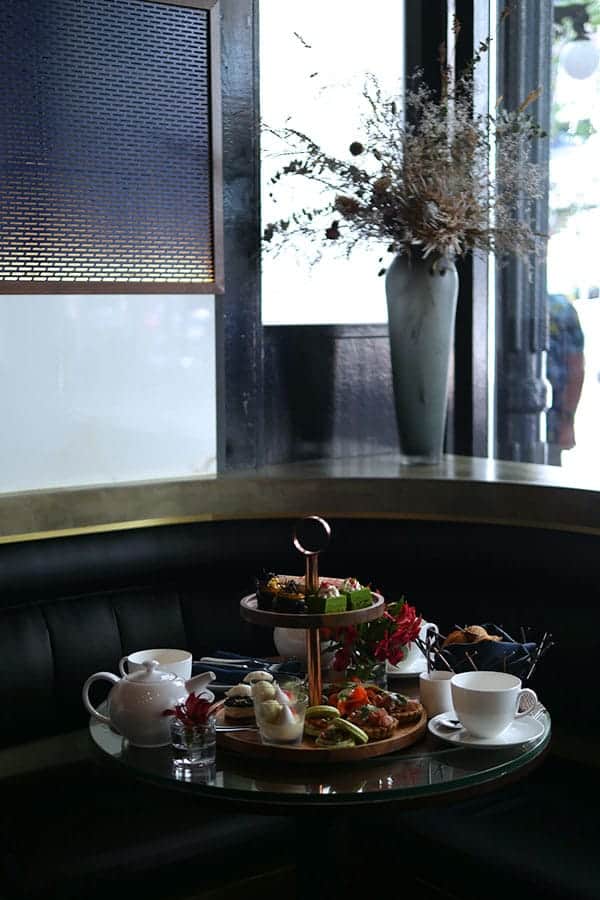
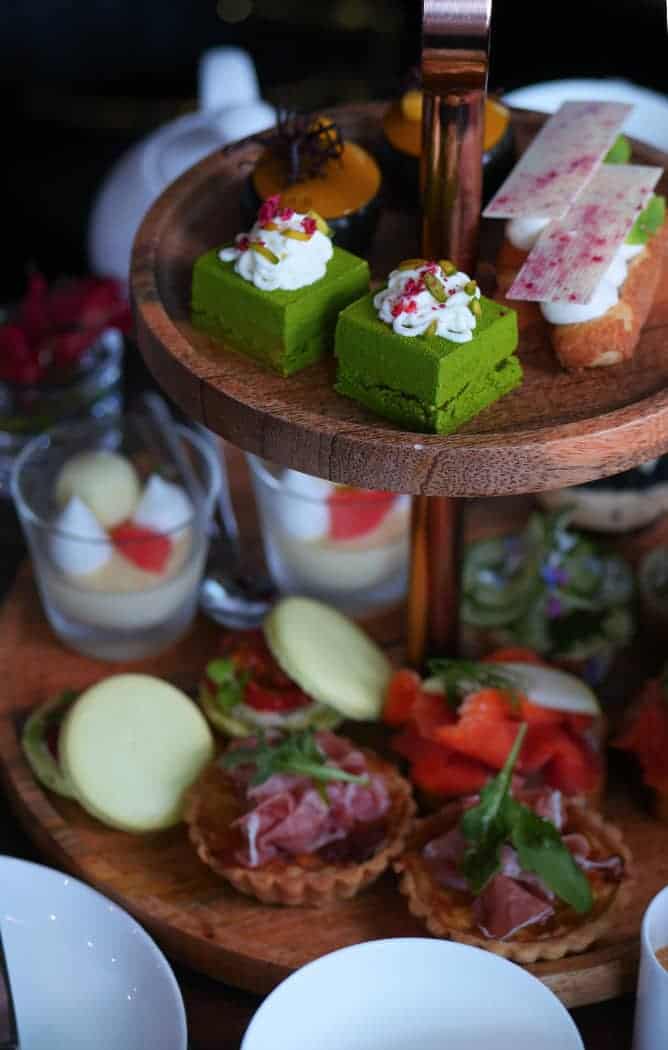
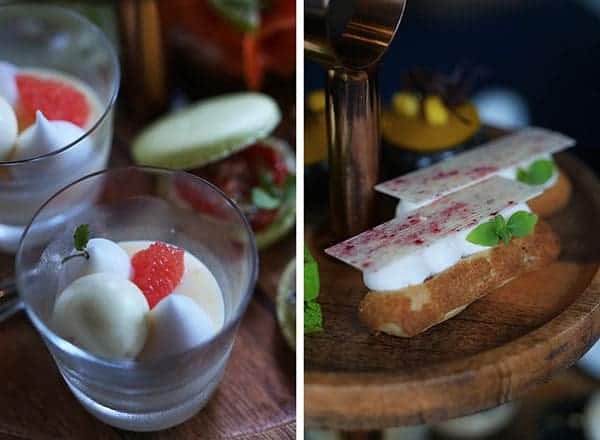
The Food
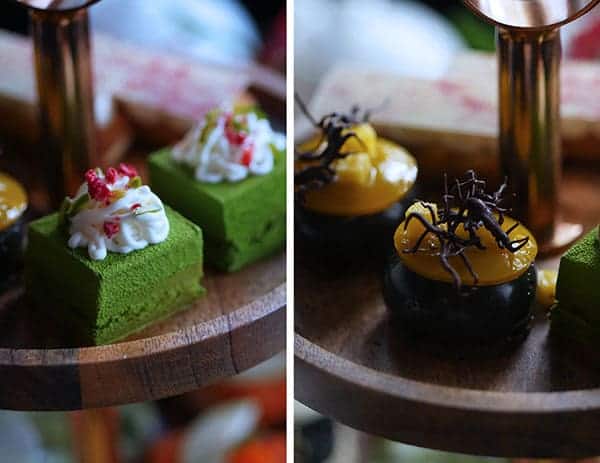
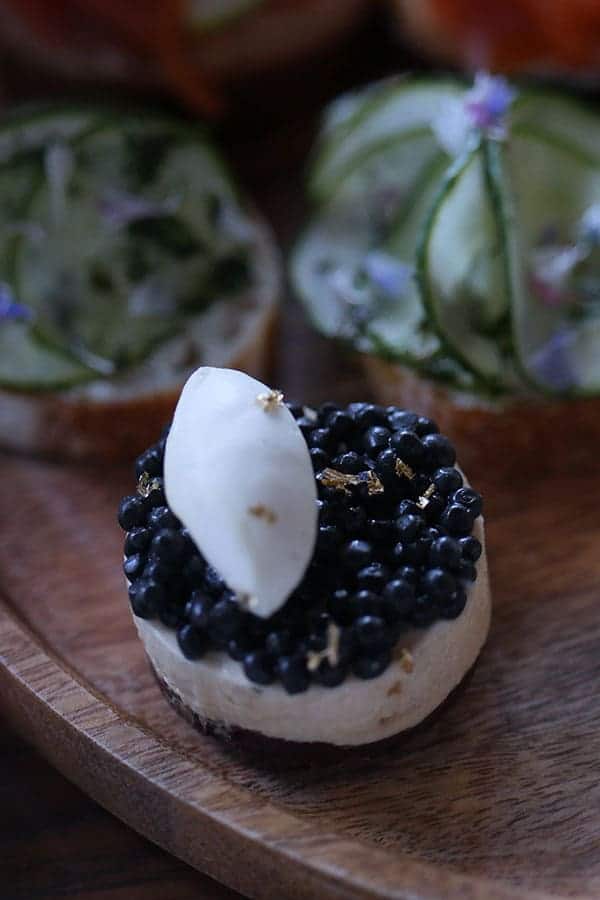
For a dessert heavy weight like Mosquito, I was pleasantly surprised to find that the savoury offerings were also just as delicious as the desserts. I enjoyed every piece on the tray and even the one dessert piece which didn't "work" for my taste - the miso chocolate tart - was impressive in it's presentation and unique flavour pairing. Another edgier offering was the savoury macaron filled with mozzarella cream and tomato sauce. The only other time I remembered having a savoury macaron during afternoon tea was at the HK Ritz Carlton.
I would highly recommend it for anyone who appreciates fine desserts. On the service side, it's professional but since it's a boutique business, you won't find the same level of attentiveness as you would when having tea at a hotel. However, it's mid-price position, amazing dessert selection and chic ambiance fully compensates for that. Overall, I was thoroughly impressed with this fresh take on afternoon tea, it dared to push the boundaries a bit while maintaining a certain level of sophistication and beauty.
Notable Points:
- the afternoon tea service provides an opportunity to experience this sexy lounge in the daytime
- sweetss and savouries are both equally good
- the newest afternoon tea offering in Vancouver
- excellent value for money. High food quality and ambiance with a mid-range price position
- lots of other shops and restaurants nearby on Water Street for you to make a day out of your tea experience
Ambience: Sleek and sexy lounge with dark booth seating and wooden tables. High industrial ceilings with specially designed pendant light fixtures. There are 2 small tables by the windows. The restaurant is partitioned into two parts, one in the front and one in the back which is much darker in the daytime.
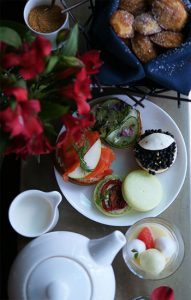 Scones:There were no scones offered, instead, we received a generous basket of tiny olive & orange blossom madeleines. They were tender with a delicate trace of orange blossom.
Savoury: All the savouries were surprisingly well executed for a dessert heavy weight like Mosquito. I was pleasantly surprised by the smoked salmon sandwich, the bread had a nice chew and paired perfectly with an herbaceous creme fraiche. The shell of the prosciutto quiche had a delightful buttery flavor and crumbly texture but the prosciutto itself could have been more flavorful. The savory macaron really took me by surprise. The macaron shell was expertly made and assembled with a savory filling of mozzarella cream and tomato sauce. The shell was full and slightly chewy and this was even consistent in the unassembled shell which did not appear to have undergone the same maturation process as the assembled one. All the savouries were of a good size. Not teeny tiny.
Sweets:The sweets exhibited all the qualities of desserts made by an expert pastry chef - correct textures, discernible flavours, complex flavour pairings finished with a sophisticated presentation. My favourites were the Chocolate Coffee Mousse with mango jelly, Eclair a la Fraise with a fragrant mascarpone rose creme and strawberry jam, and the Citrus & Avocado semifreddo which was had a smooth texture and played on varying degrees of tartness between the citric elements of yuzu curd, candied kumquat and honey yuzu foam. The Miso Chocolate Tart was a bit more ambitious flavour pairing and I didn't find that it worked for me. It was a little flat since it was neither sweet nor salty and it had a little smokey bitter aftertaste. I did appreciate the exquisite presentation of the chocolate caviar on top and that did taste good on it's own.
Tea:A small collection of teas. It's one of the most pared-down tea list I've ever seen for afternoon tea. There is 3 black, 1 green and 3 herbal. Well, I guess when you're at Mosquito you're not expected to enjoy hot tea since their alcoholic drink selections are sleeker and more unique.
Tea Ware: Thedesserts and savouries were presented on a hip 2 tiered woodentea tray while the madeleines were nestled inside a dark blue napkin and served in a small bread basket which was lightly dusted with powdered sugar. The rest of the tea ware were simple and white.
Alcoholic Beverages:Similar to Trump Hotel, Laduree, Fairmont Pacific Rim, Notch 8, alcoholic beverages can be ordered with the tea set. Ranges from $13-$25 per drink.
Service: Professional service with attention to detail. It was a bit understaffed as we found it easier and faster to flag down someone at the service station for most of the requests we were making. Once found, everyone was more than happy to help.
Other notes:
♥ Tea Set $40/per person
(includes one pot of tea)
Basket full of mini madeleines, 4 savouries, 5 sweets
Can add alcoholic beverages for an additional cost depending on selection. Ranges from $13-$25
♥ Reserve by phone: (604) 398-3188
♥ Parking: Metered street parking along Water Street or a sheltered parking lot on 160 Water Street. It's called Easy Park and it also has spaces for EVO and Car2Go share cars.
Monday - Friday $2.75 per hour (daily maximum $13 before 6pm, $9 after 6 pm)
Saturday - Sunday $2.75 per hour (daily maximum $9)
Waterfront Skytrain Station is a 7 minute walk away.
♥ Address: 32 Water St, Vancouver, BC V6B 1A4
♥ TEL: (604) 398-3188
Here is Part 1 of 3 events that I will share with Deborah Moore tomorrow on AM1470.
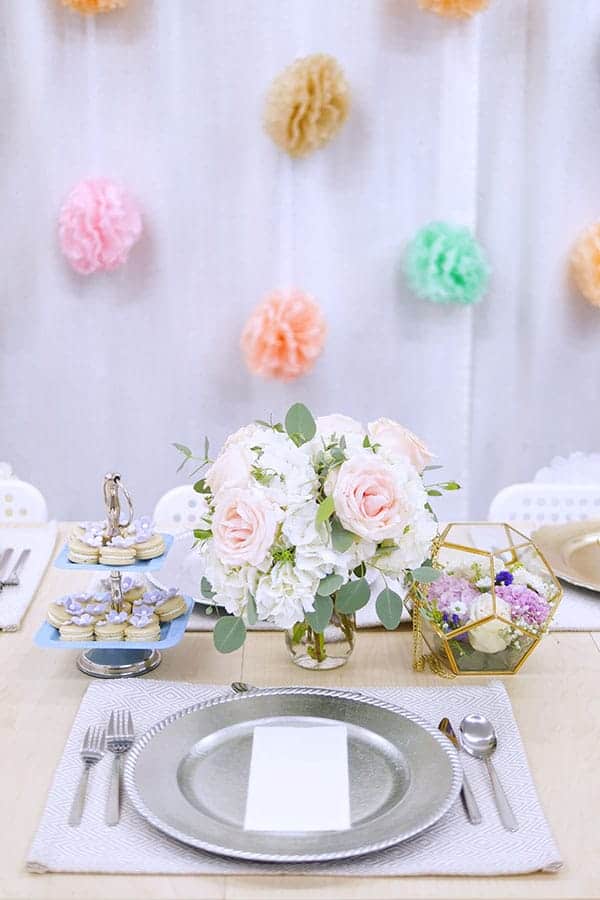
I'm always up for a good time in the company of other women who enjoy a nice meal and pretty party decors so this past weekend's ladies night was a real delight. A fellow blogger, Maggie, YouTuber, Cici, her two friends and I had a lovely private dinner prepared by Vancouver's original Dinner in the Sky chef, Travis Petersen. The night was made all the more special by the group effort bringing the beautiful dinner to fruition. Maggie organized, Cici hosted and decorated, Kelly contributed an exquisite floral arrangement for the table and I made macarons, of course 🙂
Here's a little glimpse into our night:
The Decor
Many private chefs hold private "underground" dinners in their own homes nowadays but part of this special experience was having our chef, Travis Petersen, come to us which allowed us to decorate the space in any way we desired. Cici, our gracious host, did all the decorating. She made a colorful feature wall with hanging pom poms in pretty pastel colors which ended up looking marvelous in photos. She also prepared a pretty table setting complete with a pastel colored floral arrangement, photogenic tableware and plate chargers. Kelly also contributed by bringing a beautiful arrangement of roses and hydrangeas encased in a modern gold trimmed terranium.
The Drinks
Prior to the party, Cici showed me her idea of putting edible flowers into ice cubes for our drinks. She asked me where she could find them and I was at a loss even though I had always intended to use real flowers in my macarons one day. The next best thing I could think of was my mom's organic garden. She had organic lavender which I thought just might work. So I dropped them off with Cici prior to the party and she put them into ice cubes. I just didn't know they were long ice cubes. WOW! The long ice cubes ended up working perfectly because lavender is a vertical growing flower, and the long cubes looked wonderful peaking out of the wine glass. (BTW, I discovered you can find organic edible flowers at Whole Foods! It's in the refrigerated herbs section.)
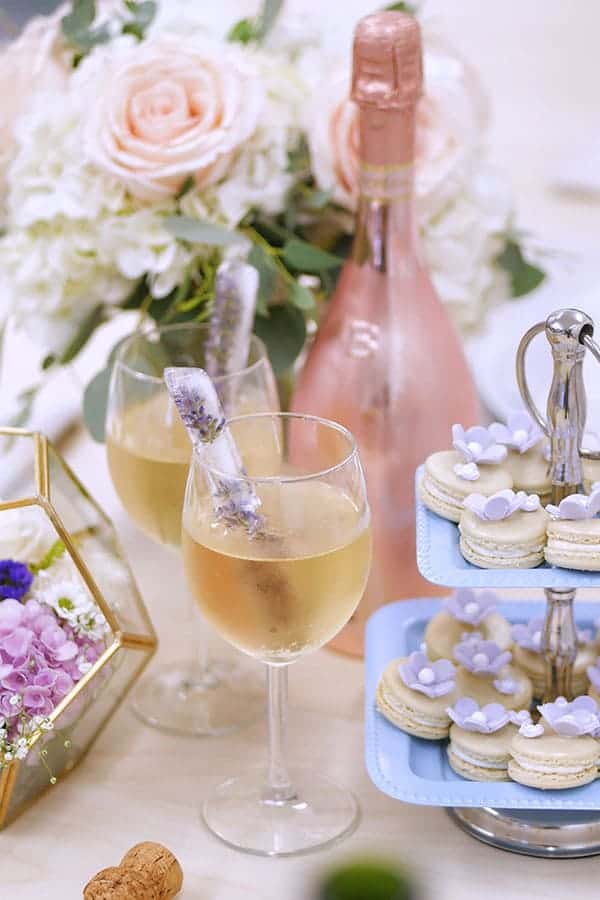
The Food
Chef Petersen prepared a scrumptious 4 course meal that one would find in any fine dining restaurant. We had Grilled Portobello mushroom nicoise and ahi tuna ceviche crispy sesame wonton crackers with asian mango and avocado salad to start. The main was an absolutely delicious Crispy skin salmon with squid ink noodles on a roasted red pepper and saffron veloute. Lastly, we ended the meal with a port poached pear with vanilla pastry cream, edible flower and cake crumble.
And not only does he cook, he also does the dishes too. So you can sit back and relax with a glass of wine and enjoy the night without worrying about the work that awaits you once your guests leave.
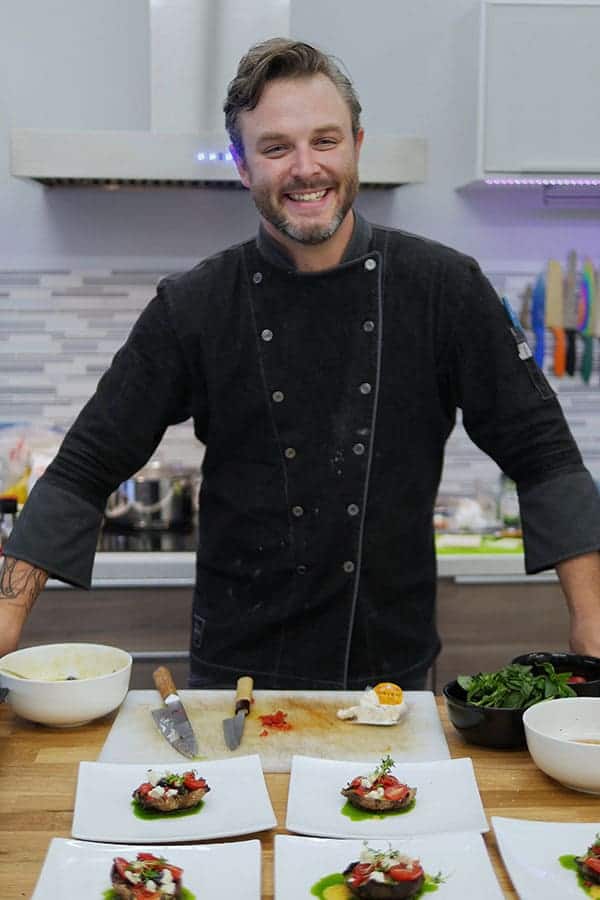
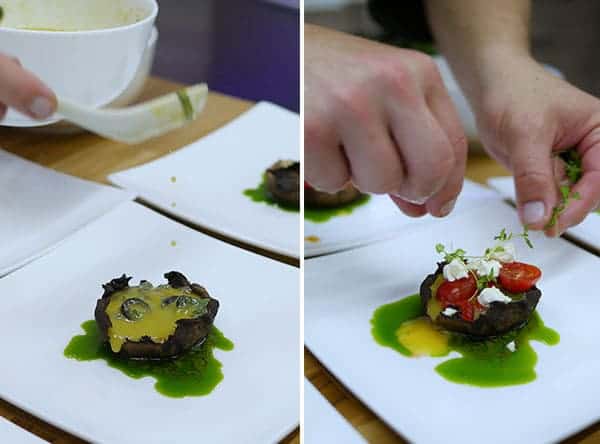
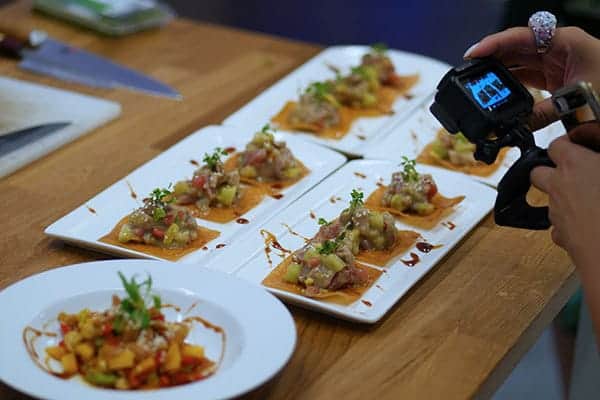
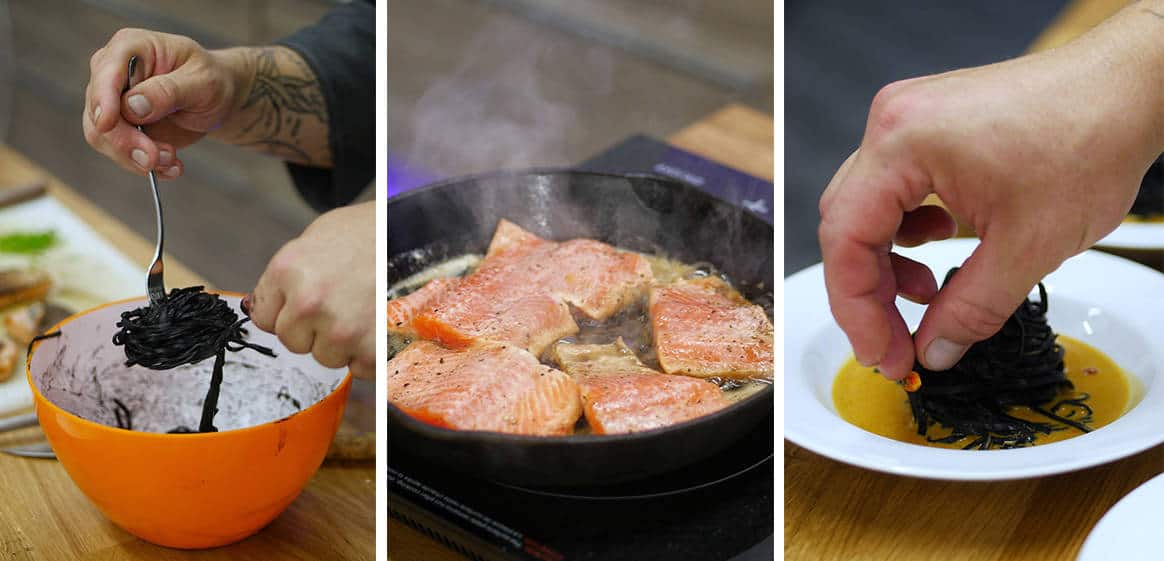
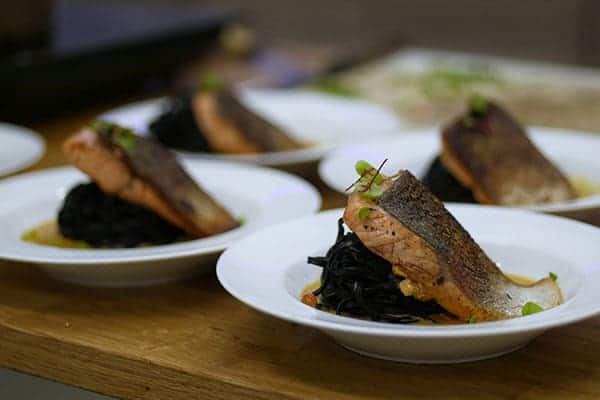
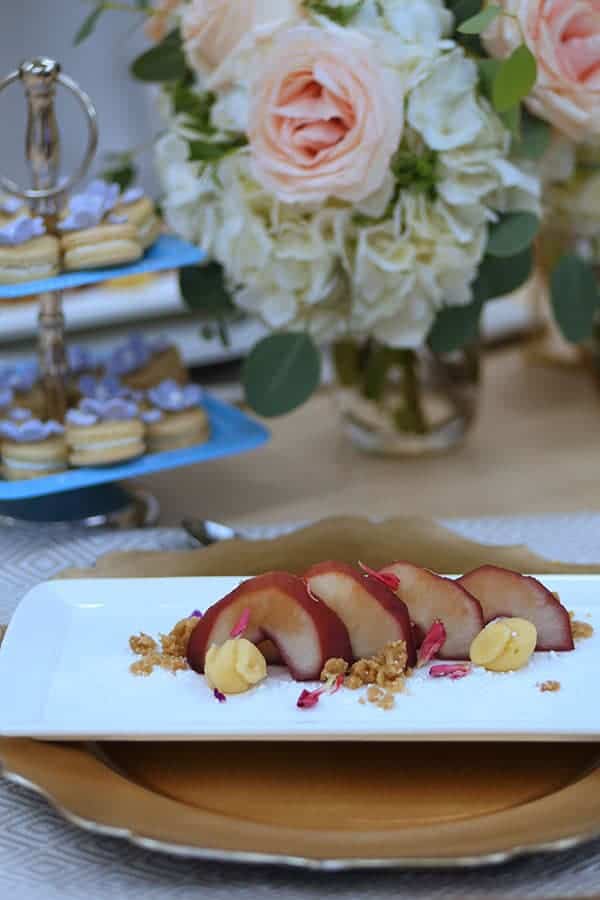
The Photos
When you eat with food bloggers nowadays, it's almost a rule to make natural light readily available either through a window or open door for the purpose of food photography. Here we are outside on the pavement making use of the little bit of sunlight left before dinner.
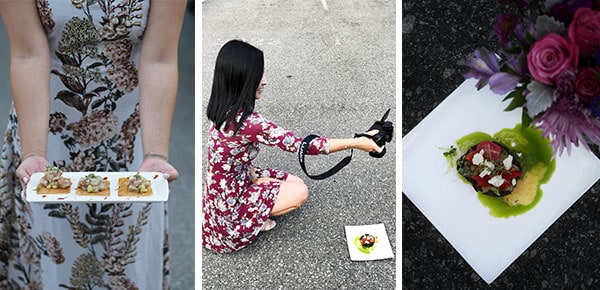
The Macarons
And finally, I think we can all agree that a floral themed party absolutely requires floral themed macarons right? Here is my little contribution to the party - lavender lemon macarons. The shell color was kept mostly in its original almond colour with a tiny bit of Americolor gold. Once they were assembled, I brushed a tiny bit of gold dust onto the surface to create a pretty shimmer effect.
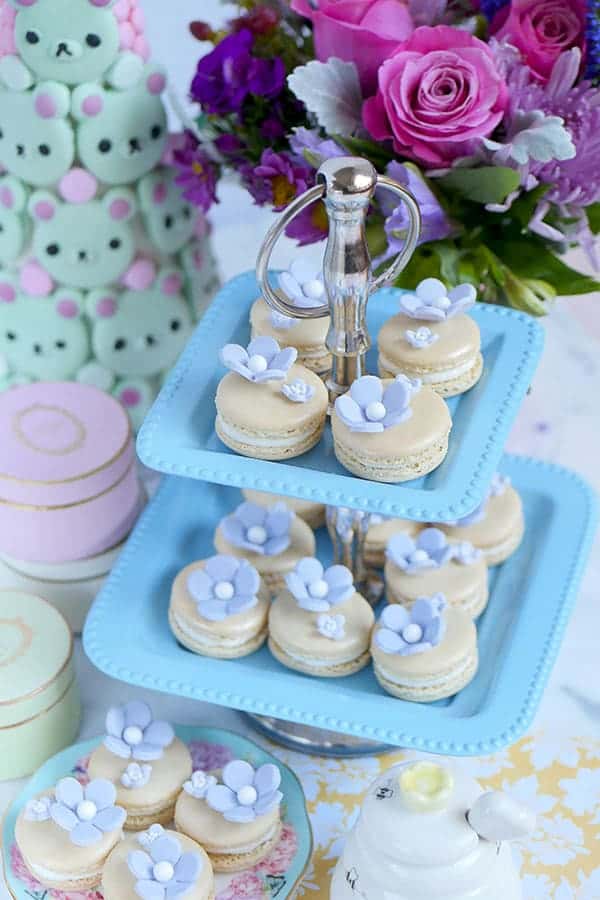
As for the filling, I piped a ring of lavender buttercream on the outside and placed a dallop of lemon buttercream on the inside. It's one of my favorite flavor combos! After having one, I was pleasantly surprised when Chef Petersen asked me for more of these 🙂
There's been a lot of request for this recipe so I'll get it up for you as soon as I can. It's been a beautiful, busy and crazy summer. There has been so many wonderful experiences that I am trying to live-in-the-moment for so please bear with me and I hope you are all enjoying your summer too!
Thanks for reading!
XOXO,
Mimi
[srp post_limit='5' post_random='yes' category_include= 131 widget_title = 'Other Vancouver Life Moments']
Matcha macarons filled with strawberry cream that is naturally colored and flavored. The shells are extra flavorful with green tea powder.
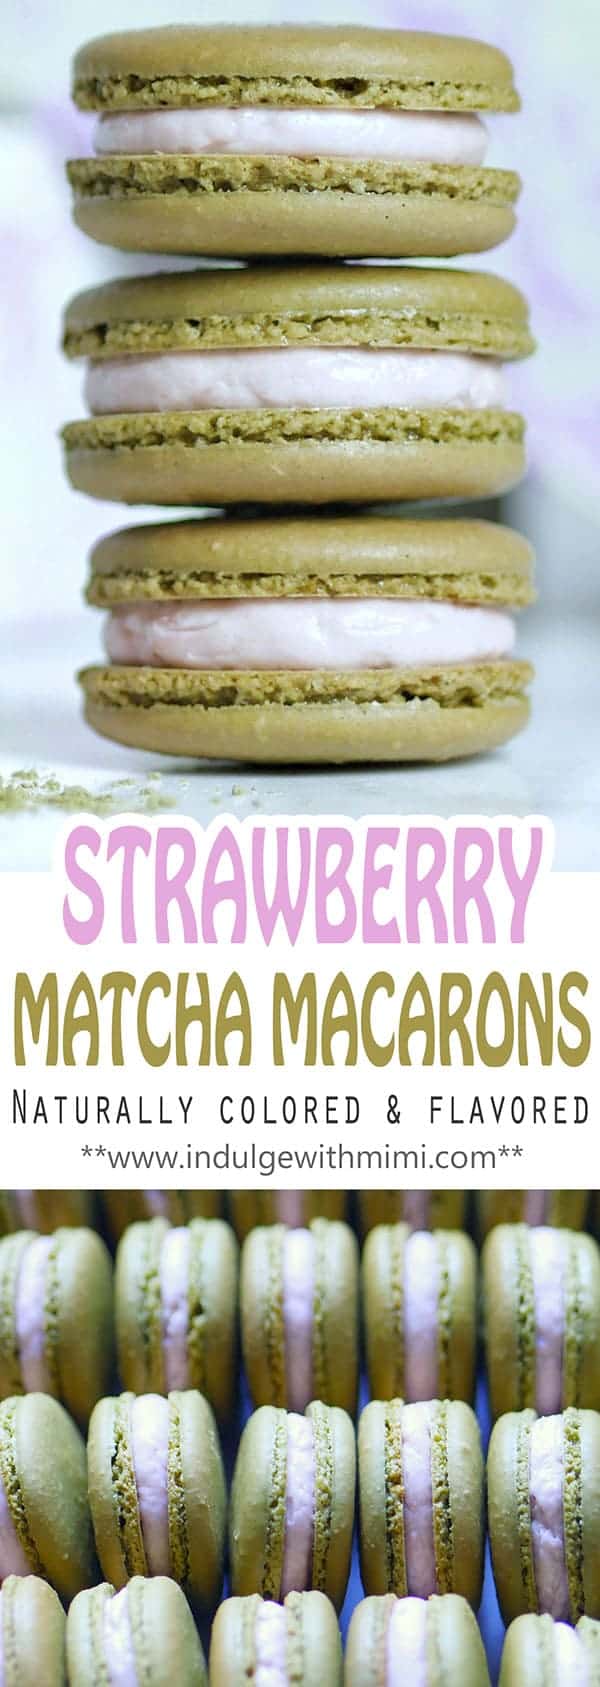
This recipe was influenced by a dinner party experience I had in which one of the guests was concerned about food that contained food colouring. Before eating each dessert item, he asked diligently if it contained any food colouring. Unfortunately, I had indeed used some food colouring in the macaron shells so he couldn't have any due to his concern in regards to it. It really got me thinking. Yes, brightly colored baked goods are so cute and too darn photogenic for their own good but not everyone may feel comfortable ingesting it. So I created this new recipe which is naturally flavoured and colored. Today I present to you this Matcha Green Tea Macaron filled with Strawberry Swiss Buttercream.
In the last matcha macaron recipe I wrote, I included the addition of a few drops of Americolor's Avocado gel color to give the shells the typical vibrant green color one comes to expect in their macarons. This time, I left out the Avo green gel color and let the natural colors of the matcha come through. As you can see, the result is a more muted and mossy green. As for the strawberry buttercream, the pink color derives solely from the real strawberries used in the recipe. I quite admire this natural colour combo and believe you can take great pride in letting your guests know that this macaron is naturally colored and flavoured from raw ingredients. It also tastes absolutely delicious - a winning combo! I'm proud to have this new recipe in my recipe box and I hope you will be too.
Happy Baking!
XOXO, Mimi
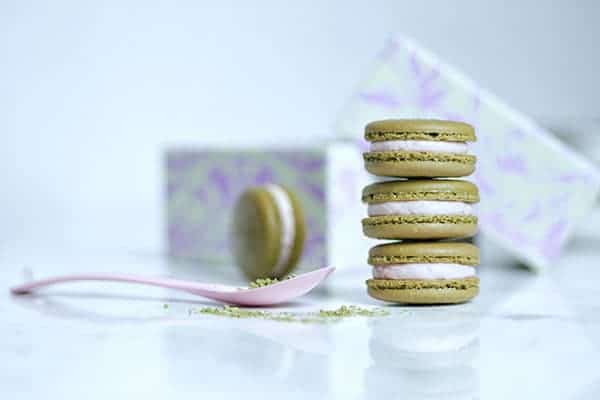
Prep Time 2 hours
Cook Time 14 minutes
Rest Time 30 minutes
Total Time 2 hours 44 minutes
Ingredients
Matcha Green Tea Macaron Shell
- 65 grams almond flour
- 65 grams icing sugar
- 1 tablespoon matcha green tea powder
- 45 grams castor sugar
- 50 grams egg whites, aged, room temperature
- 1/8 tsp. cream of tartar
Fresh Strawberry Puree
- 350 grams fresh organic strawberries
- 6 tsp granulated sugar
Swiss Meringue Buttercream
- 65 grams egg whites
- 130 grams granulated sugar
- 195 grams room temperature butter
- 1/4 tsp salt
- 1-1 1/2 tsp strawberry extract (optional)
Instructions
Basic Macaron Shell
- Set aged egg whites out at room temperature.
- Pulse almond flour and icing sugar together in a food processor to further break down any large pieces of almond flour.
- Sift dry ingredients: almond flour, icing sugar and matcha powder. Discard big pieces of almond that can't be sifted.
- If you are new to making macarons, please read the instructions to my BEST MACARON RECIPE before attempting to follow the rest of the instructions since it is condensed for the advanced macaron baker.
- With the balloon whisk attached, whip the room temperature egg whites on low-medium speed.
- Add cream of tartar when it becomes foamy.
- Turn up the speed to medium.
- Once the whisk starts to leave tracks in the egg whites, add sugar a little at a time.
- Turn the speed up to medium-high and whip until firm peaks, stop mixer and add gel food color if desired. Continue whipping on medium-high until stiff peaks.
- Fold the dry mix and meringue together until the batter becomes a "lava" or honey-like consistency.
- Transfer batter into a piping bag fitted with a round piping tip.
- On parchment paper or silicone mats, pipe out round shaped macarons.
- Rap the tray hard on the counter to remove any excess air bubbles. Use a toothpick to pop any remaining bubbles.
- Wait until the shells become completely dry before baking.
- Bake at 325F for 12-14 minutes. Every oven is different, you may need to adjust your own temperature settings. Please read How to Use Your Home Oven Properly for Baking Macarons if you are unsure.
- Macarons are done when the foot doesn't push back and the tops don't move when you wiggle it.
- Once baked, let cool completely before removing from the baking mat/parchment paper.
Fresh Strawberry Puree
- Wash strawberry and remove stem and a bit of the surrounding white flesh with a paring knife. Dry it with paper towels.
- Place the strawberries and sugar in a small pot, boil on LOW heat for approx 30 minutes.
- It will start to break down by itself. Occasionally, stir the mixture so the sugars and juices come together.
- Using a heat proof spatula, occasionally press down on the fruit very gently to help break it down. If it is still hard, just let it break down by itself until its soft enough to push down on it with the spatula.
- It will reduce into a very thick, chunky compote that is not runny. Take off heat after appr. 30 min. (Watch accompanying video to see the proper consistency. You may need to keep it on the heat some more if it is still runny.)
- Pour the compote into a food processor or blender and blend for a minute or two until the fruit is all broken down.
- Pour through a sieve into a heat proof cup. The mixture is thick so use a spoon to push it through. If the consistency is correct, you should have about 3 tablespoons of puree. Set puree aside.
Swiss Buttercream
- Cut up butter and let it come to room temperature as you measure out other ingredients.
- Add sugar and egg whites into a heat proof mixing bowl. Stainless steel is light and safe.
- Place over a pot of boiling water.
- Whisk the whites & sugar mix over the boiling water.
- Pay attention to whisking the mixture when it starts getting hot, you don't want to cook the eggs.
- Whisk the mixture until the temperature reaches 160F. This temperature is generally accepted to be able to kill salmonella in eggs.
- Pour the mixture into the Kitchenaid mixer and whisk on low with the balloon whisk, then turn it up to medium.
- Once the mixture is thick and glossy, and the bottom of the bowl is cool to the touch, stop mixer. Change the whisk attachment to the paddle attachment.
- Add butter a little bit at a time while beating with the paddle attachment on medium speed.
- The mixture might look curdled or separated for a while but keep mixing. It will all come together.
- Add strawberry puree a tea-spoonful at a time to a max of 3 tablespoons. Beat until incorporated.
- Add strawberry extract if desired and incorporate.
Notes
- Castor sugar is also known as extra fine granulated sugar or berry sugar. Granulated sugar can be used by castor sugar is preferable.
Recommended Products
As an Amazon Associate and member of other affiliate programs, I earn from qualifying purchases.
-
Round Piping Tip #10
-
Ateco Disposable Piping Bags, 12-Inch, Pack of 100
-
USA Pan Rimless Baking Sheet for Better Airflow to Macaron Shells
-
Regular Sized Silpat Non-Stick Silicone Baking Mat
-
McCormick Gourmet All Natural Cream Of Tartar, 2.62 oz
-
C&h Powdered Sugar 4 Lbs (1)
-
India Tree Superfine Caster Baking Sugar, 1 lb. bag
-
C&H Pure Cane, Granulated White Sugar, 10 lb
-
Anthony's Almond Flour Blanched, 2lb, Batch Tested Gluten Free, Non GMO, Vegan, Keto Friendly
-
Food Processor for Almond Flour
-
![Jade Leaf Organic Matcha Green Tea Powder - Authentic Japanese Origin - Culinary Grade - Premium 2nd Harvest [3.53oz]](https://www.indulgewithmimi.com/wp-content/uploads/2015/02/71YExRTmNBL._SL1111_edit.jpg)
Jade Leaf Organic Matcha Green Tea Powder - Authentic Japanese Origin - Culinary Grade - Premium 2nd Harvest [3.53oz]
Nutrition Information
Yield
12 Serving Size
1 grams
Amount Per Serving Calories 248 Total Fat 16g Saturated Fat 9g Trans Fat 1g Unsaturated Fat 6g Cholesterol 35mg Sodium 170mg Carbohydrates 26g Fiber 1g Sugar 24g Protein 3g
This information is provided as a courtesy and is an estimate only. This information comes from online calculators. Although indulgewithmimi.com attempts to provide accurate nutritional information, these figures are only estimates.
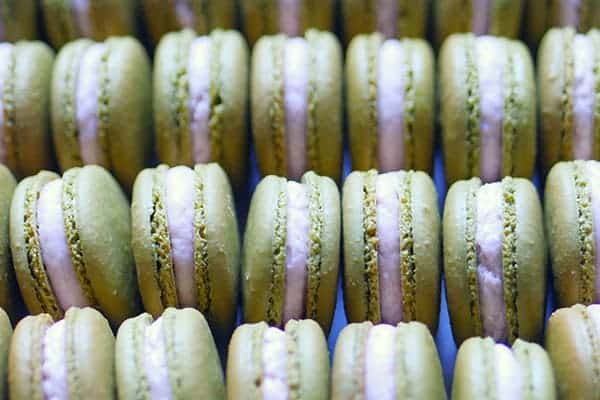

This is Part 2 of summer activities in and around Vancouver that I shared with Deborah Moore this morning on AM1470.
Continuing on with Part 1 of summer activities in Vancouver where I talked about the different places to stand up paddle board in and around Vancouver, the last one on the list was Alta Lake. It's 1.5 hours away from downtown Vancouver and 12 min. away from Whistler Village.
It's coincidentally the first place where we had our first SUP experience a few years ago. We rented the boards from Backroads Whistler and quickly fell in love with the sport to where we eventually bought our own boards that season. Although we've returned to Whistler many times after that, we never had an opportunity to bring our boards with us until two weeks ago. We had originally planned to take our first camping (tbh, "vanping") trip together. We really wanted to take advantage of the wonderful summer weather and be in nature but due to the forest fires in the interior, the only road to the campsite where we booked was blocked. We quickly re-routed our trip to Whistler because of the allure of using our boards on Alta Lake. It's a relatively calm body of water for SUP and the water on the beach edge is shallow for wading and swimming.
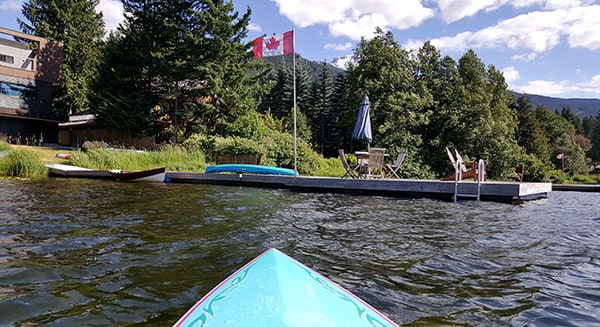
On another day, hubby "surprised" me with a hike in Nairn Falls. Okay, so it's not like he had champagne and roses prepared for me there, nothing of that sort (but it would be nice right? ...hubby, if you're reading this lol). On a whim, we decided to go on a hike instead of heading out on the water again so I suggested we do a hike at Brandy Wine - a beautiful trail with a nice view of a waterfall that we've done before. Hubby started looking up places to hike around Whistler and he told me to get into the car and he'd surprise me with the location. Fine with me, I like surprises 🙂

We drove about half and hour to arrive at a park called Nairn Falls Park. As soon as I arrived at the entrance , I started to take photos. It was truly beautiful. We were up high looking down at the most beautiful seafoam green water that was gushing down the river. I took some time to capture this perfect scene - vibrant green water, snow capped mountain and evergreen trees. What more could you ask for? Really! While I was greedily snapping away, hubby said, '"C'mon, keep moving. I promise you. It gets better." It does? Really? He must know something I don't.

We kept walking along the trail which is compact earth and rocks. It's not too hard or steep. I even saw young children walk by themselves while holding onto the hands of even younger siblings, and more impressively, a mother with a baby on her back. You'll still need the proper footwear though. We only had on running shoes and could navigate the trail with no problems. It was only when we veered off the main trail and tried to climb down the sides of the mountain in the makeshift paths down towards the water's edge did we encounter some slippery situations, literally. Well worth it though, here is the view once you get down.

We sat on the rocks cooling off with the mist from the gushing waters that was so clear and so green. What a dream it was! It was very spa-like, except it was real and we got to experience it for free. It really reminded me to be cognizant in my daily life to preserve the limited natural resources we have on this planet. After a brief rest and a fast and furious photo shoot, we headed back on the trail. I had no idea what I was walking towards. Was there supposed to be more on this trail?

We kept walking along the trail and after a total of about 40 minutes (approx. 1.5 hours round trip), we reached a viewing platform where we could view the most beautiful waterfall. What sets this waterfall apart is how it has created a perfect puzzle-like appearance in the big rocks in it's path. Just so spectacular! I was in awe. No wonder why hubby said he chose this hike for me. He said he knew I would want to take pictures for my blog and that I did. I hope you enjoyed them and if you get a chance next time you're in the Whistler area, make a visit!
And if you don't have a chance to head up to Whistler, here is the last summer activity that you can do on a rainy day in Vancouver. Read Part 3 of my talk with Deborah Moore here.
XOXO,
Mimi
[srp post_limit='5' post_random='yes' category_include= 131 widget_title = 'Other Vancouver Life Moments']

Here's a little more info on the summer activities I shared with Deborah Moore this morning on AM1470
It's the Season to be on the Water
Near the end of each spring, we eagerly follow the weather forecast to see when it would be sunny and warm enough for us to bring our beloved paddle boards out onto the water. That day for us came in mid-May this year with temperatures in the mid 20s (C). And it kept climbing throughout the rest of the season resulting in an early June heatwave with temperatures reaching 30C. Okay, so you may probably chuckle at these numbers if you're from a hot climate but these are definitely the numbers that make all of us Vancouverites rejoicing the start of our comparatively short summer season. It rains here almost 7-8 months of the year and even in the summer there are sporadic stretches of rain here and there too. So you can imagine my excitement to dust off our paddleboards - unused since last summer - for the summer season ahead.
 What is Stand Up Paddle Boarding (aka SUP)?
If you've been near waterways where people do water sports in the last few years, I'm sure you've most likely seen people paddleboarding. You'll see people standing upright on what resembles a surfboard navigated by the movements of just one paddle. It's kind of like a cross between surfing and canoeing while standing upright.
It's so much fun to be out of the water enjoying the view while doing something physical but without having to get your hair wet 🙂 Unlike a canoe or kayak, you have the flexibility to stand up, sit down or even lay down on your board to suntan. And should you fall off, it's relatively easy to climb back onto your board as opposed to recovering a capsized kayak alone.
What to Bring for Paddleboarding?
If you're renting your boards (I'll tell you where you can do so below), it will usually come with a SUP, a paddle, a life jacket and a leash for connecting you to your board so it won't drift away in case you fall off. Here are a few things you can bring along with you to make your time more enjoyable:
- sunglasses
- sunscreen
- swimsuit - You can wear it underneath a T-shirt and shorts if desired. Your bottom will get a bit wet if you decide to sit on the board and from launching the board on the shore.
- water shoes or flipflops
- frozen Gatorade or Water - it gets hot on the water since there is little shade, you'll need it to cool down
- granola bar if you get hungry
- a water-resistant bag which you can wear on your back or secure it onto the board.
- towel
- change of clothes if needed
- Aquapac - It's a waterproof case to hold your phone so you can take awesome pics of yourself on the water.
Where Can I Paddle?
Deep Cove in North Vancouver
In Vancouver, we like to bring our boards to our favorite spot which is Deep Cove in North Vancouver. The waters at the cove are generally calm during times when there aren't a lot of speedboats on the water as well so it makes for an amazing experience as you trek along the coastline of the cove giving you a nice view of the beautiful waterfront homes on the shore and eventually reaching small islands like Grey Rocks.
Because of it's natural beauty and ideal water conditions, Deep Cove is one of the busiest places to rent kayaks, surf skis and paddleboards (or SUPs) so you must do it early. In the summer season, there is no such thing as walk-in rentals. The best time to book would be at least 1 or 2 days in advance, especially if you want to be out there on the weekends. Here is the Deep Cove Kayak website link.


Cate's Park in North Vancouver
If you do show up at Deep Cove and find that all the boards have been rented already, you can make a 5-minute drive to Cate's Park where they'll usually have more boards available. The area is not as pretty as Deep Cove and the beach where you launch is a bit rocky but worth the trip if you're in the area and have your heart set on doing some stand up paddleboarding. If you paddle long enough (one hour), you can even make your way to Deep Cove on your board but don't forget you have to paddle back 🙂

Rocky Point in Port Moody
For those in the Tri-cities area, Rocky Point in Mundy Park is another great place where you can rent. The view isn't as nice as the one you get at Deep Cove since the shorelines are lined with industrial plants but the wonderful thing that sets this place apart is the opportunity to see sea lions, lots of them, resting on the floating log piles. It's a wonderful sight.
Jericho Beach in the West End
Jericho Beach is known as a great launching area for surfers so you guessed it - the water will be choppy! Unlike the relatively calmer warmers of Deep Cove, expect to ride a few waves when you're out there. Here's the link to the Windsure where you can rent SUPs, skimboards or windsurfing boards.
Granville Island
Paddleboarding around Granville Island offers you a magnificent view of Vancouver's urban glass jungle and one of Vancouver's nost iconic landmarks - Science World, which was originally built for Expo 86. You'll face a lot of competition for the narrow waterways from the other kayaks, boats and yachts in this area so keep that in mind. The water quality there is also known to be less than desirable. Here are two places where you can rent from: Ecomarine & Vancouver Water Adventures

Alta Lake in Whistler
Alta Lake in Whistler is another favorite of ours. It's a 5 minute drive from Whistler Village so it makes a perfect daytime activity while you're up there in the summer season. There is a convenient dock for you to launch your board and the water by the beach is shallow and calm for swimming. Rentals can be made here.
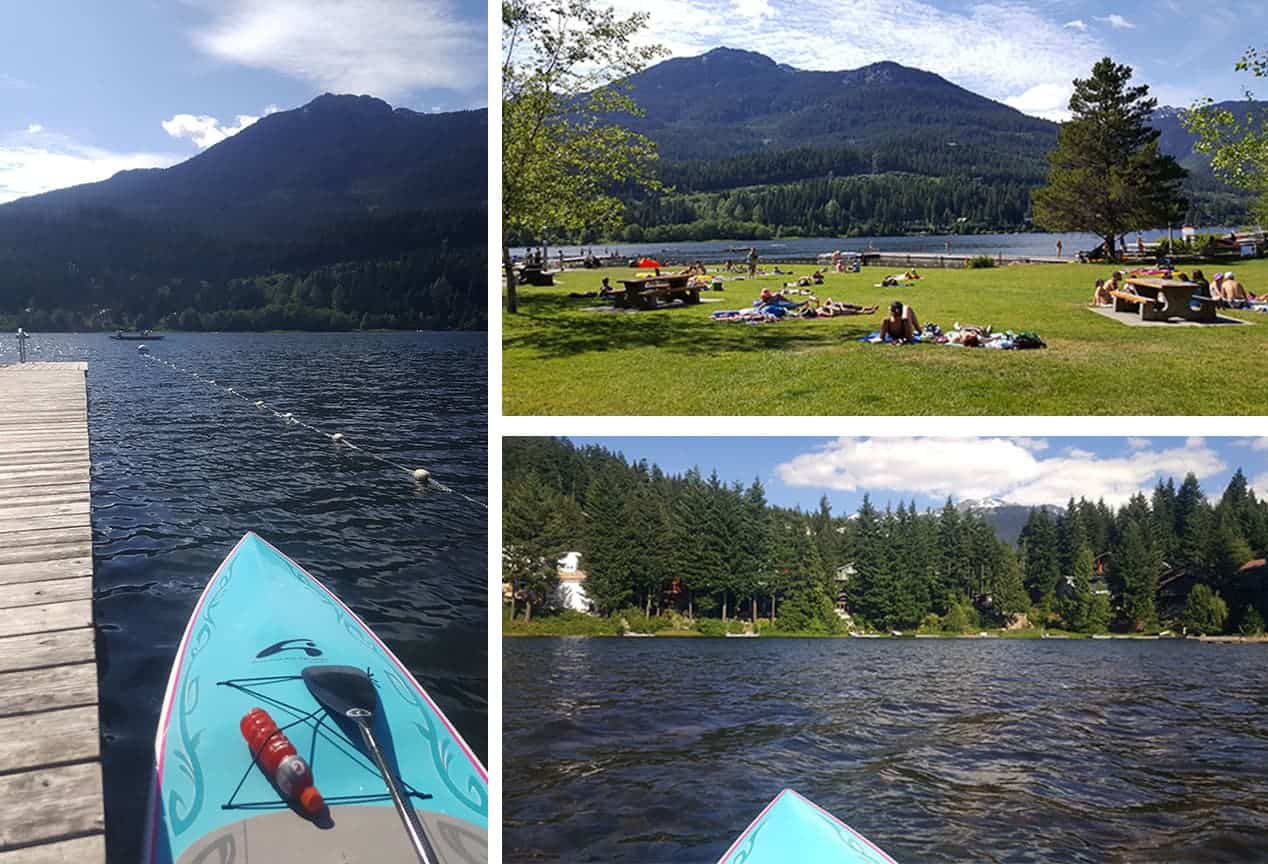
I hope you get a chance to try out paddle boarding this summer. One of my girlfriends always noted her desire to go out on the water with me one day. We finally made it happen this year and she's been hooked ever since. I think she's well on her way to getting her own board soon because she has quickly fallen in love with it, and I think you will too!
Click here to read the PART 2 of the summer activities I shared with Deborah Moore this morning.
XOXO,
Mimi
[srp post_limit='5' post_random='yes' category_include= 131 widget_title = 'Other Vancouver Life Moments']
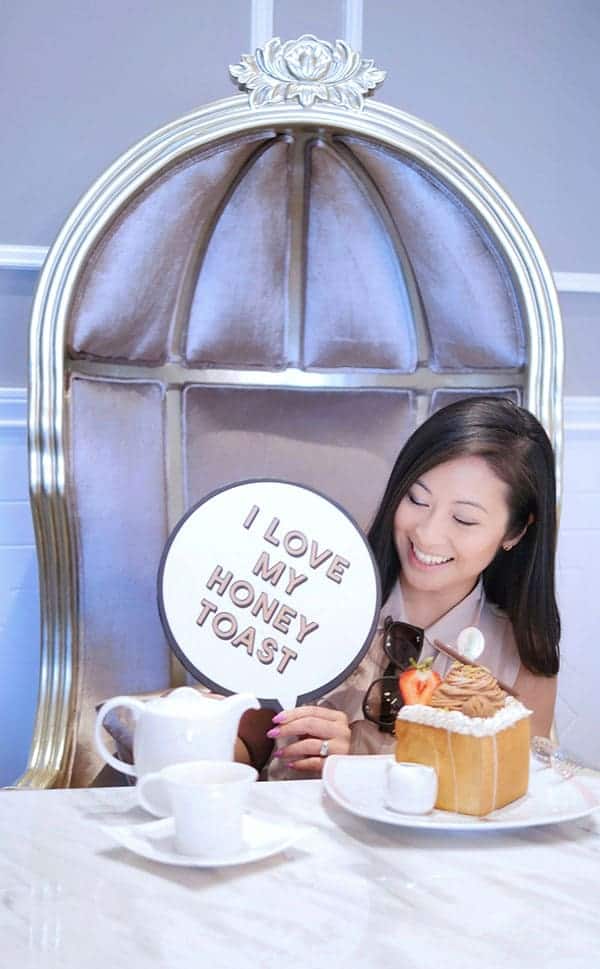
My "Dessert Weight"
It's July 3rd today and I want to share a little bit of my one-month weight loss journey that I started in the beginning of June. I tried to lose my "dessert weight" - basically the weight I think I've gained from eating desserts, and the weight from overeating stemming from the fear of being hungry later. It's extra weight that comes from unhealthy lifestyle habits so I was simply trying to lose those extra few pounds and nothing more since maintaining a healthy weight for my height and being satisfied at meal time is very important to me.
My Goal
My weight loss goal was to lose one pound per week at a total of seven pounds. It's nothing dramatic but I chose this goal because I wanted to lose it gradually and not have the process become so painful that it would make me fall off the wagon. I knew that developing sustainable lifestyle habits would help me more than reaching a weight loss goal only to gain it back afterwards when the actions taken to get there can't be repeated on an ongoing basis.
So far, it's been four weeks and I've lost five pounds. Here's what I did to lose my little "dessert weight".(Please note, I'm not a dietitian or trainer. These tips happened to be effective for me and my body type.)
1. Cutting Desserts
GASP! Oh I know.... how could I do that? That just goes against everything my blog and I stand for 🙂 Well, I'm not saying that I cut out all of it! I just happened to eat it at least 3 to 4 times a week. It was so easy since I'd buy a cake here and there plus there were days when I "had" to taste test my own desserts for the blog. See what I do for you all? Lol. I cut down my dessert intake down to 1 to 2 times a week. Sometimes I'd share it or if it was ice cream at home, I'd only take a few teaspoons full and stop. I was still able to find it satisfying since I was able to have a taste of it. In the past I was just mindlessly eating more than I needed just to "finish it".
2. Cutting Carbs
Instead of eating rice and noodles. During meal times at home, we'd pair a protein with quinoa or a salad. For salad dressing, I would use a tablespoon of peanut butter. I would also add some of the foods I liked to make it more enticing - strawberries, mandarins, dried cranberries to name just a few. I also cut down on eating out unless it was something I really wanted to splurge on - calories-wise. Of course, if I was eating with others, I would always partake in the food fun. If my dining companions wanted to eat something sinfully delicious, I would not kill the mood by saying no. For me, eating out with others should a fun and engaging activity where we can share a similar experience together. A splurge here and there is totally okay! Like this one I enjoyed with @maggiemei & @cici.w:
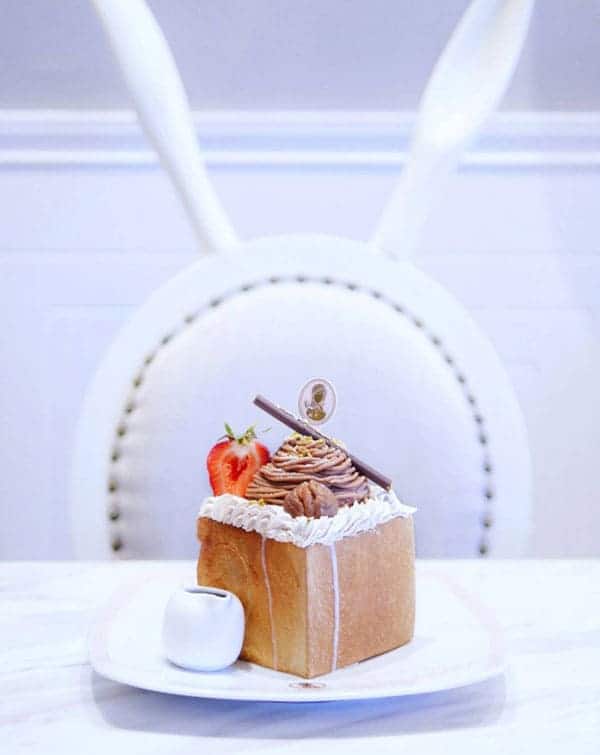
3. Increase the Exercise
I regularly exercised 1 to 2 times a week but obviously it wasn't offsetting enough of the calories I ate each day. So i increased it to every other day. Most of it consisted of thirty minutes on a stationary bike at home in front of the TV. Although, logistically, it was the easiest way to fit in physical activity, I actually preferred one to two hour walks in the city and paddle boarding, both of which I did once a week. "Fun" exercise is the best. It feels like I'm not exercising at all.
Btw. I actually hate exercising. I'm not one of those people who get a "high" after exercising. Those people are crazy 🙂 Which leads to my next point: I realized that exercise can only burn off so many calories, which is not a lot. Since my usual exercises were not high impact or for a long period of time, I wasn't burning a whole ton, maybe just about 150 to 200 calories each session, therefore, some restraint was needed to not snack out of boredom. I loved chocolates and when I read on the packaging that one piece was 80 calories, it was enough for me to put it down. It was easier for me not to eat it than it was for me to work it off.
4. Eating a smaller breakfast.
This is a shocker. My whole life I've been told to eat a big breakfast which was what I did until I started calorie counting (with My Fitness Pal) and realized I added 3-400 calories to my diet each day during a time when I wasn't even hungry. I seriously struggled to finish my breakfast most mornings. It usually consisted of a piece of fruit, half an avocado and a handful of nuts or an egg. For a drink, I would drink lemon water with grated ginger. After reading some more articles that supported eating a smaller breakfast, I decided to give it a try. Breakfast time became less of a chore and I literally felt the same as if I had eaten a bigger one. Some days I'd swap the lemon for honey or add an extra egg to my meal, providing more satiety if I was required to have a later lunch.
5. Conscious Eating
Paying attention to what I ate as described above and how much of it was a huge mind set shift. I used to overeat out of fear that I'd be hungry later so over time it was hard to gauge when I was actually full. I had to train myself to recognize when I've had enough food. The first few days of my diet, I did deliberately lower my portions to cut the calories and yes, it was hard! I did feel hungry afterwards but after about 3 days, my body seemed to adjust to the new smaller portions and I was able to get by with less to feel full. I now try to consciously eat slower so I can have time to develop that "full" feeling. I also eat till I'm just full, not stuffed. And to alleviate the fear of being hungry, I tell myself that I can always eat a snack later. Sometimes I do. Sometimes I don't. And if I do, its usually a glass of milk (UHT which I absolutely love) or a large piece of fruit that I actually enjoy so it becomes a "treat"- usually fruits like Dragon Fruit or watermelon.
And there you have it. I'm still about two pounds away from my goal and I noticed that losing weight is not linear for me. The first week, I quickly lost three pounds and my weight was stagnant for two weeks until last week when I lost another two. I'm happy I developed some new habits that I can use each and every day without feeling unnecessarily restricted. I'll make sure to keep you posted and please let me know if you have any tips or suggestions.
Now let's just enjoy our desserts 🙂
XOXO,
Mimi
[srp post_limit='5' post_random='yes' category_include= 131 widget_title = 'Other Vancouver Life Moments']
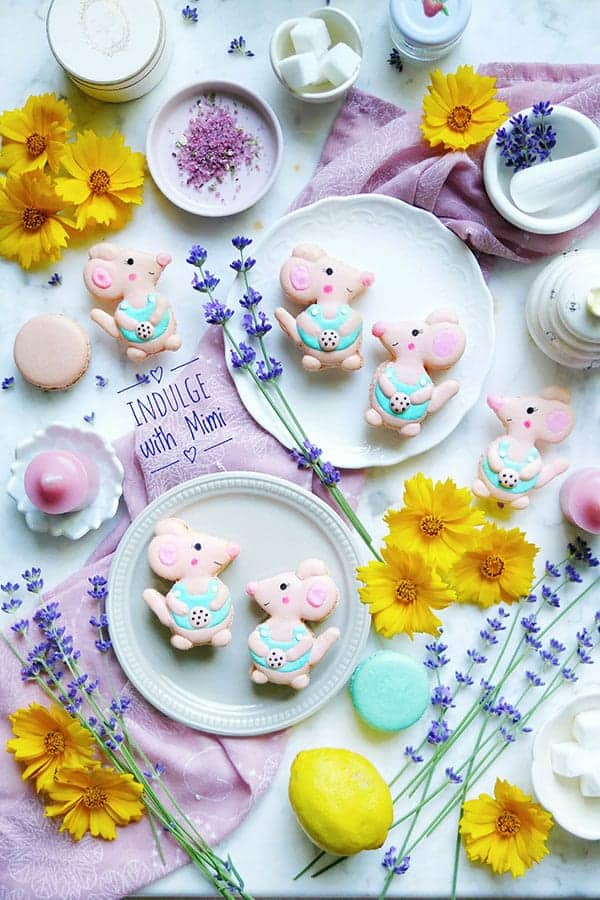
Canada 150
On Canada's 150th birthday today, I'd like to pay a little tribute to this country which I'm lucky to call my home. (Read about my Canada150 Afternoon Tea experience here.) I know you're probably thinking why I didn't post an accompanying photo of a maple leaf or other well-known images symbolic to the country. I'm sure for many of my Canadian-born friends and even my own husband, being Canadian is a part of them that is as natural as life itself. For me, when I look back on my life, there was a time when I wasn't a Canadian. Looking back on the beginning of my life here in Canada, I somehow remember this little mouse. I'll tell you why.
Are We in Canada Yet?
My family and I immigrated from Hong Kong after I finished kindergarten. I didn't know how to read or write much in Chinese and probably only knew a few words in English. I remember when we passed through customs, we had these immigration forms that we had to fill out and sign our names on. I asked Dad, how should I sign it? In English? (I was yet to have an English name.) Dad told me, "Oh, it's just a formality, you can sign it whichever way you like. In fact, you can even put a turtle on it if you want." And that's what I did. I drew a turtle on the signature line like any other a 6 year old would do. Dad laughed and I was none the wiser. In retrospect, that was probably an extra blank form Dad gave me to occupy my time since I was probably one annoying child to ride on the plane with. I remember asking him incessantly when we would finally be in Canada like children often do on long car or plane rides. And sometimes I'd overhear my family saying that we were going to Vancouver. I would protest and say, "but, I thought we were going to Canada!?" I don't know how many times Dad had to remind me that Vancouver is a city in Canada. I must not have understood the concept between cities and countries then. Okay, I was definitely not the brightest little one lol.

Learning English
When we started school, I didn't know much in English so I often had no idea what my teachers and classmates were talking about. I spent a lot of time watching and observing what everyone else did, that was the only way for me to make some sense of the world around me. We lived in a remote region of the province so there were no dedicated group classes for ESL students. Instead, my sister and I were often pulled out of our regular classes and taught English by a specially appointed teacher in the school library. We would learn English by reading children's books and one of them that I will always remember is, "If You Give a Mouse a Cookie." It's about the adventures of one child who tries to give a mouse a cookie only to find that he could not be satisfied until a series of other requests were met. I really loved reading that book with my teacher. She was a wonderful patient woman along with all our other teachers and the principal.
Even with all the support and special attention, I was still unable to keep up with my classmates so after grade 2, my teachers told my parents that it would be best to keep me behind to repeat the grade. I don't remember much else from that time except that I loved books and I would read a lot on my own time. I took out a lot of books from the library and read all the English words in them, often times not understanding what I was reading. They were just words that I didn't know but gradually, with the help of structured lessons, playing with my Canadian friends and just constant reading, they did start to make sense. At the end of grade 2, my teachers gave me a test to see if I could go back into the actual grade I should be in the next year had I not failed, which was grade 4. I actually ended up with a Grade 5 competency level and was allowed to skip two grades.
Looking back, I really appreciated the special attention we received at school since we were able to learn English that much faster. It was also a blessing to be surrounded by so many kind Canadian friends who only spoke English. That also contributed to how quickly we were able to learn and assimilate into Canadian life. I am so grateful for all the wonderful and welcoming Canadian people who were a part of our lives in our formative years in Canada. After university, I decided to stay and work in Canada even though many of my friends were moving back to Asia to pursue their careers. I knew I really loved Canada and wanted to stay and build a life here. It's a real privilege to live in a country where we have the right to vote, speak freely and have the confidence to pursue our wildest dreams. I don't take that for granted.
Canadian Life
To all my fellow Canadian friends, if you ever find yourself becoming impatient with someone who doesn't speak English, I hope you'll be reminded that just because someone doesn't speak English today, that doesn't necessarily mean they won't tomorrow. They may be trying their hardest and every time they encounter someone who converses patiently and kindly with them, their confidence will grow, along with their love for their newly adopted country. And for all my fellow immigrant friends, I commend you for taking a big leap of faith for leaving behind everything you know to start a new life in a new country, one that is presumably offering you a better life than the one you left behind, so it's important to put your best foot forward and embrace your newly adopted country and it's culture. Canadian society is one of the most multi-cultural and tolerant in the world but it's a two-way street. Along with contributing our own special ethnic diversity into the mix, we also have to learn (and use) one of the two official languages (English and French) and to respect local customs. In doing so, you'll open up doors to a new life with many great Canadians who are waiting to make a new friend just like you. So don't give up, keep learning and keep reading. In my case, I learnt that if you give a mouse a cookie... you take one step closer towards becoming a Canadian.
Happy Canada Day!
XOXO,
Mimi
Ingredients
Supplies
- Kitchenaid stand mixer or handheld mixer and mixing bowl
- food processor (if making own almond flour)
- spatula
- heavy duty baking pan
- silicone SILPAT mat or parchment paper
- gel food colours in brown, pink & blue
- fine piping tip (ex. Wilton 4)
- medium piping tip (ex. Wilton 10)
- piping bag
- white confetti sprinkles
- black sprinkles
- edible pen
- tweezers
Brown Macaron Batter
- 85 grams almond flour
- 85 grams icing sugar/confectioner's sugar
- 65 grams egg whites
- 58 grams granulated sugar
- 1/4 tsp cream of tartar
- 1 drop brown gel color (Warm Brown by Americolor)
Pink Macaron Batter
- 65 grams almond flour
- 65 grams icing sugar/confectioner's sugar
- 50 grams egg whites
- 45 grams granulated sugar
- 1/8 tsp cream of tartar
- 1/2 drop pink gel color (Deep Pink by Americolor)
Blue Macaron Batter
- 65 grams almond flour
- 65 grams icing sugar/confectioner's sugar
- 50 grams egg whites
- 45 grams granulated sugar
- 1/8 tsp cream of tartar
- 1/2 drop blue macaron batter ( Turquoise by Americolor)
Instructions
Basic Macaron Shell
- Set aged egg whites out at room temperature.
- Pulse almond flour and icing sugar together in a food processor to further break down any large pieces of almond flour.
- Sift dry ingredients: almond flour, icing sugar. Discard big pieces of almond that can't be sifted.
- If you are new to making macarons, please read the instructions to my BEST MACARON RECIPE before attempting to follow the rest of the instructions since it is condensed for the advanced macaron baker.
- With the balloon whisk attached, whip the room temperature egg whites on low-medium speed.
- Add cream of tartar when it becomes foamy.
- Turn up the speed to medium.
- Once the whisk starts to leave tracks in the egg whites, add sugar a little at a time.
- Turn the speed up to medium-high and whip until firm peaks, stop mixer and add gel food color if desired. Continue whipping on medium-high until stiff peaks.
- Fold the dry mix and meringue together until the batter becomes a "lava" or honey-like consistency.
- Transfer batter into a piping bag fitted with a round piping tip.
- On parchment paper or silicone mats, pipe out round shaped macarons.
- Rap the tray hard on the counter to remove any excess air bubbles. Use a toothpick to pop any remaining bubbles.
- Wait until the shells become completely dry before baking.
- Bake at 325F for 12-14 minutes. Every oven is different, you may need to adjust your own temperature settings. Please read How to Use Your Home Oven Properly for Baking Macarons if you are unsure.
- Macarons are done when the foot doesn't push back and the tops don't move when you wiggle it.
- Once baked, let cool completely before removing from the baking mat/parchment paper.
Nutrition Information
Serving Size
1 grams
Amount Per Serving Unsaturated Fat 0g
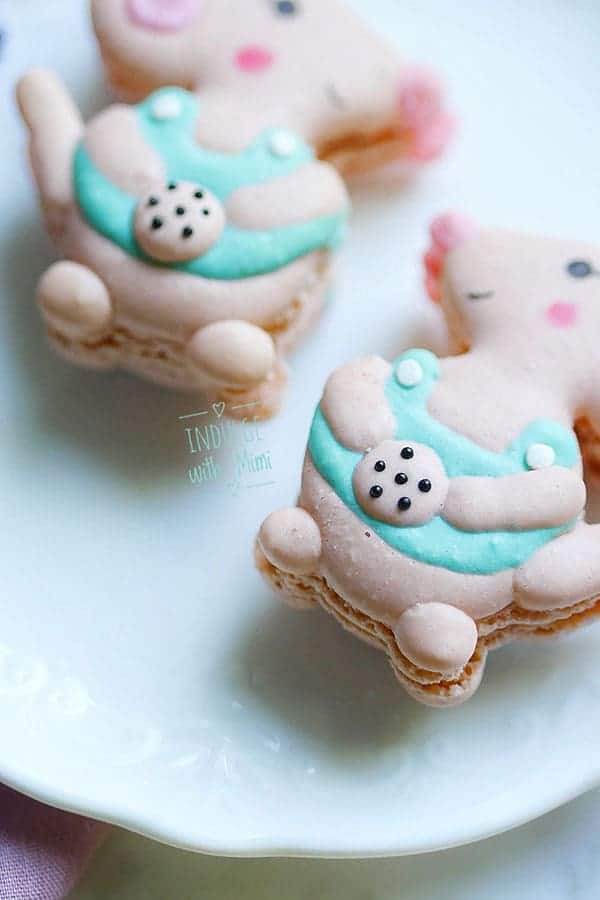
Mouse & Milk Jug Macaron Template
Available for download for Newsletter Subscribers. Just sign up for the newsletter and wait for the double opt-in confirmation email. Confirm your subscription and you'll be sent the password to the member's only area.


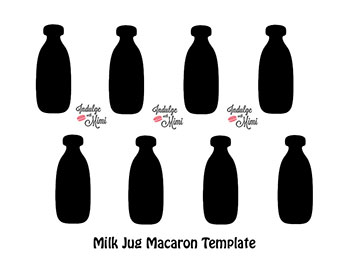
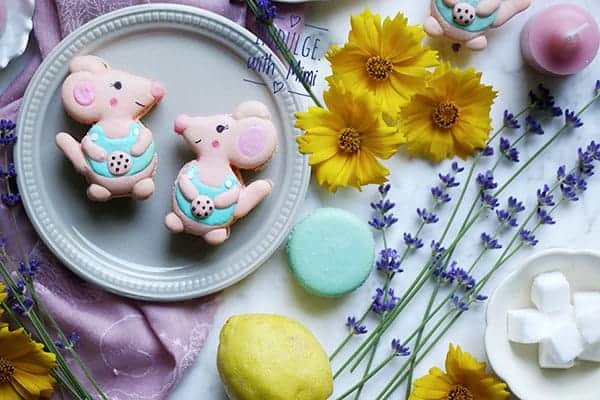
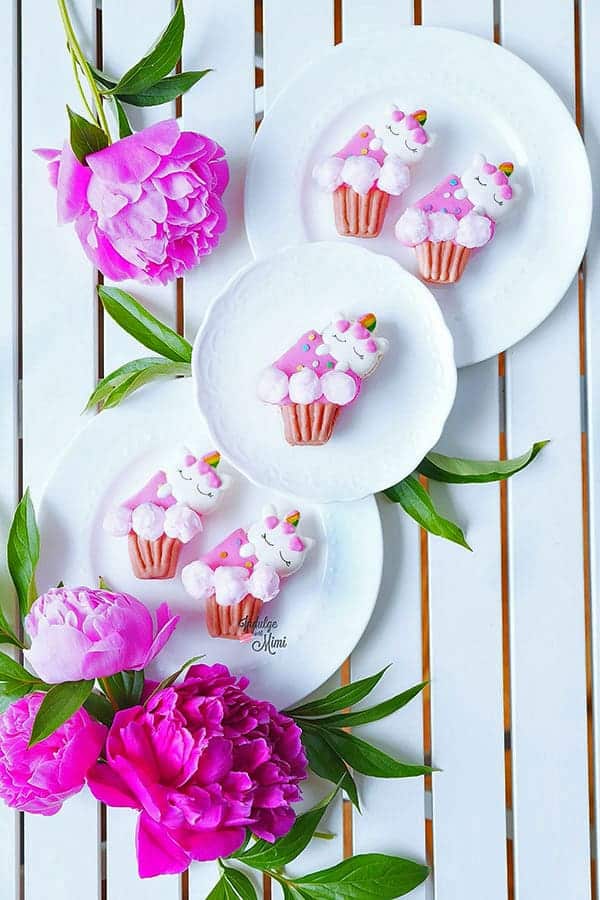
Unicorn macarons are definitely good but unicorns with rainbow horns hanging onto a cupcake topped with cotton candy are GREAT! Ever since I created Tri-color Unicorn Macarons over the holidays, I've been thinking of new ways to incorporate this magical creature into my creations. Another project I did was the Double Unicorn Macarons which was a collaboration with Christina's Cupcakes |(see it here) . Today's project is unicorns hanging onto one of the most photogenic treats out there - sweet pink cupcakes! I think it has everything I ever wanted in Macaron Art.
How to Prepare Multiple Batter Colors
You'll need to prepare three sets of batters using my Best French Macaron Recipe. Pay attention to the ingredients for the pink batter, you'll need a little bit more of it. For macaron art, I like to prepare different sets of batter separately instead of dividing them up into small amounts and folding in the color. I think there is too much room for mistakes that way. Over folding is a big concern since you're adding colour to the finished meringue and not during the whipping process. I prefer to prepare different batters the longer and more reliable way. After all, it's macaron art.It requires patience to realize the vision. Plus, you will realize very quickly that there will be much more tears in the kitchen when you've spent lots of precious time piping your little works of art only to find that they don't bake properly.
I always have everything weighed out and ready to go. As soon as I have added the gel colour and finish whipping up a batch of meringue to stiff peaks, I will start folding it along with the almond flour. During this folding time, I already have another batch of meringue mixing in the Kitchenaid Mixer. It helps to work pretty quickly so the folded batter doesn't have to wait too long and dry out. To further prevent this, I transfer the batter into the piping bag. And of course, it helps to have a stand mixer and several Kitchenaid bowls at your disposal.
So that's how I do it and that's one of the ways I found to keep me sane while making macaron art 🙂
My Preferred Method
- have everything weighed out and ready to be used.
- Whip egg whites and add cream of tartar and sugar at the appropriate stages. After adding gel colour to the meringue and it has reached stiff peaks, stop the Kitchenaid stand mixer, take out the bowl and start whipping another bowl of aged egg whites.
- Start folding the meringue with the almound flour.
- All the while, pay attention to the second batch of meringue that is currently being whipped. Continue to add cream of tartar and granulated sugar as per recipe instructions.
- Go back to your folding whenever you can. Once you've folded to the honey or lava stage, transfer the batter into a piping bag to prevent it from drying out.
- The second batch of meringue should be ready to be used now. Continue steps 2 to 5 until you've created all the colors you need.
A Simpler Method
A simpler method to creating multiple colored macaron batters is to make one big batch of meringue and then split it up amongst bowls filled with equally weighted almond flour. Please read my brand new tutorial on How to Create Multiple Colored Macaron Batters.

Adding Cotton Candy
The cotton candy is optional. I added it because I had it on hand from my afternoon experience at Trump Hotels and thought it was a great opportunity to experiment with it. It's so fluffy and make the design really Pop! However, please note it needs to be added on immediately before consumption since they deflate within half an hour.
Video & Template
I've included a video to show you the steps in piping this character. Pipe each part according to the steps shown since you'll need to wait until certain parts dry up before adding more batter to it.
As for the template, make sure you print out BOTH of the unicorn cupcake templates. It's an assymetrical design so that's the way to make both the top and bottom shell match when they're assembled. This situation actually arose with one of the readers who used my Over the Rainbow Macarons, the clouds weren't matching up after baking because they had missed reading the instructions to print out BOTH templates.
Giveaway
Lastly, I'm going to be drawing a winner in four days for my latest Giveaway. There's still time to enter. Get the instructions here.
Good luck!
XOXO,
Mimi
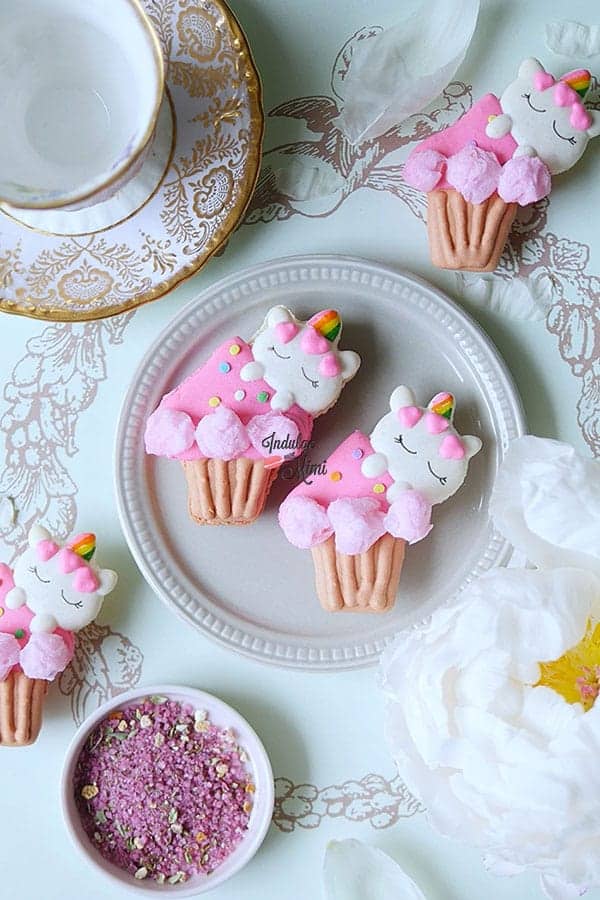
Piping Step By Step
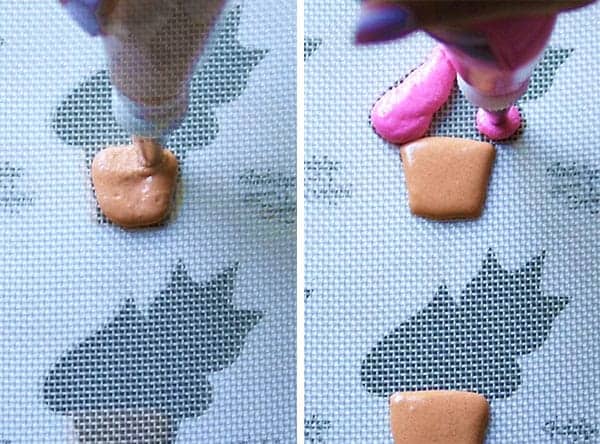
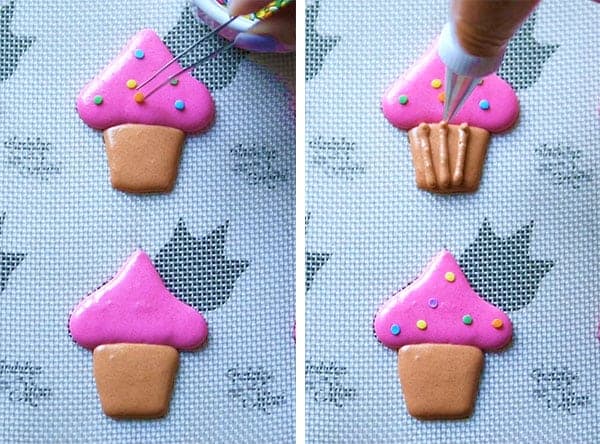

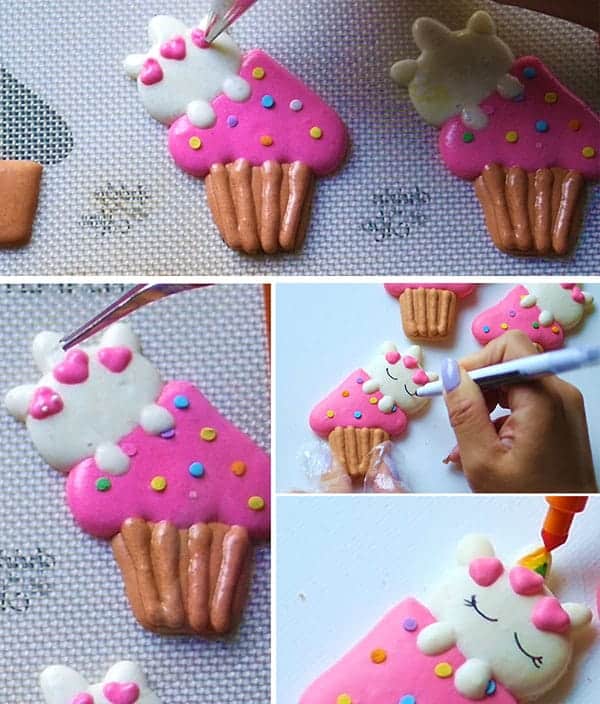

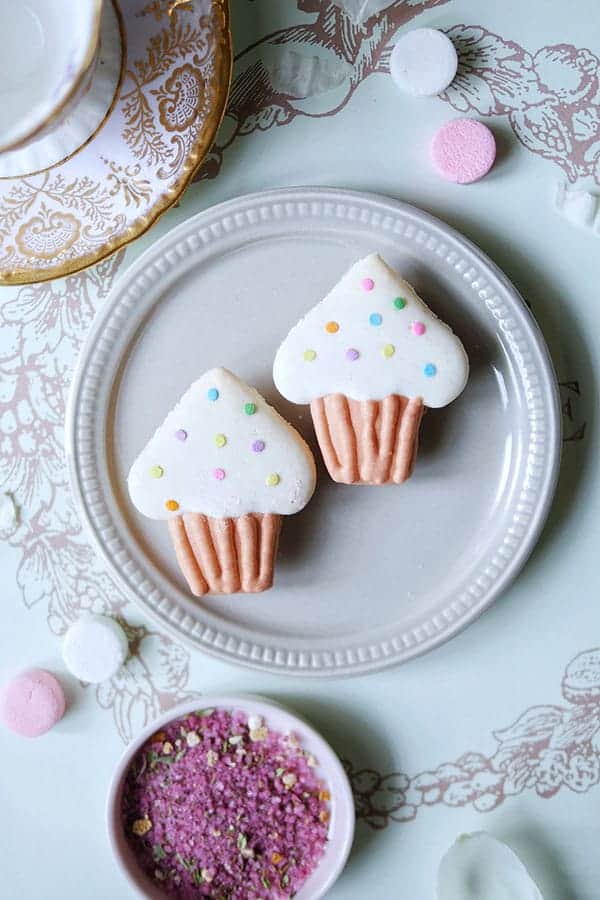
Unicorn on Cupcake Macaron Templates
Sign up for the newsletter, wait for the confirmation email, confirm your subscription and you will be sent the password to exclusive templates for subscribers only.


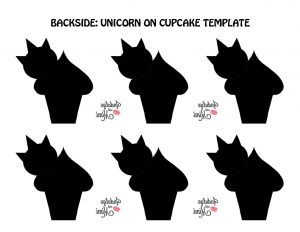
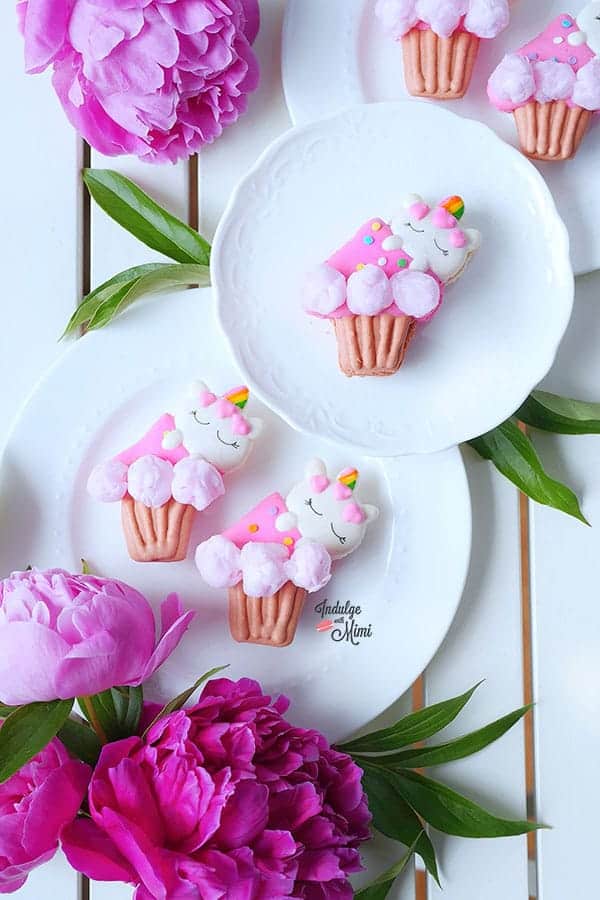

Prep Time 1 hour 30 minutes
Cook Time 15 minutes
Rest Time 30 minutes
Total Time 2 hours 15 minutes
Ingredients
Supplies
- Kitchenaid stand mixer or handheld mixer and a mixing bowl
- food processor (if making own almond flour)
- spatula
- heavy duty baking pan
- silicone SILPAT mat or parchment paper
- gel food colours
- fine piping tip (ex. Wilton 4)
- medium piping tip (ex. Wilton 10)
- piping bag
- rainbow confetti sprinkles
- edible pen
- tweezers
White Macaron Batter
- 65 grams almond flour
- 65 grams icing sugar/confectioner's sugar
- 50 grams egg whites, aged
- 45 grams castor sugar*
- 1/8 tsp cream of tartar
Pink Macaron Batter
- 85 grams almond flour
- 85 grams icing sugar/confectioner's sugar
- 65 grams egg whites, aged
- 58 grams castor sugar
- 1/4 grams cream of tartar
- 1 drop pink gel colour (Deep Pink by Americolor)
Brown Macaron Batter
- 65 grams almond flour
- 65 grams icing sugar/confectioner's sugar
- 50 grams egg whites, aged
- 45 grams castor sugar
- 1/8 grams cream of tartar
- 1 drop brown gel colour (Warm Brown by Americolor)
Small Batch Edible Glue
- 20 grams icing sugar
- 1 1/2 tsp. of meringue powder
- water in a spritzer bottle
Instructions
Basic Macaron Shell
- Set aged egg whites out at room temperature.
- Pulse almond flour and icing sugar together in a food processor to further break down any large pieces of almond flour.
- Sift dry ingredients: almond flour, icing sugar. Discard big pieces of almond that can't be sifted.
- If you are new to baking macarons, please read the instructions to my BEST MACARON RECIPE before attempting to follow the rest of the instructions since it is condensed for the advanced macaron baker.
- With the balloon whisk attached, whip the room temperature egg whites on low-medium speed.
- Add cream of tartar when it becomes foamy.
- Turn up the speed to medium.
- Once the whisk starts to leave tracks in the egg whites, add sugar a little at a time.
- Turn the speed up to medium-high and whip until firm peaks, stop mixer and
add gel food color if desired. Continue whipping on medium-high until
stiff peaks. - Fold the dry mix and meringue together until the batter becomes a "lava" or honey-like consistency.
- Transfer batter into a piping bag fitted with a round piping tip.
- On parchment paper or silicone mats, pipe out round shaped macarons.
- Rap the tray hard on the counter to remove any excess air bubbles. Use a toothpick to pop any remaining bubbles.
- Wait until the shells become completely dry before baking.
- Bake at 325F for 12-14 minutes. Every oven is different, you may need to
adjust your own temperature settings. Please read How to Use Your Home
Oven Properly for Baking Macarons if you are unsure. - Macarons are done when the foot doesn't push back and the tops don't move when you wiggle it.
- Once baked, let cool completely before removing from the baking mat/parchment paper.
Small Batch Royal Icing
- Combine the dry ingredients in a glass bowl.
- Spritz the water onto the dry ingredients a little at a time and then blend everything together until you reach a thick consistency. If it's too runny, add more sugar. A spritzer is great for controlling the amount of water you are adding at one time.
Notes
Castor sugar is also known as extra fine granulated sugar or berry
sugar. Granulated sugar can be used by castor sugar is preferable.
Nutrition Information
Yield
18 Serving Size
1 grams
Amount Per Serving Calories 231 Total Fat 6g Saturated Fat 0g Trans Fat 0g Unsaturated Fat 5g Cholesterol 0mg Sodium 16mg Carbohydrates 43g Fiber 1g Sugar 40g Protein 4g
This information is provided as a courtesy and is an estimate only. This information comes from online calculators. Although indulgewithmimi.com attempts to provide accurate nutritional information, these figures are only estimates.
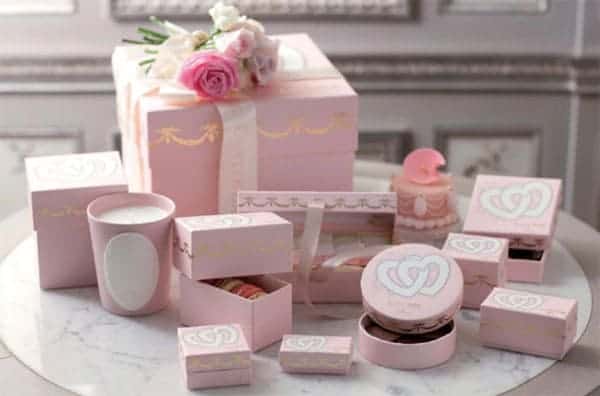
Every bride hopes her wedding will make a beautiful impression on her guests on her big day and what's more beautiful than delicious Laduree treats wrapped in the most elegant packaging? The pretty pastel boxes beautify any wedding table setting and they also make wonderful keepsakes for your guests. This is truly one wedding favor which guests will treasure and keep. Each time they see them on their dresser drawer or mantle they will surely be reminded of your special day.
Here are a selection of items which would make great wedding favours, wedding gifts or bridal party goodies. With the exception of the macarons (due to their fragility), all of these items can be ordered directly from the store for shipping anywhere in Canada.
Note: 2017 pricing is shown and is subject to change
Tel: (604) 336-3030
Address: 1141 Robson St, Vancouver, BC V6E 1B5
E: [email protected]
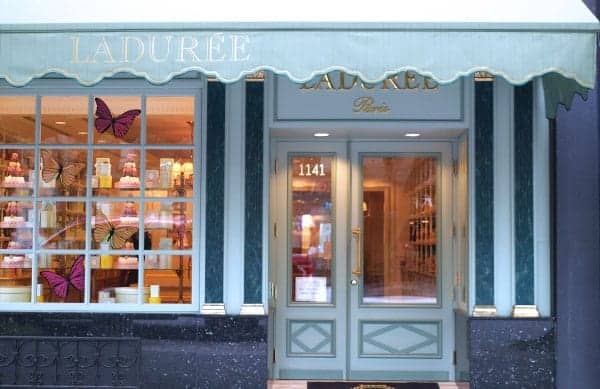
Macaron Wedding or Party Favours
An obvious choice for wedding or party favours are Laduree's world-famous macarons. They are flown in from France twice a week and at least 9 permanent flavours are available at any given time: chocolate, pistachio, salted caramel, vanilla, rose petal, orange blossom, coffee, lemon and liquorice. Special seasonal flavours are also offered depending on availability.
To hold these favours, Laduree also offers their popular collectors boxes in smaller versions which fit from one, two, three or four macarons - just so adorable! Durable and sturdy, your guests can reuse them as jewelry or trinket boxes. There are both wedding and baby shower themed boxes and of course, the signature Prestige box with the iconic Laduree logo and gold details. And for those who prefer to let the macarons take centre stage, soft disposable boxes are offered for a lower price.
Macaron Favours in a Classic Prestige Collector Box (minimum order of 20 pc.)
1 macaron in a collector box (by special order, available in green or floral)
2 macarons in a Prestige collector box $12 (available in green, grey or pink)
Macaron Favours in a Heart Collector Box (minimum order of 20 pc.)
2 macarons in a Heart collector box $15
4 macarons in a Heart collector box $22
Macaron Favours in a Baby Shower Collector Box (minimum order of 20 pc.)
4 macarons in a collector box $20
Macaron Favours in a Soft Box (minimum order of 30 pc.)
1 macaron in a soft box $5
2 macarons in a soft box $8.50
3 macarons in a soft box $11
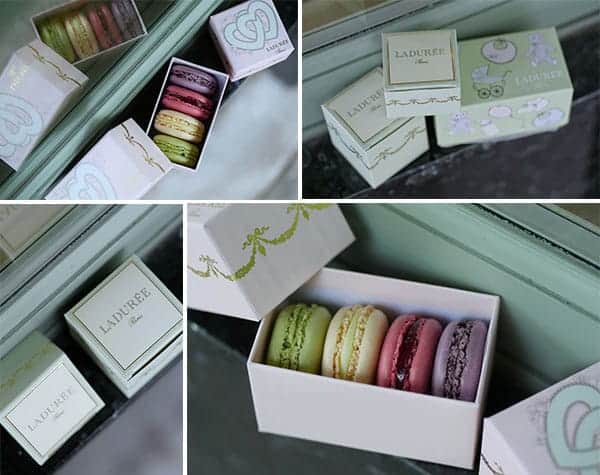
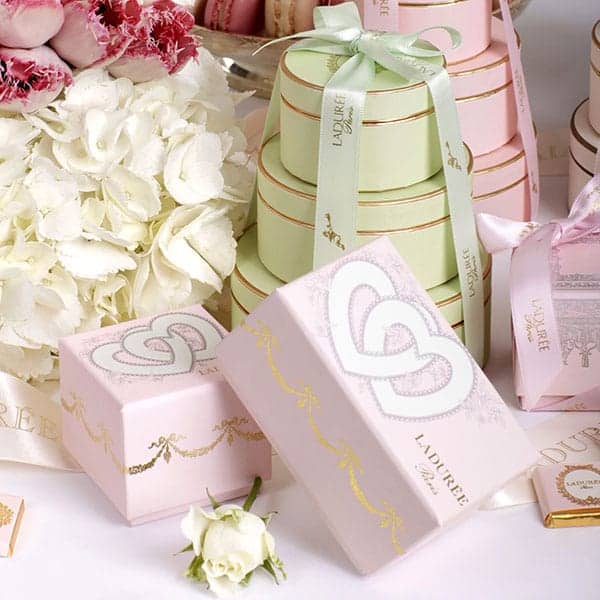
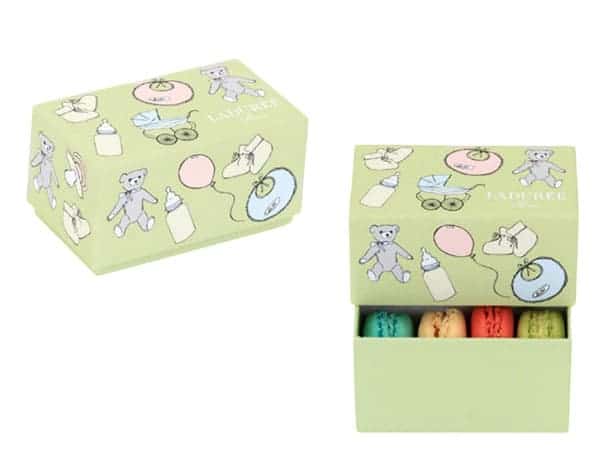
Sugared Almonds
These gorgeous sugared almonds are coated in delightful pastel shades which match their respective box colors. They have a hard outer shell so they are great on hot summer wedding days. A good alternative to macarons or chocolates if you're concerned about them melting in the heat. They look stunning stacked as a whole set but are also sold separately for those who prefer to choose a certain size. Available in soft pink, ivory and mint green.
Sugared Almonds in Triangular Soft Box
52 grams, 18-20 almonds $15
Sugared Almonds in Circular Collectors Box
52 grams, 18-20 almonds $18
112 grams, 30-32 almonds $26
145 grams 40-42 almonds $40
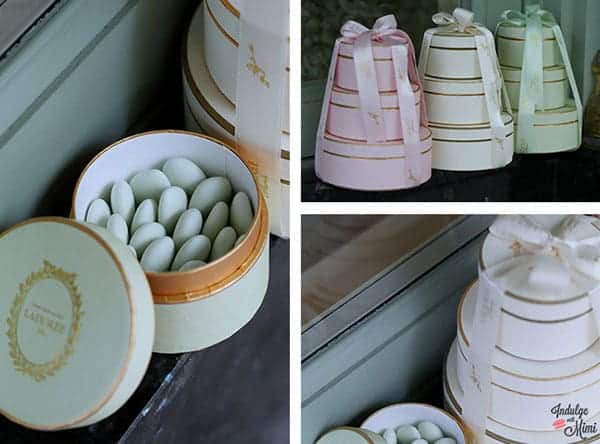

Ice Creams
A luxurious dessert idea at the reception, these adorable ice creams in a domed to-go cup is adorned with a macaron shell. Flavours include: pistachio, raspberry, lemon, chocolate, strawberry, rose, vanilla, coffee, caramel. The rose and pistachio flavours are so unique and simply divine. Please note that to-go versions may have limited flavours available depending on the day, allow ample time for ordering.
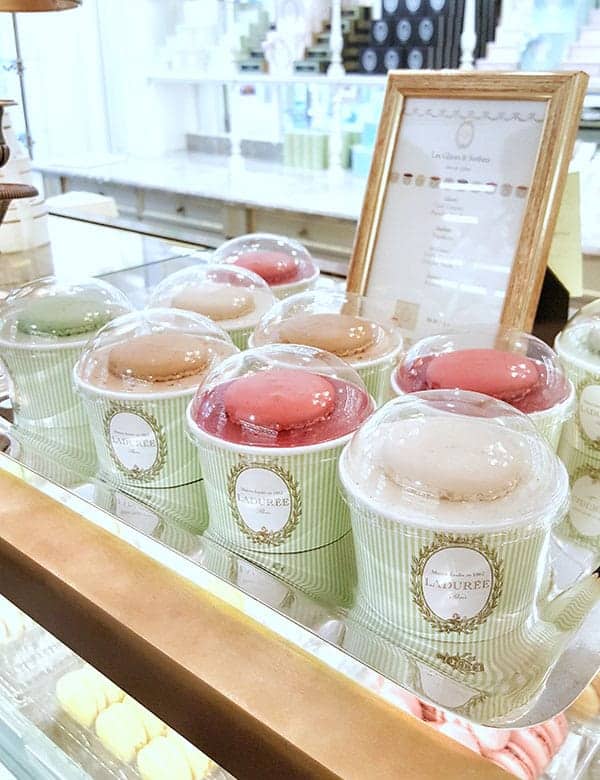
Chocolates
These Laduree chocolates can be devoured over several sittings since they come individually wrapped in boxes of 14 , 28 or 42. Available in dark or milk chocolate and presented in a pink or green box.
Box of 14 chocolates $12
Box of 28 chocolates $18.90
Box of 42 chocolates $26
Luxurious Candies
This set of luxurious candies comes in an individually packaged trio which can be given separately. Two different flavour sets are available: mimosa, rose and violet OR cherry blossom, hibiscus and poppy.
Set of 3 $45
Laduree Teas
Laduree teas make for a great thank-you gift for bridal party members and other organizers. A good alternative for those with don't have a sweet tooth and great for travelling since they won't melt and can be easily kept in a suitcase. Presented in a durable classic collectors box, it will be a reminder of your affection every time it's taken. Flavours include: cheri, almond, caramel, earl grey, eugenie, jardin bleu royal, josephine, lapsang souchong, marie-antoinette, mathilde, melange laduree, mille et une nuits, othello, roi soleil, rose, vanilla, violet, darjeeling and senchayamato.
125 grams loose tea $32
45 grams tea bags $21
Macarons in Classic Gift Boxes
These regular sized collectors boxes hold six macarons and up. It's another thoughtful gift idea for your bridal party. There's always a special limited edition theme in store which makes these boxes highly collectible, such a great way to remember a special moment in time.
Macarons in a classical Napoleon Collectors Box
6 macarons in a Napoleon Collectors Box $26 (available in pink, purple, green or black)
12 macarons in a Napoleon Collectors Box $50 (available only in green)
Macarons in a classical Arabesque & Pamipille Collectors Box
6 macarons in a Arabesque Collectors Box $30
8 macarons in a Arabesque Collectors Box $32
8 macarons in a Pampille Collectors Box $32
Macarons in Prestige Collectors Box
24 macarons in a Prestige Collectors Box $85
30 macarons in a Prestige Collectors Box $105
40 macarons in a Prestige Collectors Box $135
54 30 macarons in a Prestige Collectors Box $180
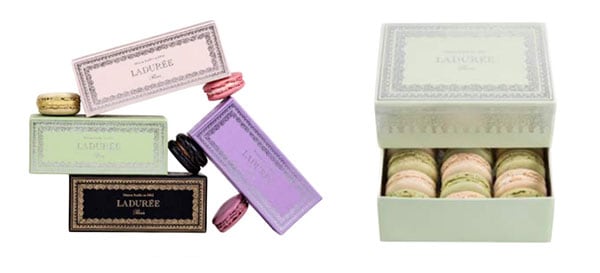
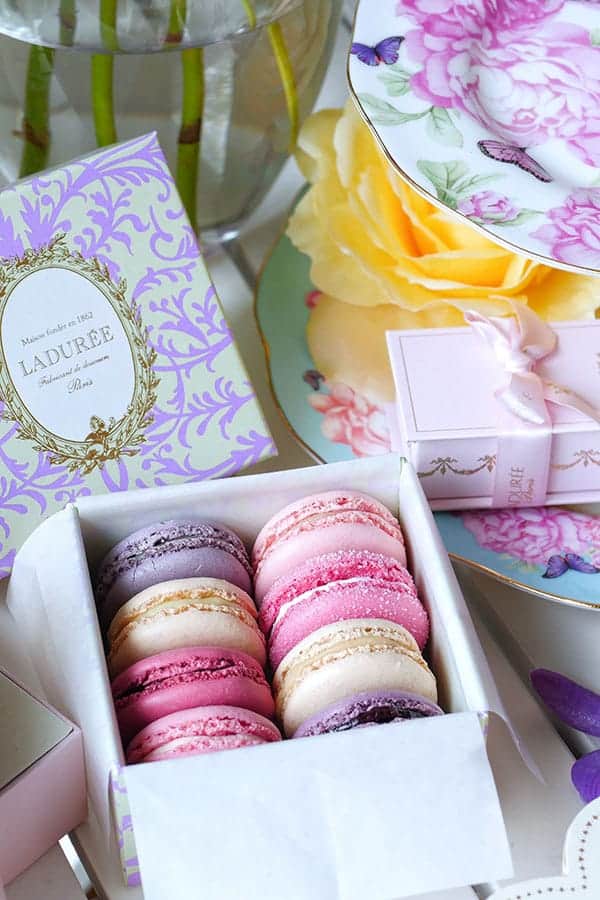
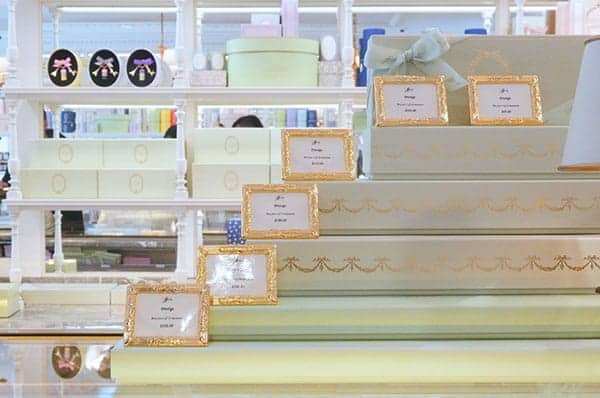
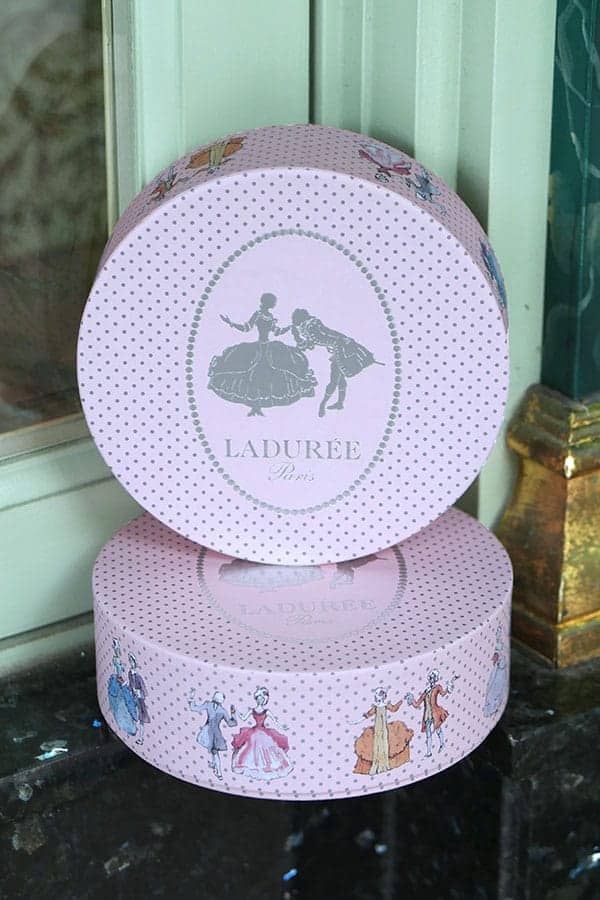
Surprise Macarons Inside Chocolates
These very unique chocolates comes in four specially selected flavours: dark chocolate violet, dark chocolate pistachio, milk chocolate rose and milk chocolate raspberry . Each chocolate is filled with a flavoured cream and a macaron shell!
Box of 4 chocolates $21
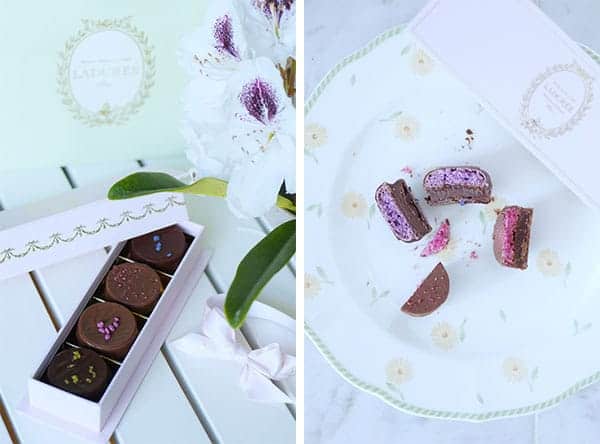
Laduree Hampers
And for wedding guests looking for a bridal or wedding gift, how about this beautiful hamper which you can personally build yourself by selecting a minimum of four items. Just imagine how delighted the happy couple would be when they treat themselves to these luxurious Laduree goodies after a long wedding planning season. The large and beautiful hamper boxes are sold exclusively as a gift set, making it all the more special.
Choose a minimum of four items and add $60 for the box.
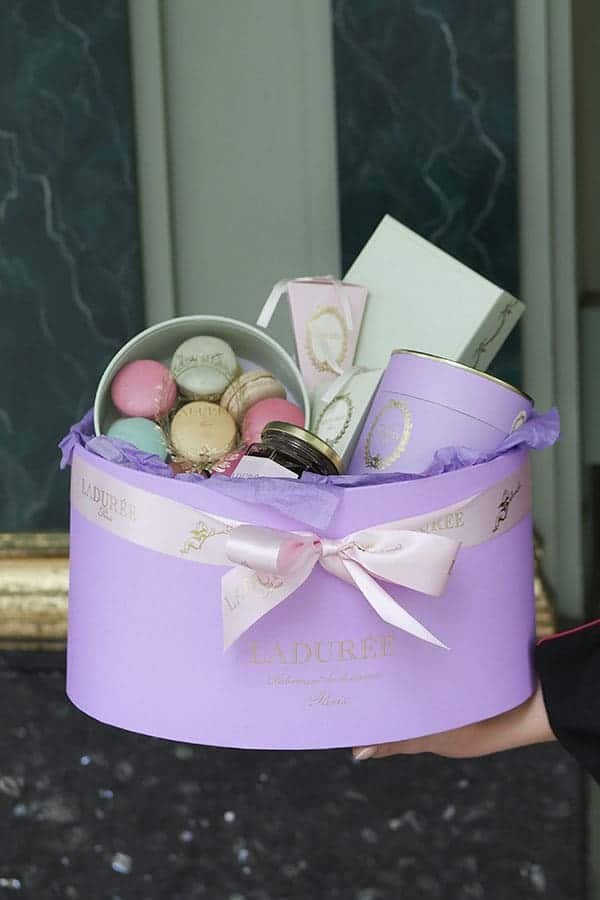
Laduree Treasure Chest
Perhaps the most ultimate gift of luxury from Laduree is this enormous treasure chest containing 200 macarons on five golden trays. It's a gift that will surely be prominently displayed and shown off with appreciation. On the other hand, don't wait to be gifted, make this a stunning piece on your sweets table and impress your guests.
Treasure chest containing 200 macarons: $900
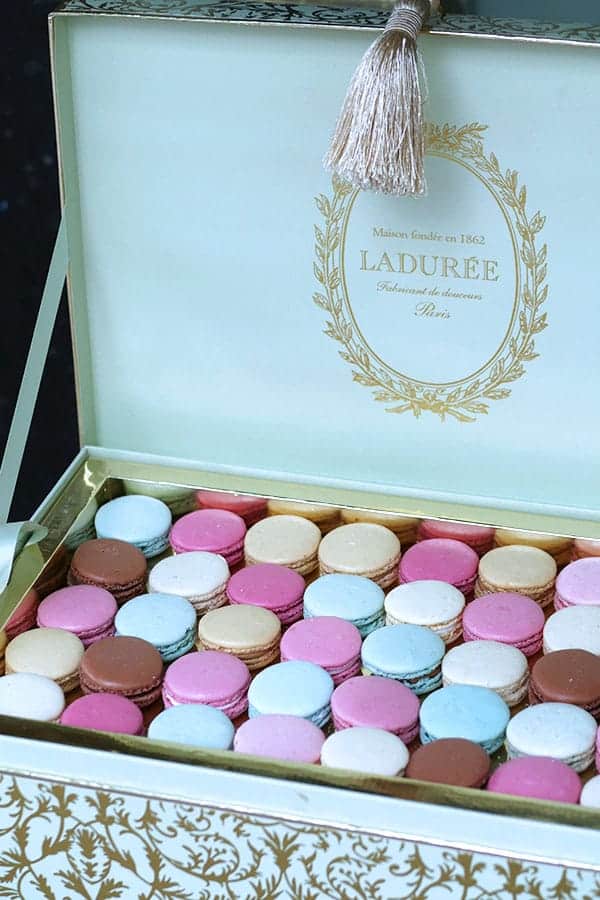
Bridal Party Ideas
Bridal parties are always a wonderful excuse for ladies to get together and do something feminine and girly together, and with tea parties being at the top of the list, here are some ideas for you to put together your own little elegant soiree:
Tea Cakes
These tea cakes are packaged and ready for you to take away if you're planning on throwing a shower at home. They come in loaves or individually wrapped by slice.
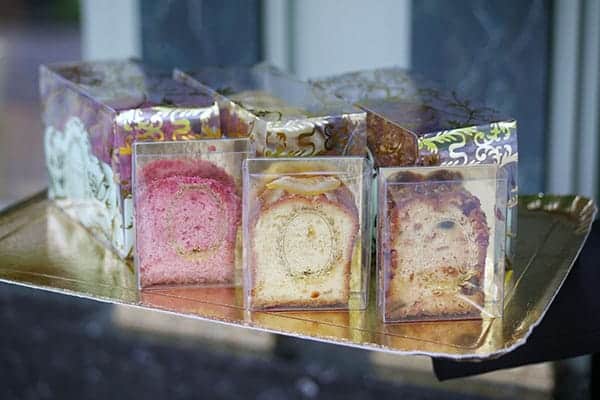
Macaron Trays
When you're planning a party, you already have a lot on your plate like decorating and taking care of the guest lists. The last thing you want to worry about is baking macarons too. Let Laduree take the stress away with one of their many macaron trays and reception gift boxes. The macarons are laid flat for a beautiful presentation.
Macarons per piece $3.15
Macarons on a Golden Tray 24 Macarons $80
Macarons on a Golden Tray 54 Macarons $180
Reception Gift Box 40 Macarons $142
Reception Gift Box 55 Macarons $195
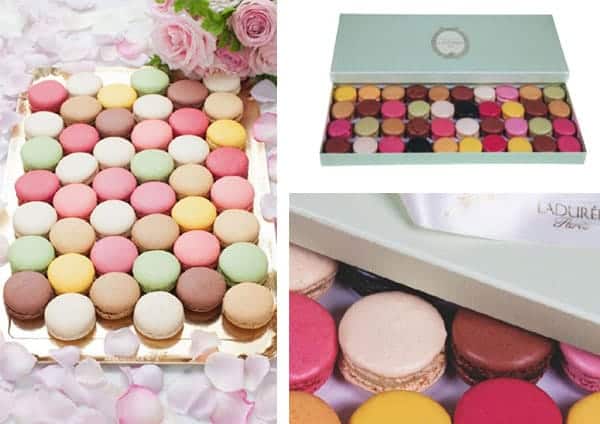
Signature Mini-Macaron Pyramids
Laduree's signature macaron towers evoke the Parisian glamour and elegance that Marie Antoinette would approve of. These beautiful pyramids are offered in a variety of sizes, and are made with a base and cone decorated with an ivory royal icing. Allow at least one day for the chefs to assemble it. It is such a beautiful piece for any dessert table or as a centre piece at the wedding reception.
Mini Pyramids, around 20 macarons $125
1/2 Size, around 40 macarons $195
Size 1, around 90 macarons $450
Size 2, around 130 macarons (by special order)
Size 3, around 150 macarons (by special order)
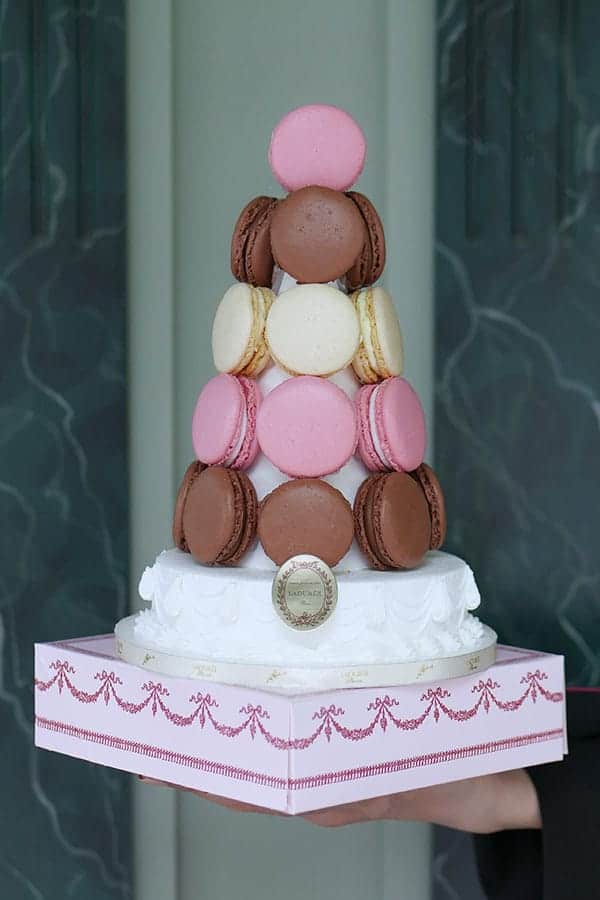
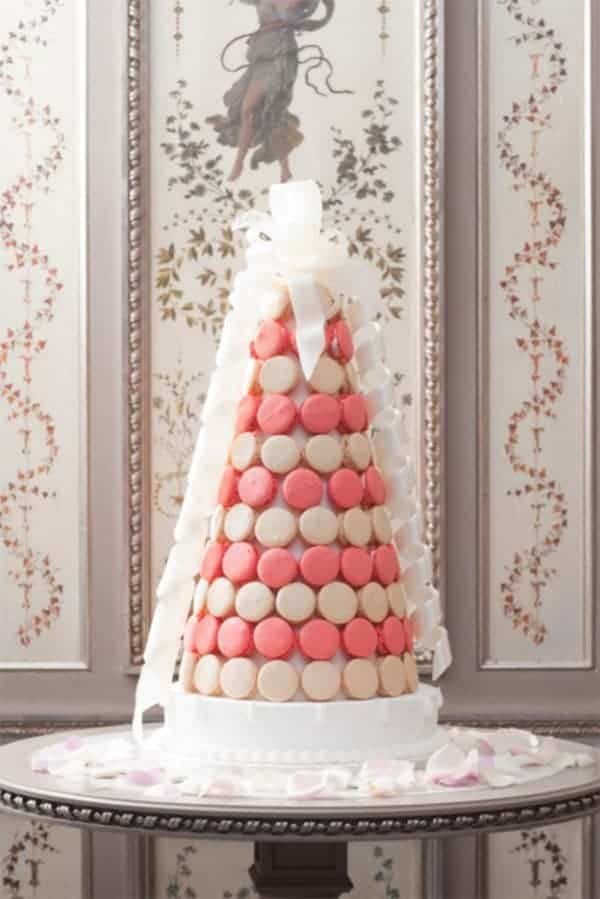
Private Parties at Laduree
Lastly, if you're throwing a shower or party, why not let Laduree do the work by providing a beautiful space for you to host your party, and a team of professionally trained staff to serve your guests delicious sweet treats and savouries. You can choose from a variety of items on their menu with no additional costs. Only a minimum spend needs to be met, $1000 on weekdays and $1500 on weekends.
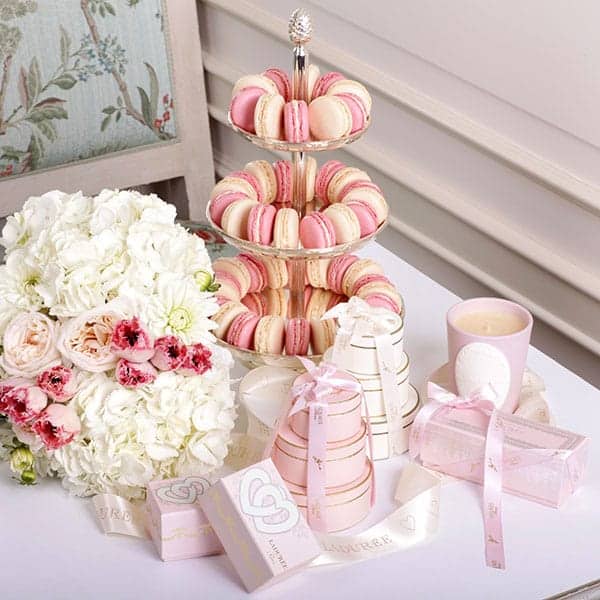
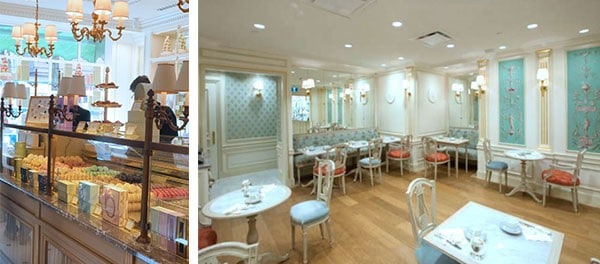
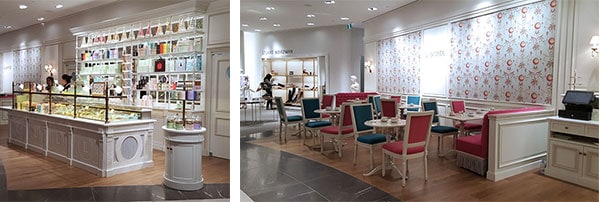
Disclosure: This is a sponsored post, all opinions are my own.
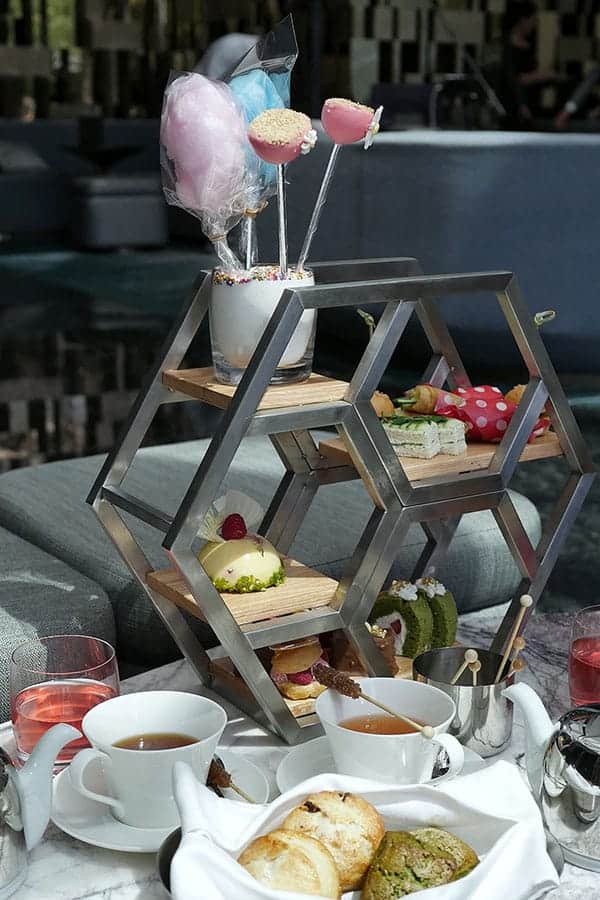
All that Glitters is... Gold?
Trump International Hotel Vancouver just introduced their afternoon tea service for the first time on June 9th and I wanted to try it out right away. So after attending a fun one-year anniversary party at Mister Ice Cream in Yaletown, we headed down to the Trump Hotel to experience the new tea service in their champagne lounge.
The champagne lounge has it's own grand entrance separate from the hotel and a side door which leads into MOTT33, an elegant dining establishment with an international presence, serving "luxury Chinese" food. The space is chic and elegant, filled with plush seafoam green booths, low white marble tables and high ceilings with a skylight showing off the 69 other floors above. Basically, it's what you think a hotel bearing the opulent Trump brand name should be. However, unlike the gilded Trump Towers of 80's excess in New York of recent Apprentice fame, it features sleeker and more modern details of a newly built hotel from this era.
But of course, it's Trump, there needs to be some gold right? Yes, you'll see a more muted and modern rendition of it on the opulent doors and large block partitions inside the room. And I swear, I even found some gold in my tea too. On several occasions when I poured the black "Immortal Tea" I ordered into my tea cup, I could see little glistening gold flakes floating inside. I had to confirm this with my tea partner, Roanna, but after peering curiously into my cup, all she could tell me was that I was still just an ordinary girl with a regular cup of tea in my hand. Oh well...even if it's non-existent, I guess life is never dull when we believe we can see sparkles wherever we go 🙂
The Tea Set

The tea set was served on a unique hexagon display that we were told was specially crafted for the tea service. It reminded me of the chic tea sets offered in luxury hotels in Asia. Out of all the tea sets I've had in the city this, along with the one at Fairmont Pacific Rim, is the most cosmopolitan. Nestled on the stylish non-traditional display were delicate savoury pieces which had influences from the different regions of the world: matcha scones, cucumber & dill sandwiches, spicy duck crepe and a 'Salmon a la Bombay' Slider to name a few. Another note of worth is that everything including the sweets are made in-house.
I quite enjoyed the food and loved the ambiance and service. It's easy to feel completely at ease sitting on their plush booth seats while basking in the abundant natural light that pours through the skylight while listening to live music playing in the background. I would definitely recommend it for those who appreciate attentive service and a modern take on afternoon tea served in a chic setting.
Until our next tea date.
XOXO,
Mimi


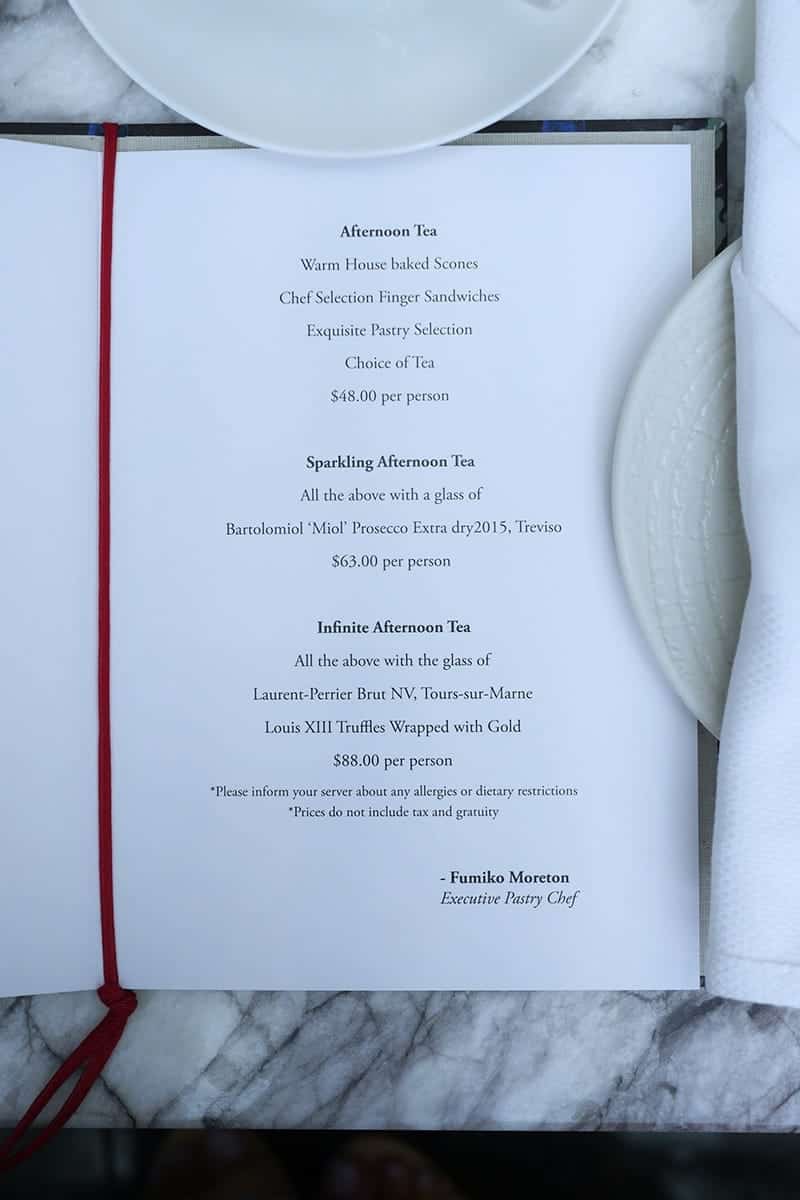
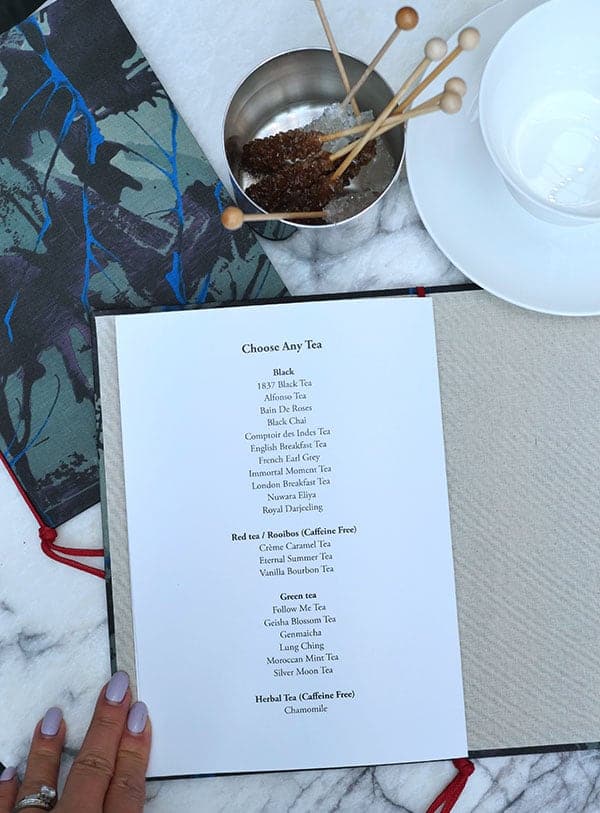
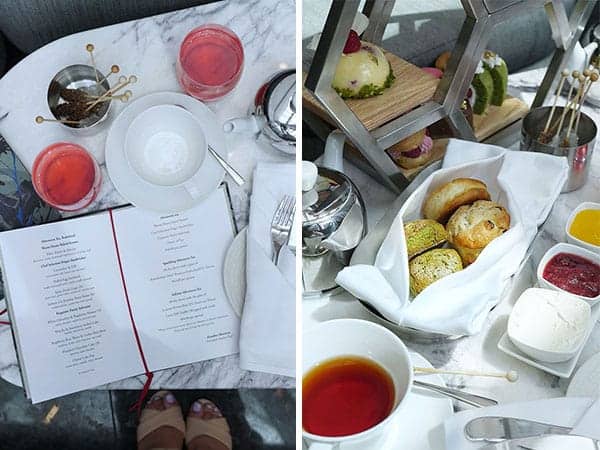
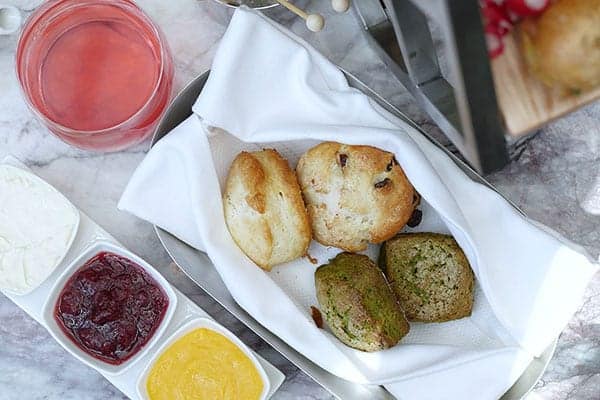
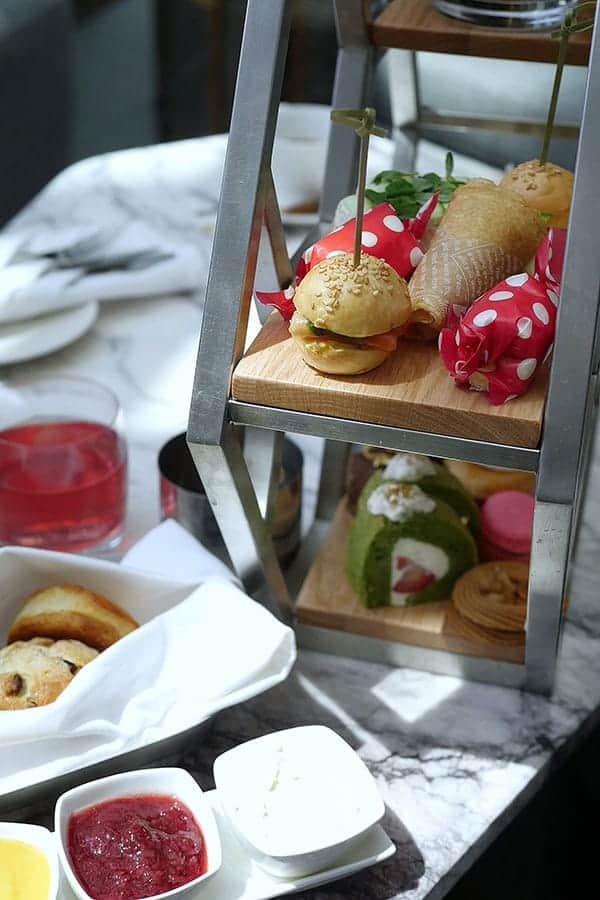
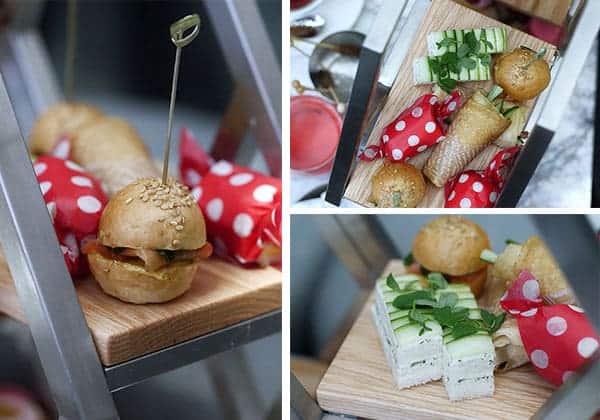
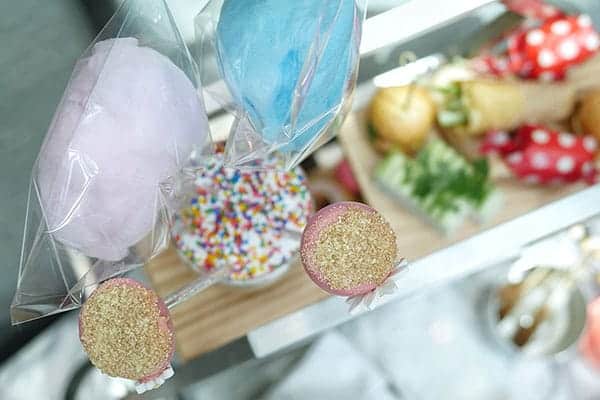

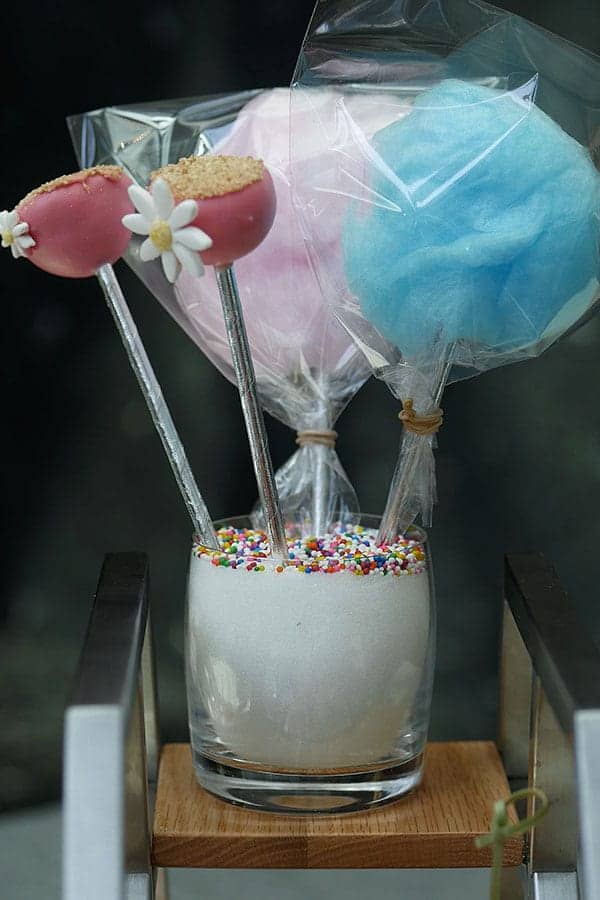
❤ OTHER NOTES:
 Notable Points:
- Brand new, newly-built property
- Unique specially created display case
- The newest afternoon tea offering in Vancouver
- Complimentary iced tea
- 5-star service and ambiance
Ambience: Sleek and chic lounge with plush booths, textured walls and marble tables.
Scones: The matcha scone, served warm, was excessively crumbly which did not allow the proper application of the toppings; the clotted cream was a bit rubbery so it made it even harder to spread (the plain raisin scone did not have this problem.) There were three toppings to choose from which was appreciated since most sets only offer two. There was clotted cream, "homemade" lemonade raspberry jam and passion fruit curd (it was listed as lemon curd on the menu but I believe it is passion fruit by the taste. I could be wrong...). The passion fruit curd was tart and mouthwatering, a nice and unique offering.
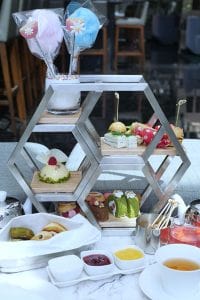 Savoury: A very thoughtful selection of four savouries inspired by the different regions of the world. All of them were fresh and flavourful, and were small in comparison to the larger sized desserts. The salmon a la bombay slider stood out for it's distinctive curry flavour and interesting flavour pairing with the smoked salmon.
Sweets:The seven sweets were a mixed bunch ranging from average to excellent. The matcha swiss roll didn't have much of matcha flavour and the cake wasn't too fluffy. Actually, both the matcha scone and matcha had a very muted matcha flavour, I'm not certain if this was a deliberate attempt to tailor it for local tastes. The macaron was filled with a raspberry cream and wasn't too hollow. The items that really stood out were the hazelnut chocolate cake, raspberry rose and lychee Paris brest, and cheese cake pop. The chocolate cake had an appealing texture with crispy layers; the brest was filled with a tart raspberry buttercream and the exotic sweet taste of lychees - a winning combo; and the cheese cake pop, the breakout hit, had a very crispy white chocolate shell with a soft rich cream cheese mousse on the inside. The cotton candy, not listed on the menu, was a whimsical bonus. I appreciated that all the desserts were all of a good size.
Tea:A small collection of teas: 11 black, 3 red/rooibos, 6 green, 1 herbal. The "Immortal Tea" I chose was very strong and near bitter when I had my first sip. I'm not sure if it was steeped with water that was too hot or for too long (the tea pot also did not easily facilitate the tea to be pulled out of the pot). It had a woodsy fragrance and was astringent. It was much more approachable with some sugar and the cream which I requested later. On the other hand, the Bains de Rose, a TWG Branded Tea, is a light colored and light bodied tea that had a pleasant rose fragrance. I really enjoyed this one.
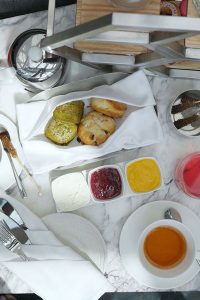 Tea Ware: The unique hexagaon display was custom-built specially for the hotel's tea service. The rest of the teaware were white and modern.
Alcoholic Beverages:Similar to Laduree, Fairmont Pacific Rim, Notch 8, alcoholic beverages can be ordered with the tea set from the bar. Special additions can be made to the tea set by adding Prosecco for $63/set or champagne and Louis XIII truffles wrapped with gold for $88/set.
Service: Fully staffed and professional. We were always checked on. The manager also stopped by and took some time to explain some of the notable points of the tea service and the champagne lounge itself.
Other notes:
♥ Tea Set $48/per person
(includes one pot of tea)
1 mini scone, 1 regular size scone, 4 savouries, 6 sweets, complimentary iced tea
Add Prosecco for $63/set
Add champagne and Louis XIII truffles wrapped with gold for $88/set
♥ Reserve online: Champagne Lounge
♥ Parking: Metered street parking along the side streets but not outside the front entrance on Georgia. $6/hour. Closest skytrain station is Burrad and Vancouver City Centre. There are also Car2Go parking lots available on Alberni street if you're taking a Car2Go.
♥ Address: 1161 WEST GEORGIA STREET, VANCOUVER , BRITISH COLUMBIA V6E 0C6
♥ TEL: 866.800.0295
Flavorful strawberry basil filling for macarons made with real strawberries and herbs! Free strawberry shaped macaron template provided.
[feast_advanced_jump_to]
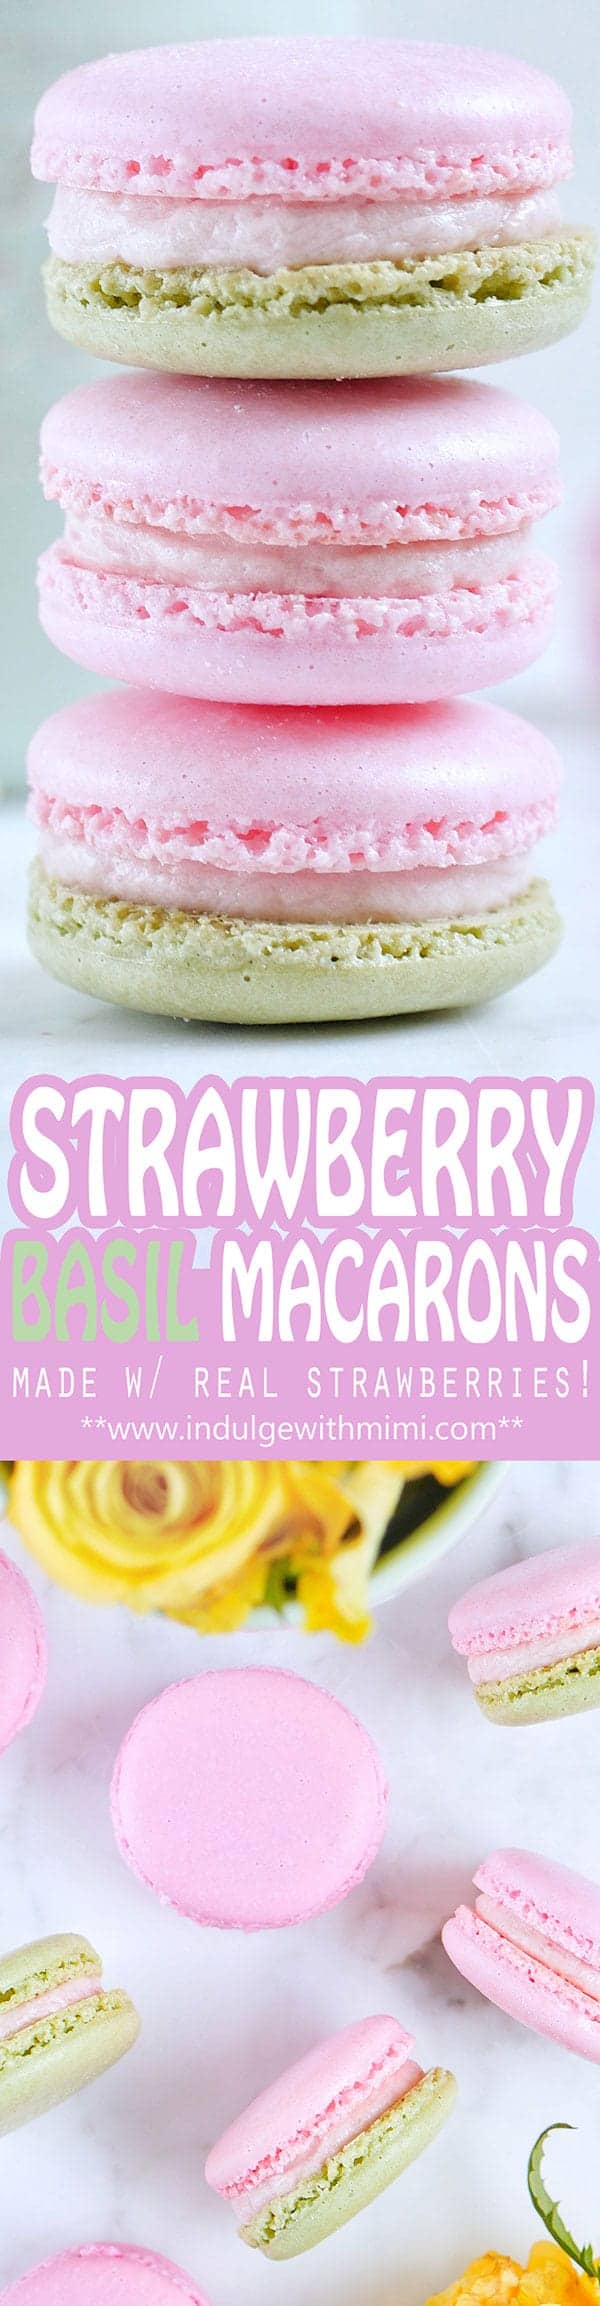
On the road of recipe development, there are those recipes which feels somewhat effortless and taste great the very first or second try, and then there are those which make you want to pull your hair out and abandon the project altogether. This recipe definitely belonged to the latter. I was initially hoping to release this recipe last month but I had to make this recipe over five times to get it just right. Yes, I am seriously picky with my fillings. There are so many different types of fillings that you can use for cakes and cupcakes but macarons have their own special needs. Their fillings can't be too soft or high in moisture so it created some of the challenges which I'll discuss below.
One of the challenges in this recipe was adding fruit flavours into a swiss meringue buttercream using real fruits. The acids found in fruit juices do not mix particularly well with fats and if you've added too much, the mixture will become a curdled mess that is hard to fix. It's easier to add such a juice to an American buttercream with it's sturdier profile but I find the American versions just taste horrid as macaron fillings since it's already sickeningly sweet, and coupled with a sweet macaron shell... oh my! It's no wonder why some people claim they don't like macarons.
There's also the issue with moisture too, we can't have too much of it. So what can we do? To obtain real strawberry flavouring without the unnecessary liquids, the strawberries and sugar are simmered together on low heat to make a strawberry compote. LOW heat is key here, we want the fruit to break down slowly and the moisture to evaporate as much as possible, leaving us a very concentrated, flavourful and thick compote which we then puree. Don't forget to watch the video below to see how thick the consistency should be when we take the strawberries off the heat.
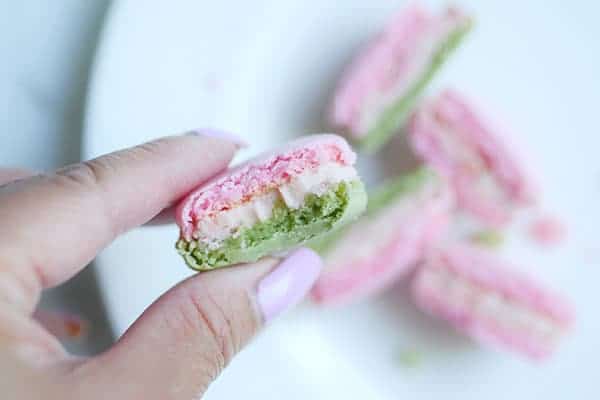
Another challenge was the addition of the basil. Which way would be best? I tried mincing basil leaves and beating it into the buttercream at the end but then little chunks of it would make its presence felt after a few bites. I didn't like that. To counter this, I decided to cook the basil with the strawberry compote from the beginning as suggested by Preservatory author, Lee Murphy, whom I had the pleasure of meeting and cooking with at her charming farm, Vista D'oro. If anyone knows about making jams or compotes, it's definitely Ms. Murphy. Read about what we cooked here. And for those who don't like basil, you can definitely leave it out of this recipe.
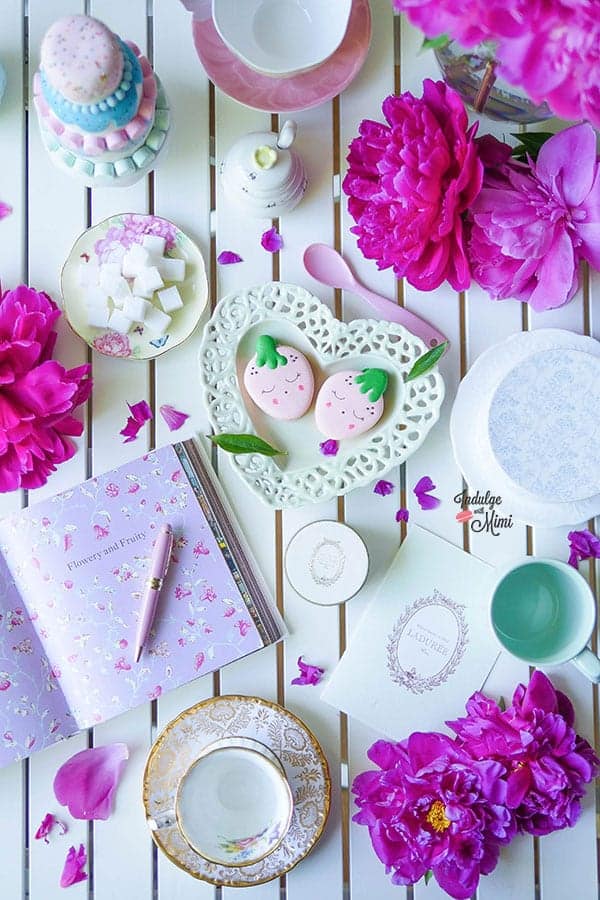
Tip for Potent Strawberry Flavor
You'll notice also that the addition of a strawberry extract is optional. You might wonder why we're using it after we took so much time to create a nice real strawberry puree for the flavouring. The extract's role is to help lend emphasis to the strawberry flavour in the top notes while the real strawberry puree provides that lingering full bodied strawberry flavour. I used the Strawberry flavour from L'orann Oils from their Naturals collection which means that the flavours are derived naturally from the fruit, it is not an artificial flavouring. It actually taste almost identical to the compote so it's a great way to add more flavour without having to add more strawberry puree into the buttercream, lowering the chances of it becoming unstable and/or too soft to use as a macaron filling. Of course, for those who don't want to add more flavour, you can definitely leave it out. It's just something that adds a little more oomph to the taste since some audiences may be more akin to and prefer macarons that have a more potent flavour, think kids and people who prefer eating intensely flavoured foods.
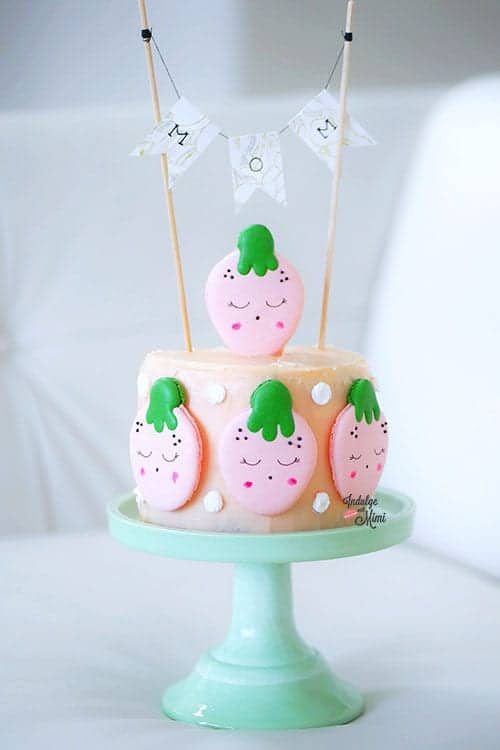
Free Strawberry Macaron Templates
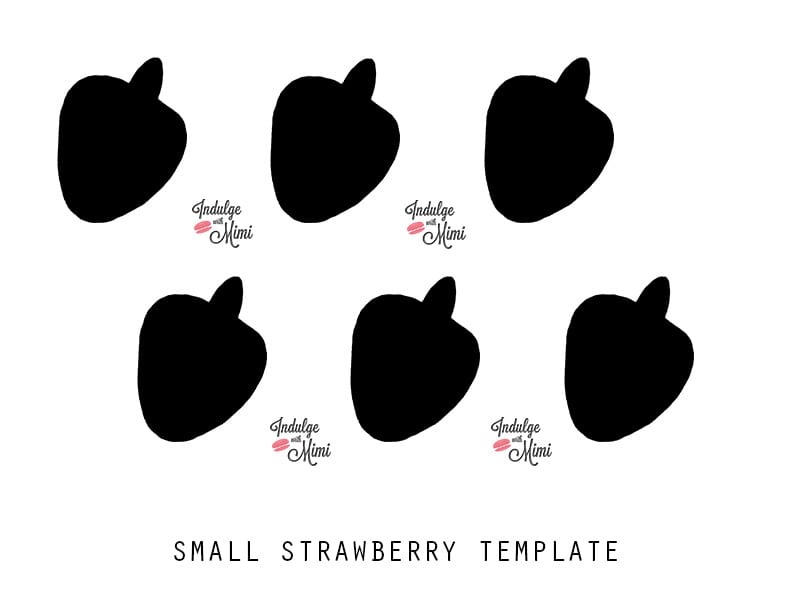
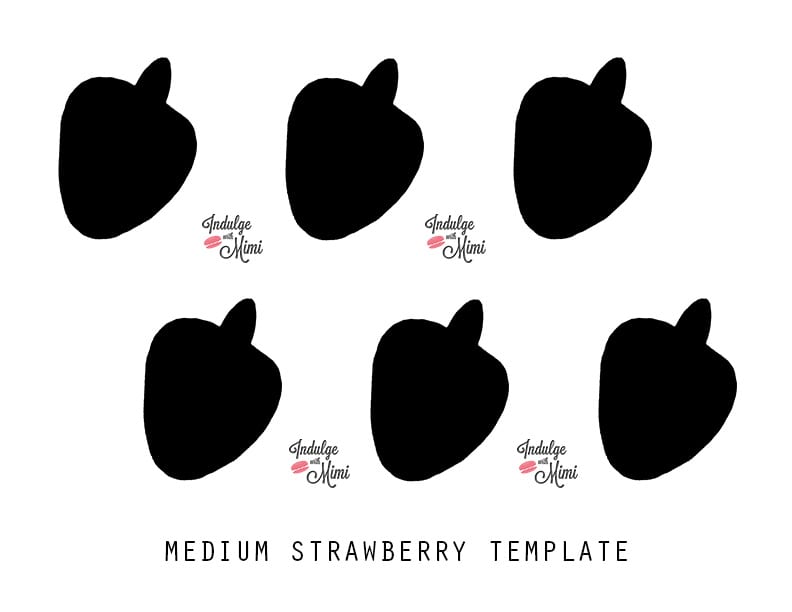
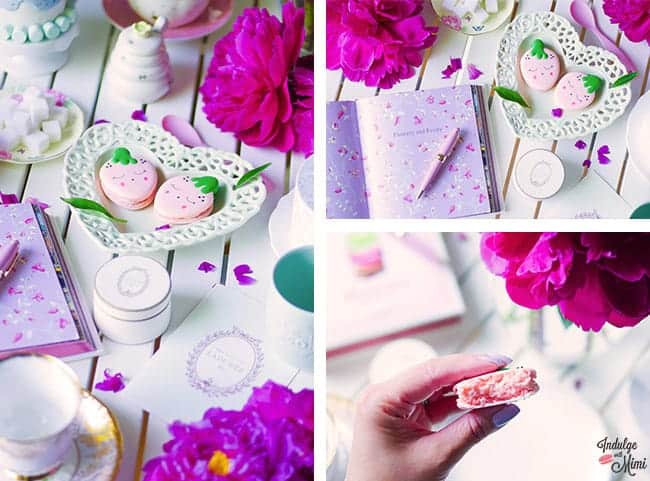
Recipe
Prep Time 1 hour 30 minutes
Cook Time 14 minutes
Rest Time 30 minutes
Total Time 2 hours 14 minutes
Ingredients
Basic Macaron Shell
- 240 grams almond flour
- 240 grams icing sugar
- 185 grams egg whites, aged, room temperature
- 165 grams castor sugar (Note 1)
- 1/2 tsp. cream of tartar
For Strawberry Basil Puree
- 350 grams fresh organic strawberries
- 6 tsp granulated sugar
- 50 basil leaves
For Swiss Meringue Buttercream
- 65 grams egg whites
- 130 grams granulated sugar
- 195 grams butter
- 1/4 tsp salt
- 1 - 1 1/2 tsp strawberry extract (optional)
Instructions
Basic Macaron Shell
- Set aged egg whites out at room temperature.
- Pulse almond flour and icing sugar together in a food processor to further break down any large pieces of almond flour.
- Sift dry ingredients: almond flour, icing sugar. Discard big pieces of almond that can't be sifted.
- If you are new to macaron making, please read the instructions to my BEST MACARON RECIPE before attempting to follow the rest of the instructions since it is condensed for the advanced macaron baker.
- With the balloon whisk attached, whip the room temperature egg whites on low-medium speed.
- Add cream of tartar when it becomes foamy.
- Turn up the speed to medium.
- Once the whisk starts to leave tracks in the egg whites, add sugar a little at a time.
- Turn the speed up to medium-high and whip until firm peaks, stop mixer and add gel food color if desired. Continue whipping on medium-high until stiff peaks.
- Fold the dry mix and meringue together until the batter becomes a "lava" or honey-like consistency.
- Transfer batter into a piping bag fitted with a round piping tip.
- On parchment paper or silicone mats, pipe out round shaped macarons.
- Rap the tray hard on the counter to remove any excess air bubbles. Use a toothpick to pop any remaining bubbles.
- Wait until the shells become completely dry before baking.
- Bake at 325F for 12-14 minutes. Every oven is different, you may need to adjust your own temperature settings. Please read How to Use Your Home Oven Properly for Baking Macarons if you are unsure.
- Macarons are done when the foot doesn't push back and the tops don't move when you wiggle it.
- Once baked, let cool completely before removing from the baking mat/parchment paper.
For the Strawberry Basil Puree
- Wash and dry basil with a paper towel. Chop into small pieces.
- Wash strawberry and remove stem and a bit of the surrounding white flesh with a paring knife. Dry it with paper towels.
- Place the basil, strawberries and sugar in a small pot, boil on LOW heat for approx 30 minutes.
- It will start to break down by itself. Occasionally, stir the mixture so the sugars and juices come together.
- Using a heat proof spatula, occasionally press down on the fruit very gently to help break it down. If it is still hard, just let it break down by itself until its soft enough to push down on it with the spatula.
- It will reduce into a very thick, chunky compote that is not runny. Take off heat after appr. 30 min. (Watch accompanying video to see the proper consistency. You may need to keep it on the heat some more if it is still runny.)
- Pour the compote into a food processor or blender and blend for a minute or two until the fruit is all broken down.
- Pour through a sieve into a heat proof cup. The mixture is thick so use a spoon to push it through. If the consistency is correct, you should have about 3 tablespoons of puree. Set puree aside.
For the Swiss Buttercream
- Cut up butter and let it come to room temperature as you measure out other ingredients.
- Add sugar and egg whites into a heat proof mixing bowl. Stainless steel is light and safe.
- Place over a pot of boiling water.
- Whisk the whites & sugar mix over the boiling water.
- Pay attention to whisking the mixture when it starts getting hot, you don't want to cook the eggs.
- Whisk the mixture until the temperature reaches 160F. This temperature is generally accepted to be able to kill salmonella in eggs.
- Pour the mixture into the Kitchenaid mixer and whisk on low with the balloon whisk, then turn it up to medium.
- Once the mixture is thick and glossy, and the bottom of the bowl is cool to the touch, stop mixer. Change the whisk attachment to the paddle attachment.
- Add butter a little bit at a time while beating with the paddle attachment on medium speed.
- The mixture might look curdled or separated for a while but keep mixing. It will all come together.
- Add strawberry basil puree a tea-spoonful at a time to a max of 3 tablespoons. Beat until incorporated.
- Add strawberry extract if desired and incorporate.
Assembly
- Pair two similar sized shells together.
- Pipe a dollop of strawberry basil filling onto one shell. Assemble with other shell.
- Place in an airtight container in the fridge and let it mature for 24 hours before eating. Enjoy!
Notes
1. Castor sugar is also known as extra fine granulated sugar or berry sugar. Granulated sugar can be used by castor sugar is preferable.
2. I always use organic strawberries in my kitchen since it's part of the "Dirty Dozen" group of fruits which are highly recommended to buy organic.
3. Basil and strawberry extract is optional. You can leave it out if you do not like or have these ingredients.
4. There is a strawberry template for you to download along with a video to show you the proper consistency of the compote when you take it off the heat.
Nutrition Information
Yield
24 Serving Size
1 grams
Amount Per Serving Calories 90 Total Fat 7g Saturated Fat 4g Trans Fat 0g Unsaturated Fat 2g Cholesterol 17mg Sodium 81mg Carbohydrates 8g Fiber 0g Sugar 7g Protein 1g
This information is provided as a courtesy and is an estimate only. This information comes from online calculators. Although indulgewithmimi.com attempts to provide accurate nutritional information, these figures are only estimates.
This is Part 3 of 3 of my recent Vancouver Adventures that I shared with Deborah Moore this morning on AM1470.

To celebrate Canada's 150 birthday this year, Fairmont Hotels has just launched their new Canada150 Afternoon Tea Set. It's a tea set which pays homage to all the different provinces of Canada where Fairmont operates by incorporating each regions distinctive foods. For example, there's the Calgary Stampede corndog made with Wagyu Beef, Montreal smoked meat sandwich, the West Coast Club and Nainamo Bar to name just a few. You can have a cross-country culinary experience just having a relaxed afternoon in the hotel's cozy private dining room of their Notch8 restaurant. If you've read about my experience here for Halloween Tipsy tea, you'll find that the room has been transformed with relics from Fairmont's storied past in Canadian history. Built by Canadian Pacific Railway as one of the grand railway hotels that brought guests from coast-to-coast on luxurious train journeys, the hotel played an integral part in the early years of Canada's formation - a perfect place to celebrate Canada 150 this year.
Canada 150 afternoon tea runs from May 1st to September 3rd, 2017 with daily sittings at 11am, 1pm and 3 pm. Adults $59, children's tea $29.50 (ages 12 and under). Reservations can be made at 604-622-1900 or online.
A: 900 West Georgia Street , Vancouver , British Columbia, Canada , V6C 2W6
T: 604-622-1900
Until our next tea date!
XOXO,
Mimi
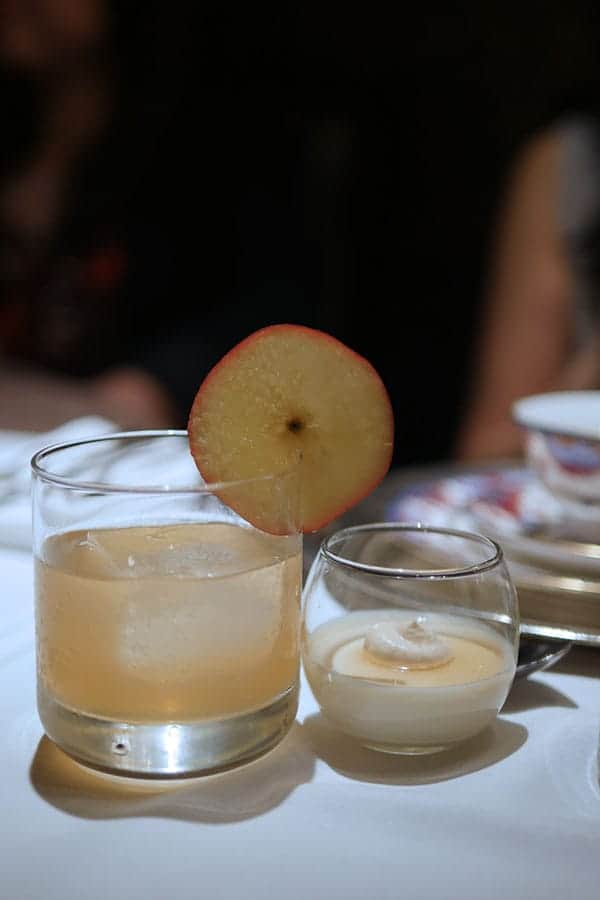
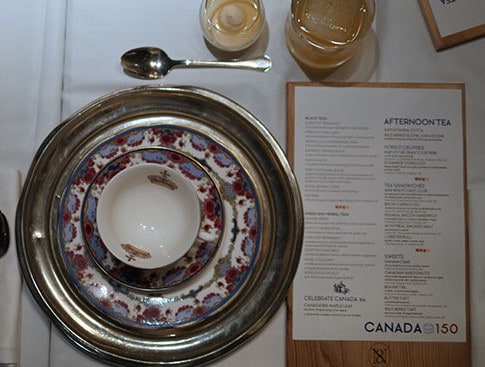
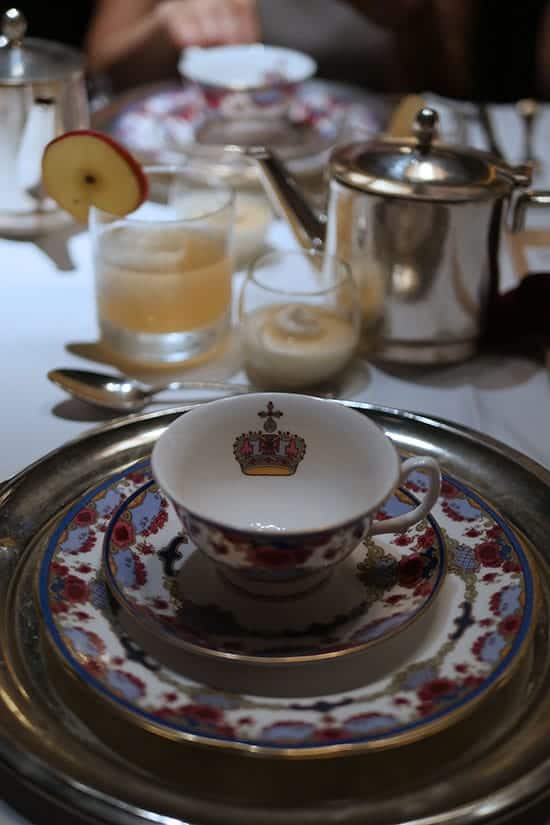
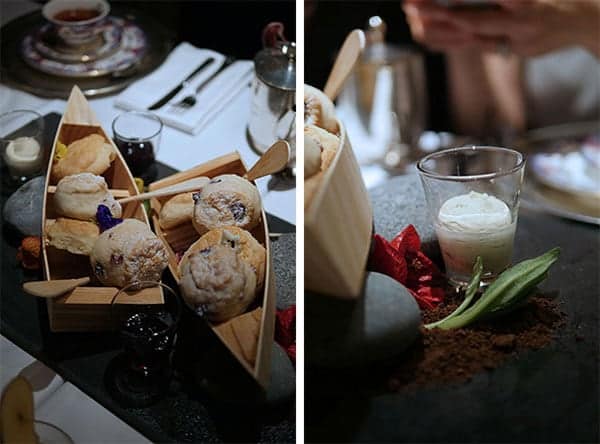
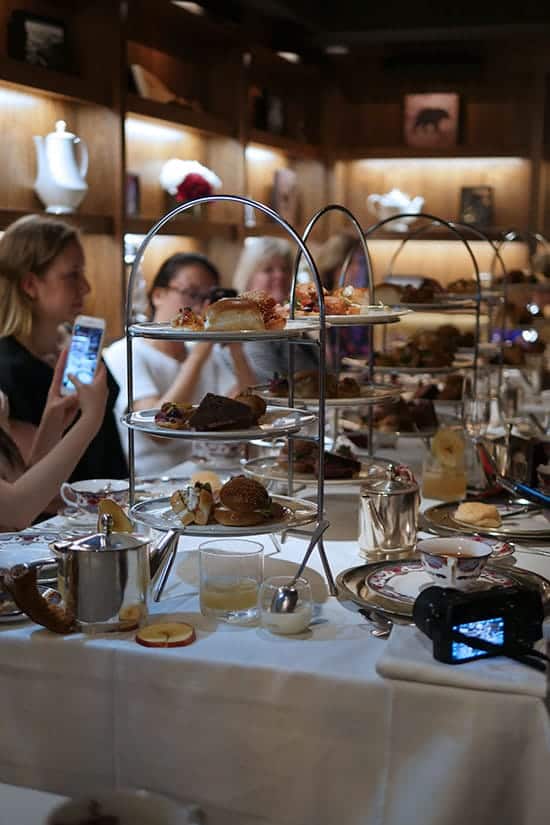
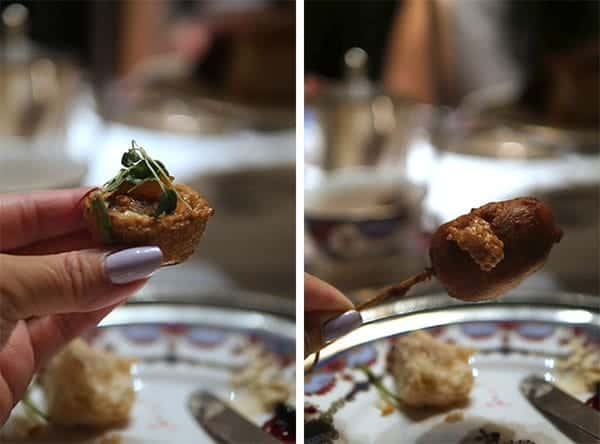
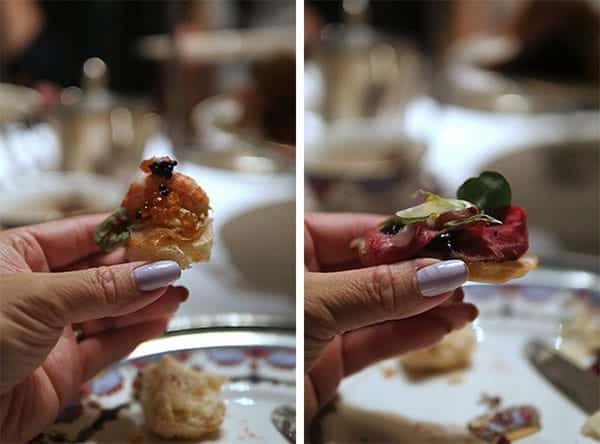
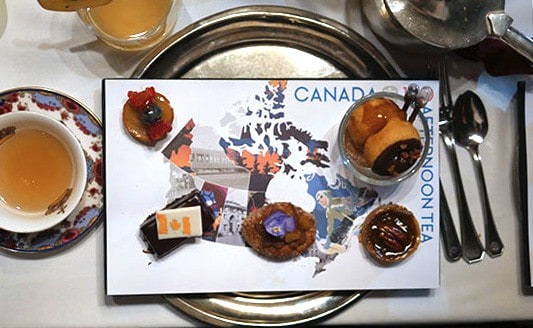
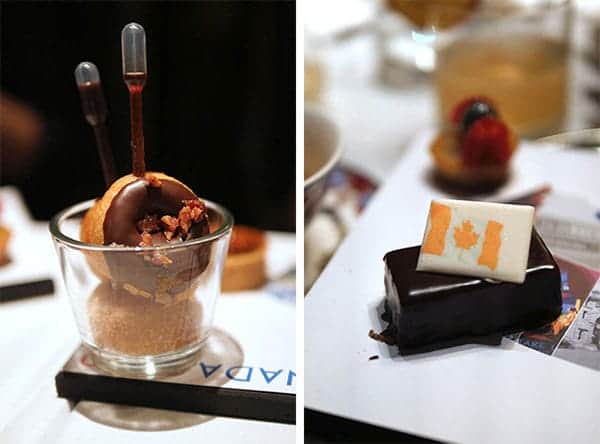
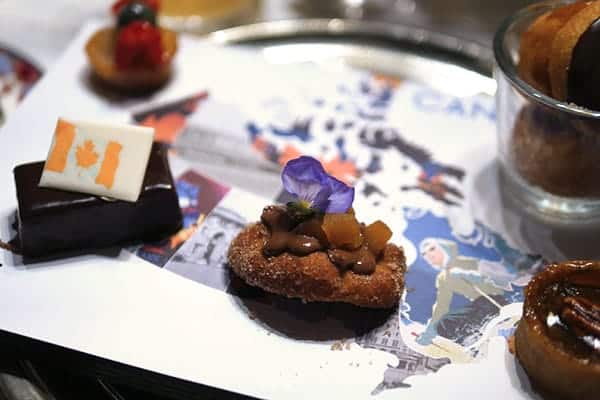
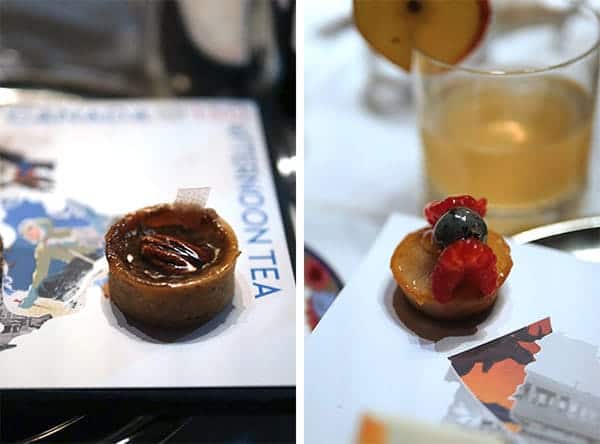
Disclosure: This was an invite event. All drinks and food were complimentary. All opinions are my own.
This is Part 2 of 3 of my recent Vancouver Adventures that I shared with Deborah Moore this morning on AM1470.
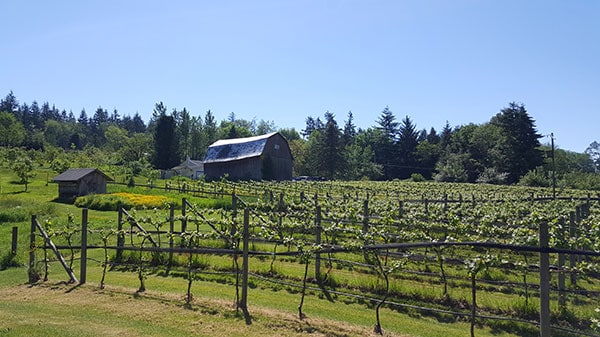
"Hot Days are the Best for Making Jams - Not"
This weekend, we experienced a very unexpected but welcomed heat wave in Vancouver. It was unusually hot for this time of year but after such a dismal start to the spring season, I was happy to embrace the hot weather, even if it meant making jams in a hot kitchen in high afternoon. To be honest, it actually wasn't that bad and I'm just being dramatic. Lee Murphy, the owner of Vista D'oro, was the one who told us that "the hot day is perfect for making jams." Having never made jams before, I fell for her playful remark and asked, "Really?" She gave out a good-natured laugh to my naivety. "No, the kitchen is going to get hot!"
Making Jams with Lee Murphy
Duly noted and I was a willing participant. It's not often you get an opportunity to receive personal instructions to make some of the beautiful recipes you only see in cookbooks by the author herself. In our case, we were at Ms. Murphy's Vista D'oro Farms to learn how to make jams just like the ones in her new book, Preservatory, published by Appetite Random House. The book is loaded with over 80 recipes - 40 for preserves, organized by growing season, and more than 40 recipes for meals and desserts that incorporates the use of preserves. I especially liked the inspiring pictures taken from the farm evoking a charming farm lifestyle that a city girl like me sometimes dreams about.
Vista D'oro Farms
To make these wonderful preserves, the process starts at the very root for Lee, literally. She, along with husband and crew, grow the different fruits and grapes that goes into their jams, preserves and wines. It's a very beautiful piece of farmland which you can visit between Thursday to Sunday from 11am -5pm. They have a gift shop, wine tasting room and they also sell charcuterie boards for you to have your very own picnic under the cool shade of one of their many fruit trees. It's a fun little spot for the whole family or a romantic date away from the city.
A: 346 208 St, Langley, BC V2Z 1T6
T: (604) 514-3539
I'm going to a tea event next. Join me here.
XOXO,
Mimi
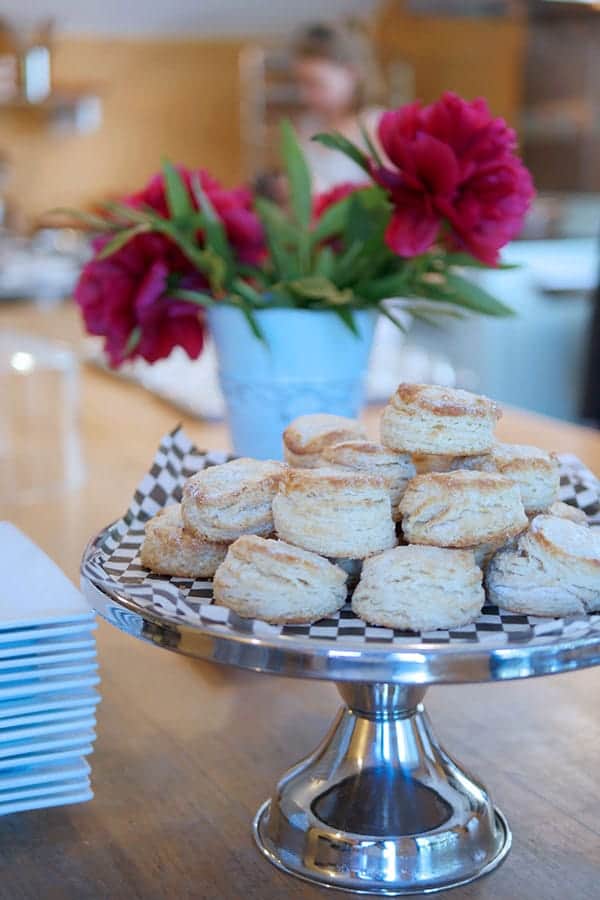
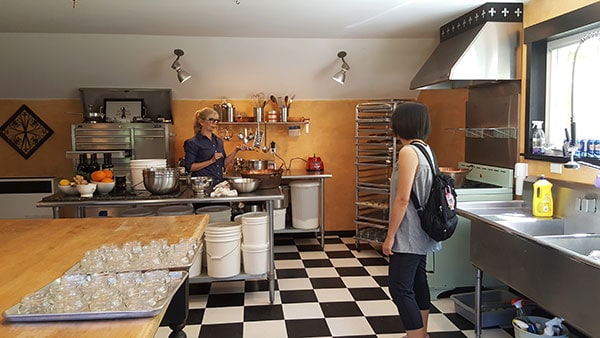
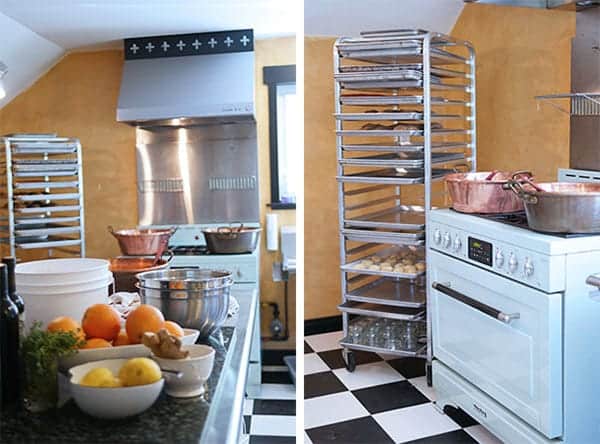

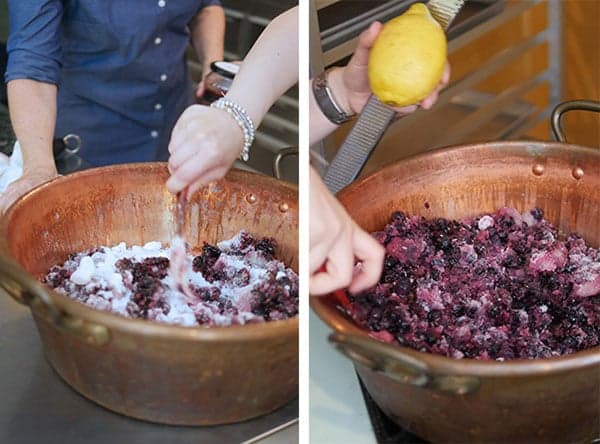
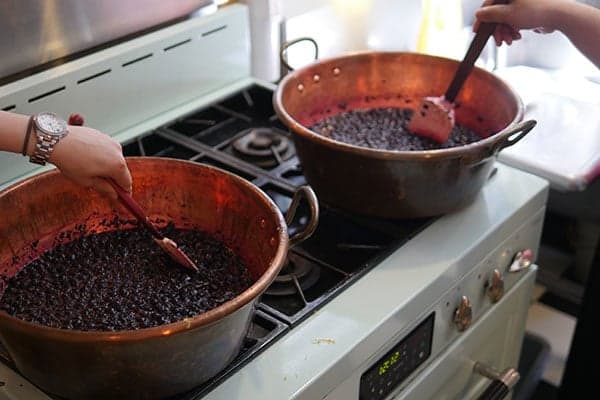
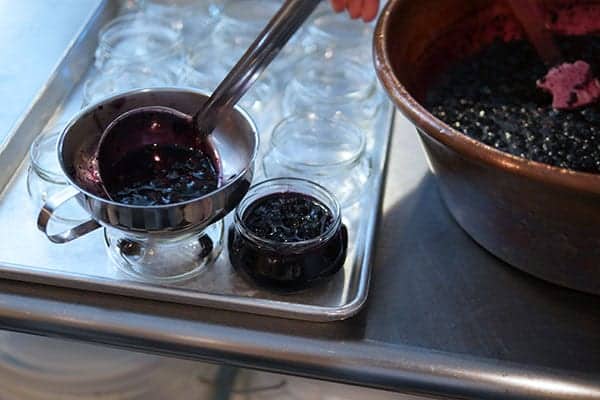
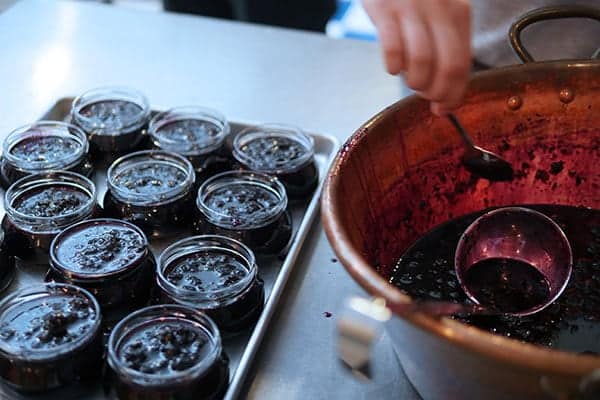
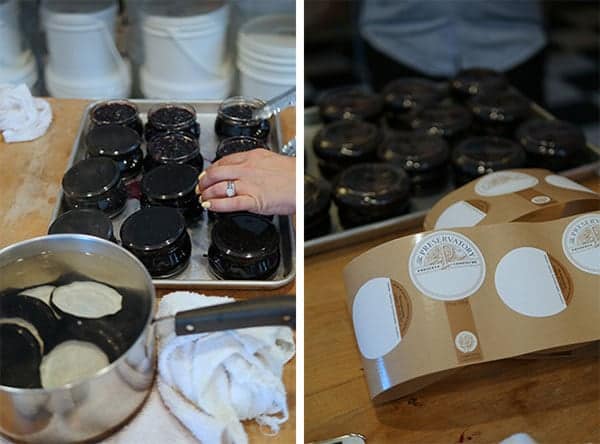

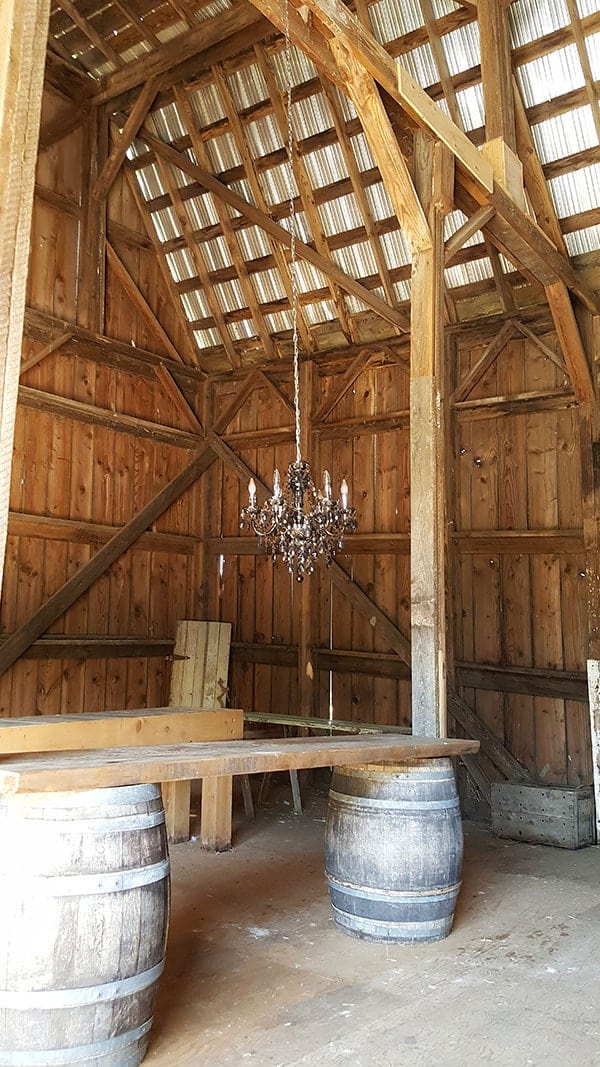
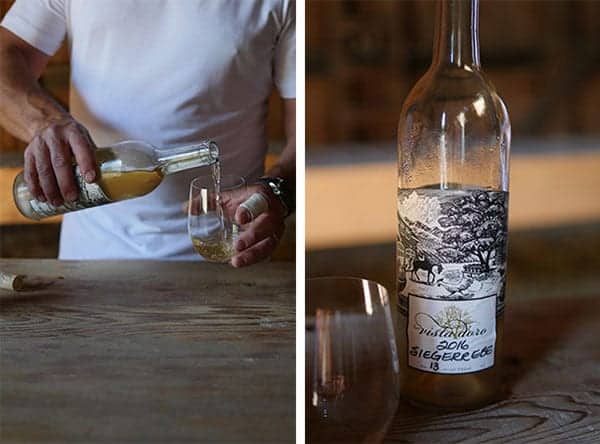
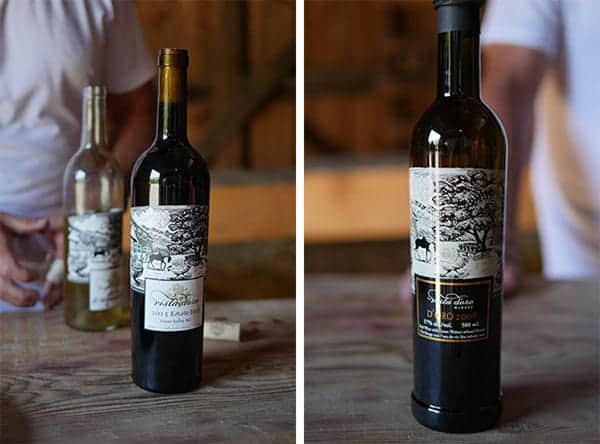
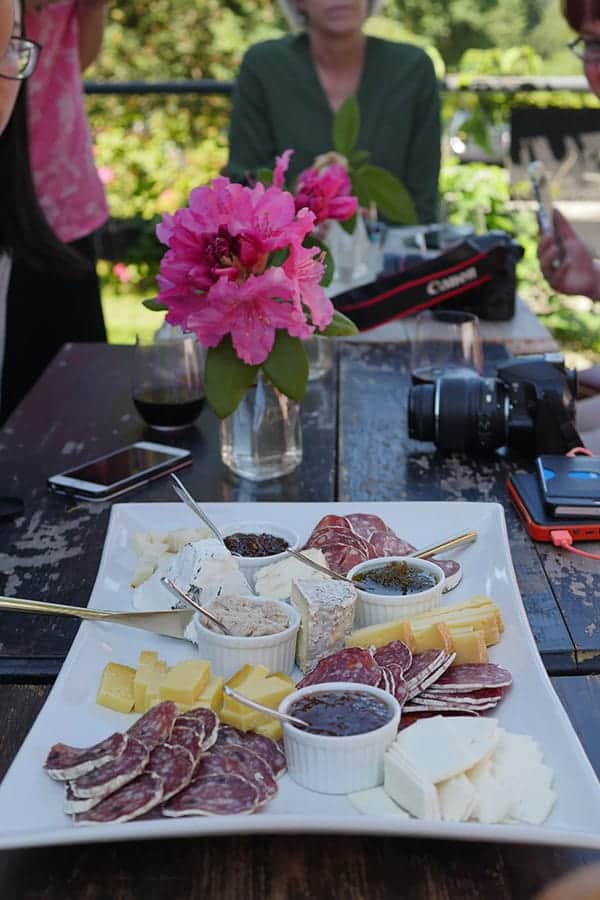
Disclosure: This was an event organized by the Food Bloggers of Canada and Appetite Random House.
[srp post_limit='5' post_random='yes' category_include= 131 widget_title = 'Other Vancouver Socials']
This is Part 1 of 3 of my recent Vancouver Adventures that I shared with Deborah Moore this morning on AM1470.
Ever since my first visit to Laduree, each time I re-visited, I became an even bigger fan of the amazing flown-in-from-France macarons, beautiful branded gifts and a to-die-for raspberry rose french toast. After spending a dreamy afternoon tea date at Laduree in Vancouver, I had the opportunity to return and try some of their hidden gems and learn a little more about the world of Laduree. Here are a few:
Macaron Cocktails
The Vancouver location on Robson street now serves macaron inspired cocktails, wines and champagne. It's such a wonderful addition to the afternoon tea experience which you usually only find at tea services in hotels.
I had the chance to try the Macaron Citron and Isaphan, both of which are equally beautiful. The Macaron Citron is topped with a refreshing lemon macaron, it has a nice lemon flavour and contains tequila which gives it a harder edge going down. In contrast, the Isaphan is a sleek Grey Goose, Chambord, lychee and rose concoction that goes down smooth, starts sweet and finishes dry. It's a perfect tribute to the Isaphan macaron that is known for it's iconic pairing of lychee and rose together.
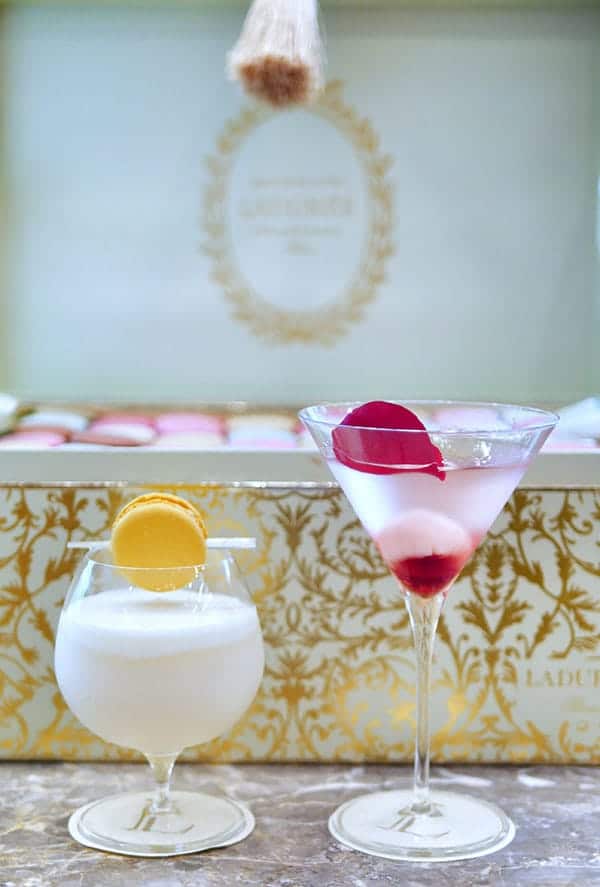
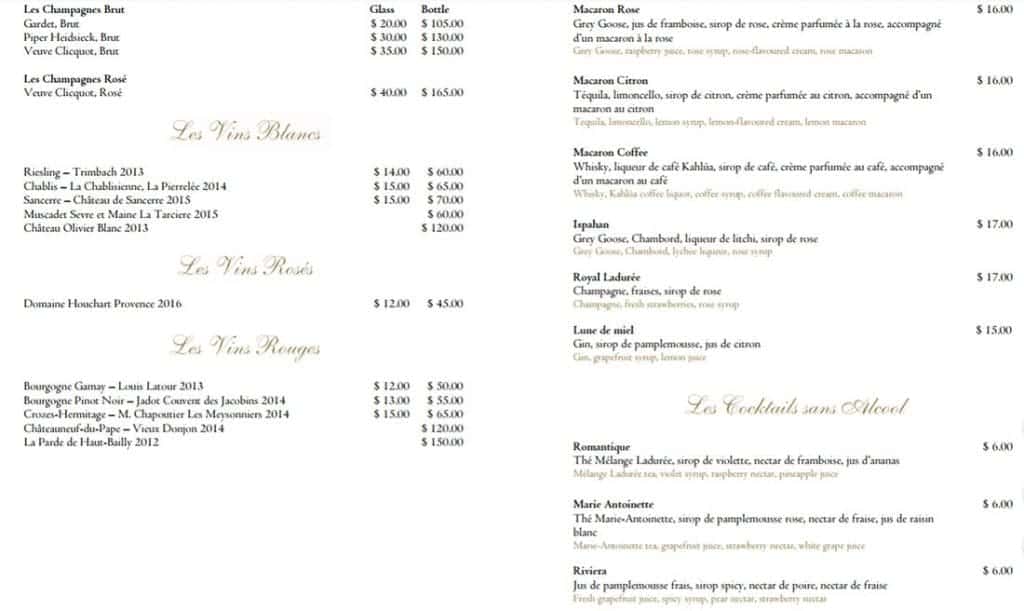
Ice Cream
One thing I didn't know until recently is Laduree ice cream. Since it is getting hot, ice cream is definitely on the list for a friendly gathering. On one particularly hot day after Sunday Brunch and shopping on Robson street, a few girlfriends and I dropped in for a little ice cream party there. Yes, you can walk it and have a little treat anytime. Although some may think a visit to Laduree is usually reserved for special occasions, it's perfectly fine to walk-in anytime without reservations and the staff are more than helpful in finding a table for you.
Lot's of work and preparation goes into making these ice creams, a pastry chef from France is flown in occasionally to make batches of these which makes it all the more special. Rose and pistachio were my favourites. The rose was very fragrant and the pistachio had a nutty aroma, both brought out the creaminess of the ice cream since they were naturally not sour. It's everything I want from my dessert - not too sweet and creamy.
And if you're in a hurry for sit-down service or you'd like to bring the ice cream home to enjoy with your family, you can also take these ice creams to go. The to-go version also has a cute little macaron on top!
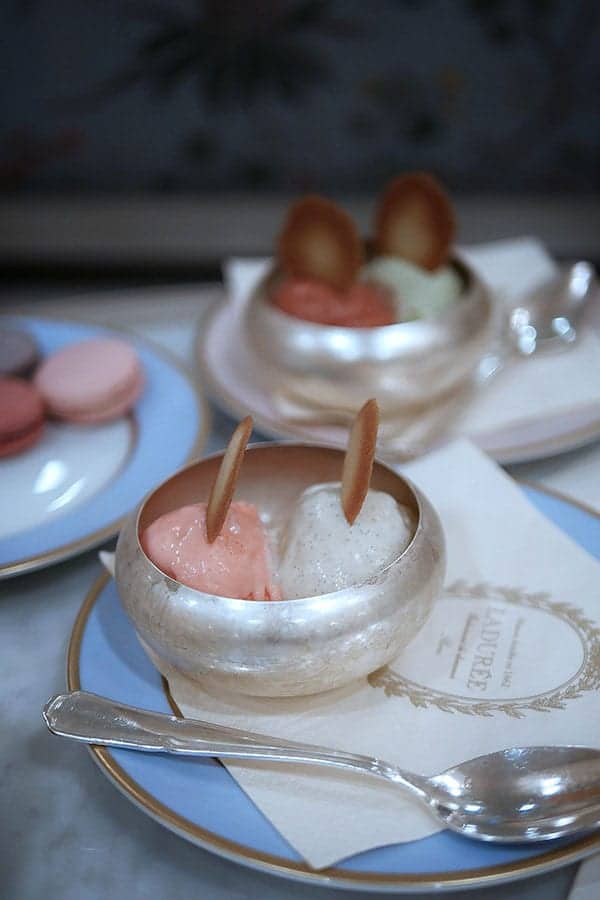
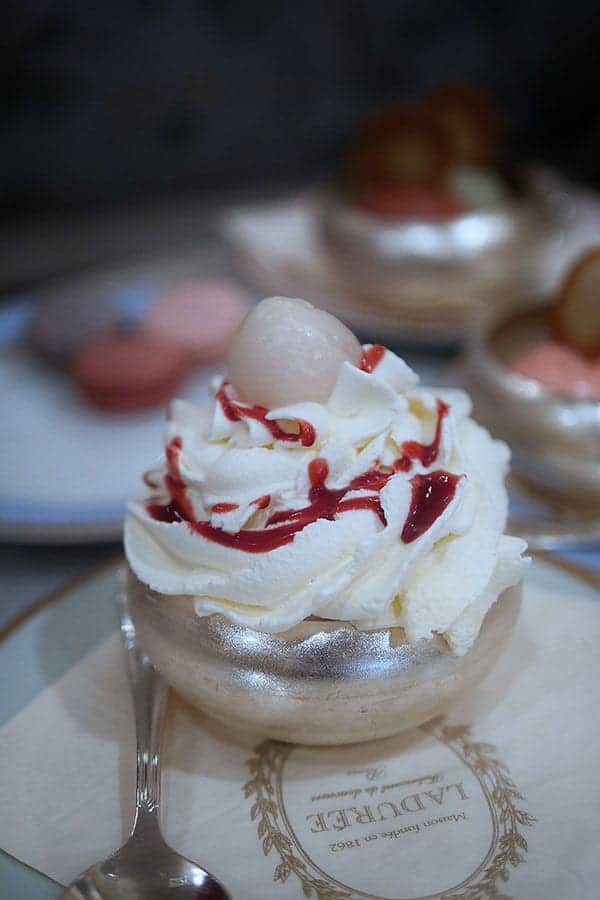
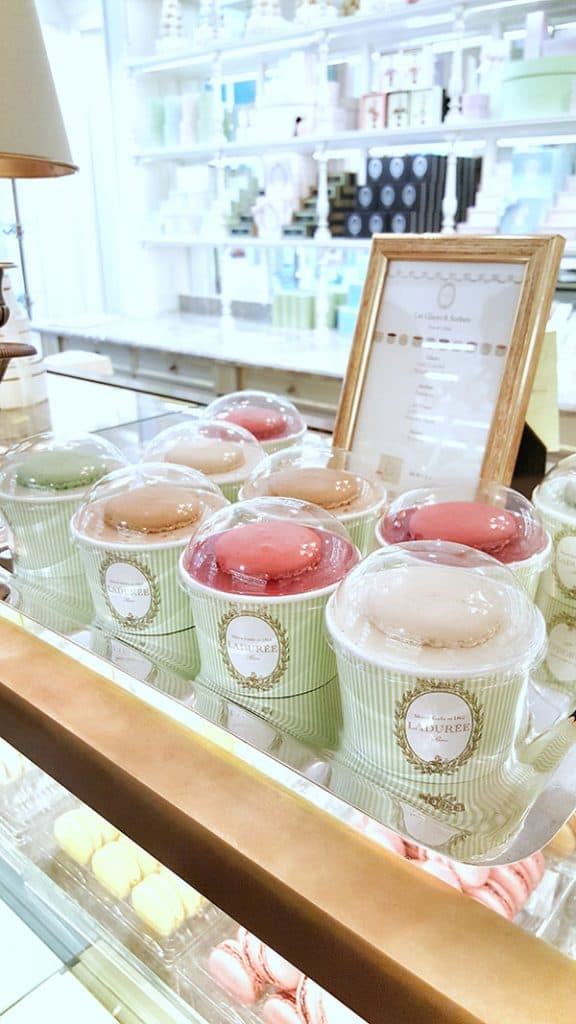
Chocolates with a Surprise on the Inside!
I love chocolates with hidden surprises on the inside and here is one that tops them all - a macaron surprise! Wow! Isn't that wonderful? Once you bite into the chocolate, there is an appealing contrast of textures between the soft flavoured creams and chewy macaron shell. It makes a wonderful gift for the macaron lover in your life, they will be delighted with this sweet little surprise.
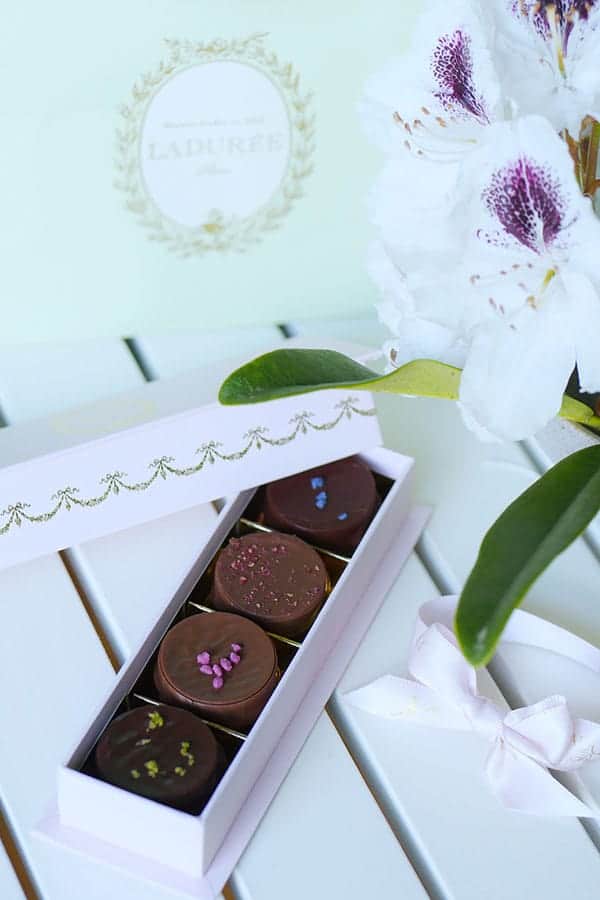
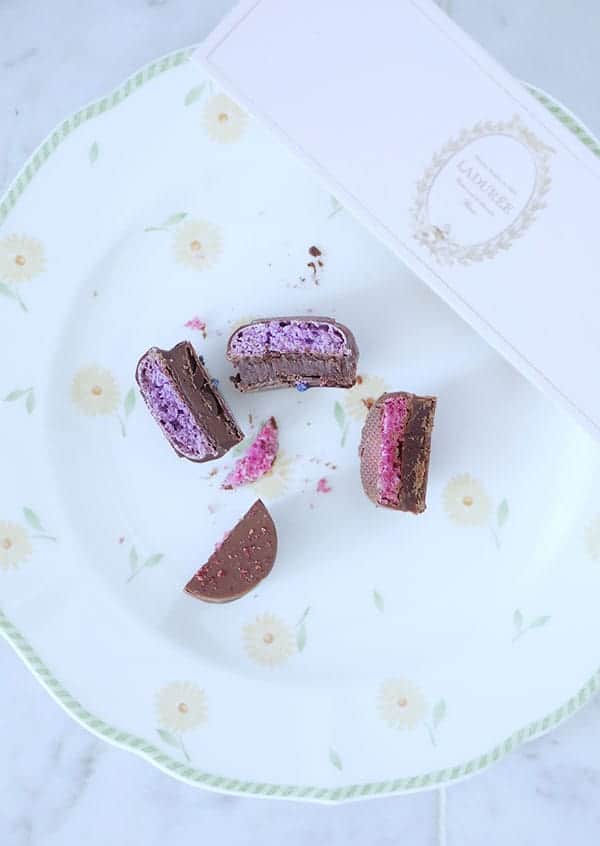
Laduree Canada
A: 1141 Robson St, Vancouver, BC V6E 1B5 (another location in Holt Renfrew as well.
T: (604) 336-3030
Disclosure: All the drinks and food were complimentary. All opinions are my own.
Better Homes And Gardens Fragrance Oil Refill Wild Berry Cheesecake
Source: https://www.indulgewithmimi.com/blog/page/5/
Posted by: olveratwerse1989.blogspot.com
0 Response to "Better Homes And Gardens Fragrance Oil Refill Wild Berry Cheesecake"
Post a Comment